 23.04.2024, 14:32
 Sprache ändern
 Registrieren
 Anmelden
Sie sind nicht angemeldet.

Hi all
I've recently purchased a full watercooling kit and intend to keep a full buildlog on this site for interest/convenience, it's just a CPU block setup for now, however I have purchased the kit for both upgradeability, and aesthetics.
however, it will be a couple of weeks before I get all the parts in the mail...
so I'll leave you with a list of parts, and current PC setup.
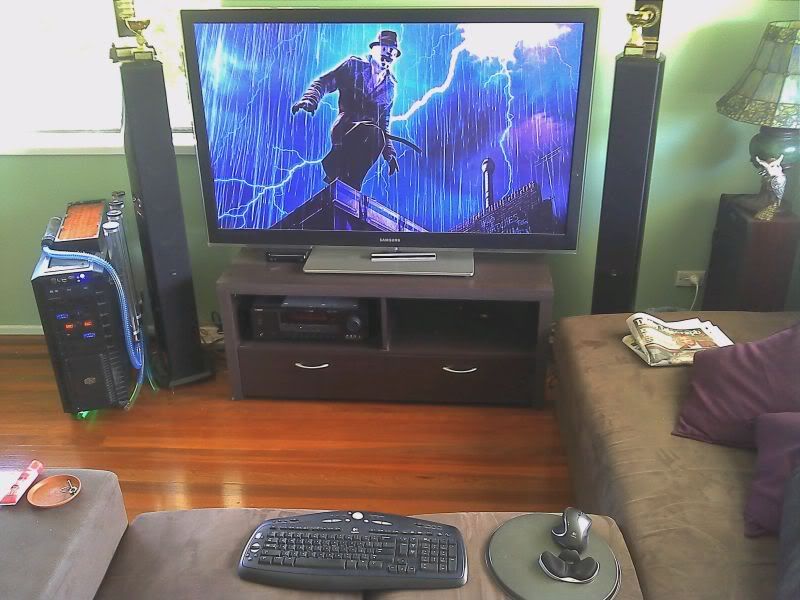
Current PC:
HAF 932 Case
Gigabyte P55A UD4P
Intel i5 750 2.6Ghz (@4.2Ghz)
Tuniq Tower 120
G.Skill Trident 4Gb @ 2000Mhz
2x XFX Radeon 5770 HD XXX
2x OCZ Vertex II (RAID 0)
Upgrades:
Aquacomputer Aquastream Ultra
Bitspower Compression Fittings Black Anodized
Tygon 3603 1/2 ID
Koolance CPU-370
Aquacomputer Airplex Modularity 420
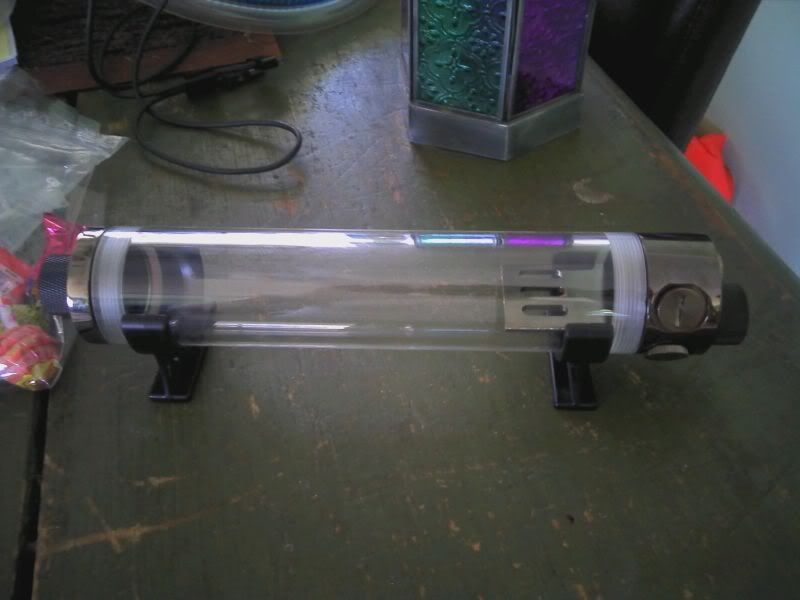
Phobya Balancer 250 Resivoir Black Nickel
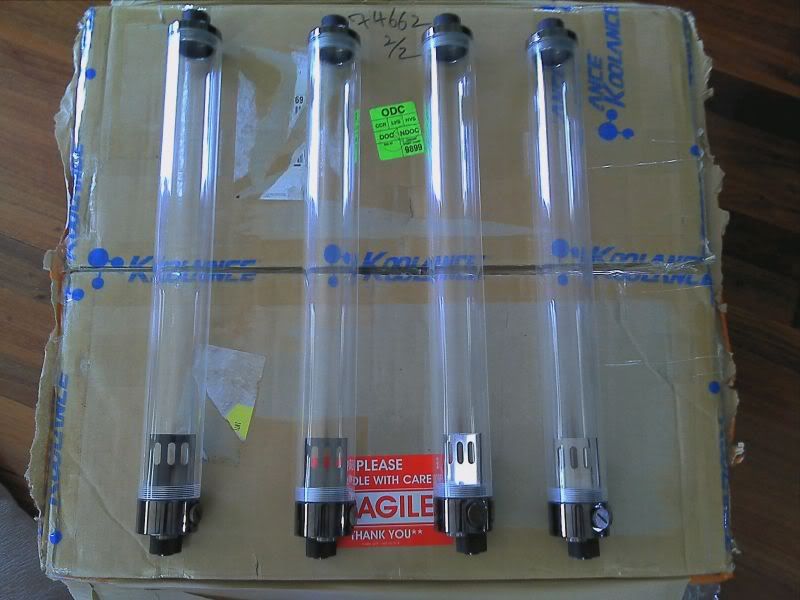
Phobya Balancer 450 Resivoir Black Nickel x 4
5L Fluid XP Nano-Fluid
8Gb Mach Xtreme ArmorX 2300 (@2500+)
Later (much later) I intend to get a motherboard and graphics card more deserving of watercooling blocks
I've recently purchased a full watercooling kit and intend to keep a full buildlog on this site for interest/convenience, it's just a CPU block setup for now, however I have purchased the kit for both upgradeability, and aesthetics.
however, it will be a couple of weeks before I get all the parts in the mail...
so I'll leave you with a list of parts, and current PC setup.
Current PC:
HAF 932 Case
Gigabyte P55A UD4P
Intel i5 750 2.6Ghz (@4.2Ghz)
Tuniq Tower 120
G.Skill Trident 4Gb @ 2000Mhz
2x XFX Radeon 5770 HD XXX
2x OCZ Vertex II (RAID 0)
Upgrades:
Aquacomputer Aquastream Ultra
Bitspower Compression Fittings Black Anodized
Tygon 3603 1/2 ID
Koolance CPU-370
Aquacomputer Airplex Modularity 420
Phobya Balancer 250 Resivoir Black Nickel
Phobya Balancer 450 Resivoir Black Nickel x 4
5L Fluid XP Nano-Fluid
8Gb Mach Xtreme ArmorX 2300 (@2500+)
Later (much later) I intend to get a motherboard and graphics card more deserving of watercooling blocks
It's all been delivered!
I was so excited!
and I took heaps of photo's for you all.
PLAN A:
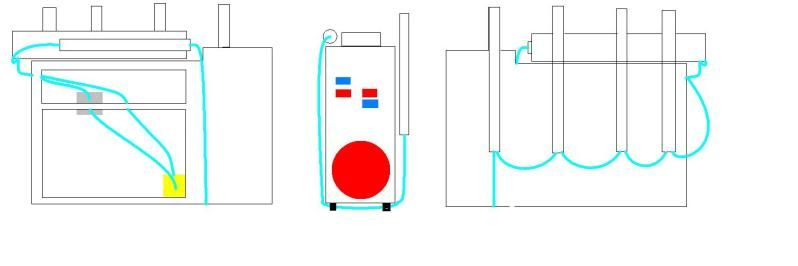
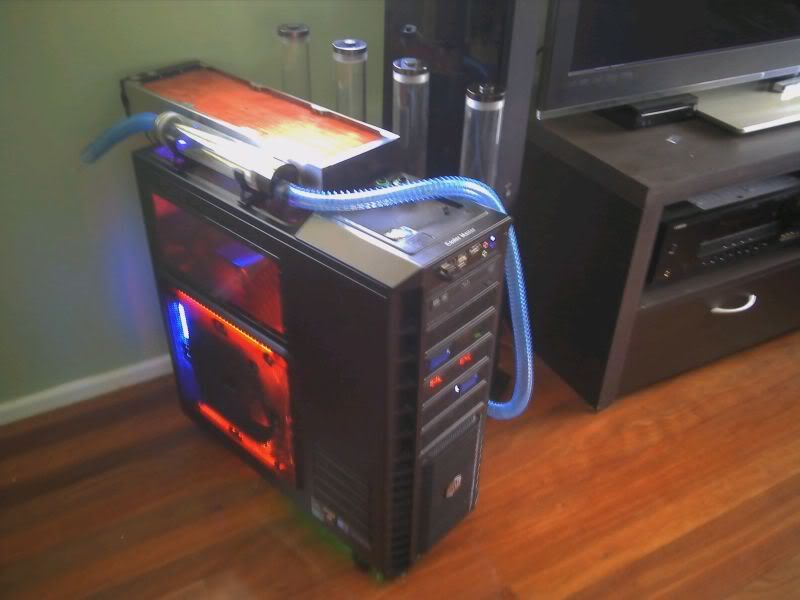
as you can clearly see (thanks to my monumental MS Paint skills) the setup is a mounted, external build, with an internal pump and CPU block, with an external radiator, and 5 resivoirs (four more than neccessary I know, but I like the aesthetics)
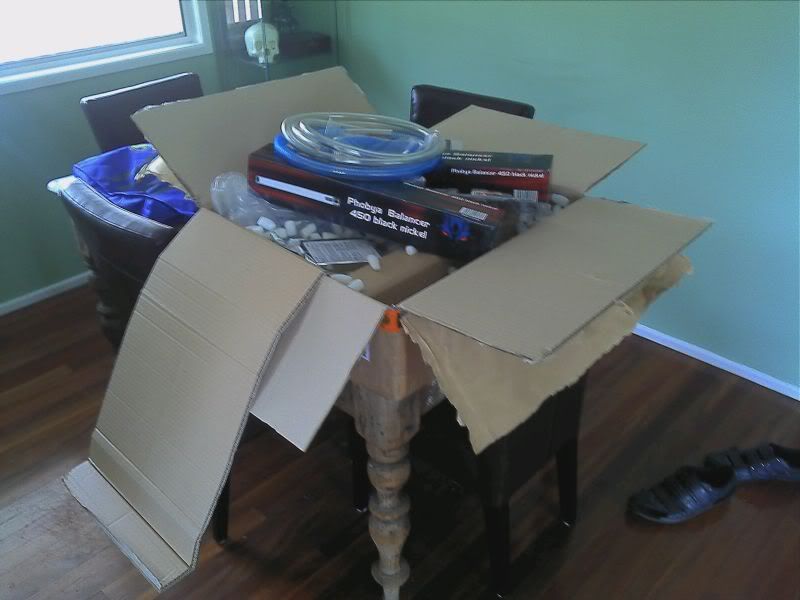
IT"S HUGE!
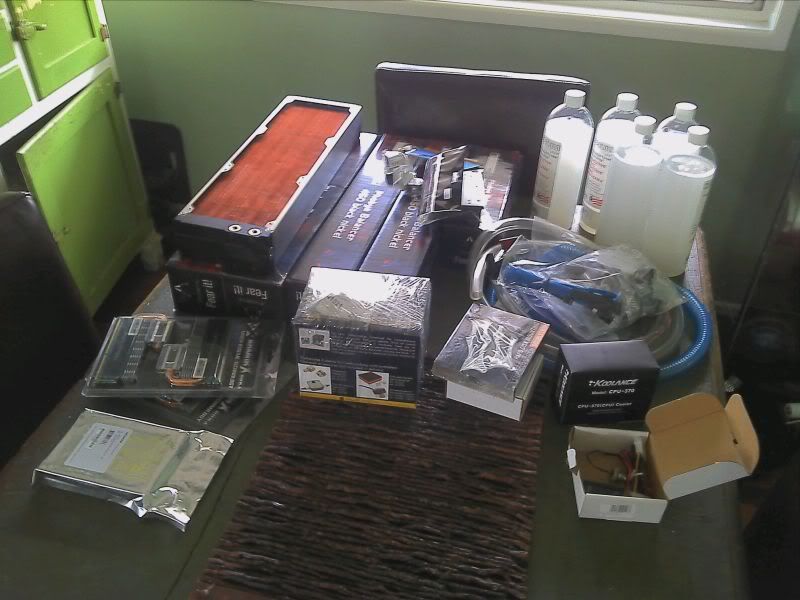
unpacked...
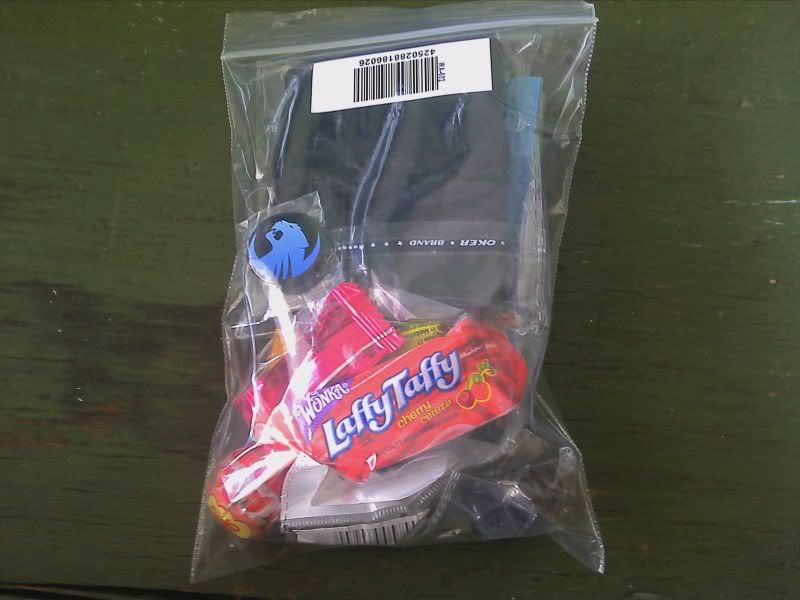
FREE STUFF!!!
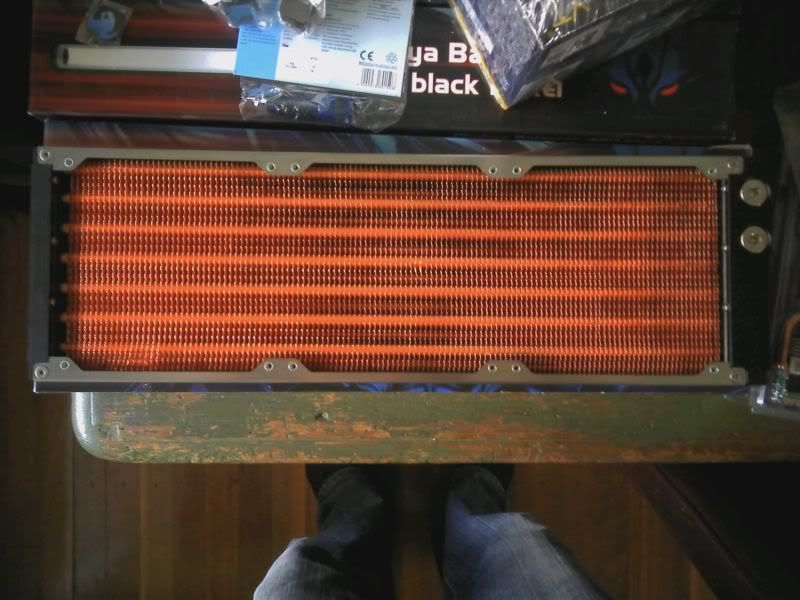
The first thing I noticed was the enormity of the radiator, it was HUGE...
This is why... either I ordered -or recieved- the 3x140... Hrmmm I'll have to formulate Sneaky plan B.
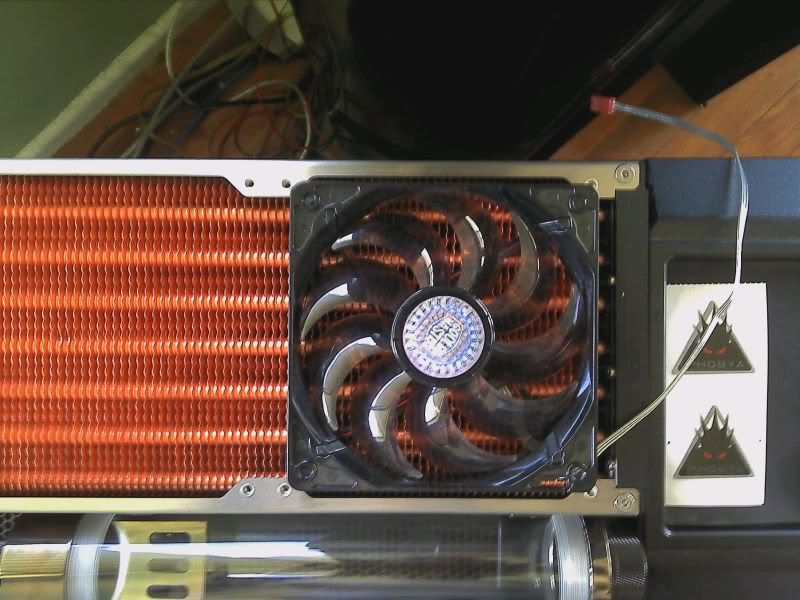
SNEAKY PLAN B:
I shan't bless you with further proof of my MS Paint mastery just yet, but the original plan ws to mount the 3x120 radiator using the mounting holes provided by the HAF 932 case, this meant that the side resivoir would have to be custom mounted (possibly to the removeable steel wall of the radiator) but now, due to the fact that exchanging the radiator would probably be more trouble and money than custom mounting and getting new fans, I've decided to mount the radiator off centre, this allows the first resivoir to be mounted in existing holes, and also removes the need to modify any of the new parts.
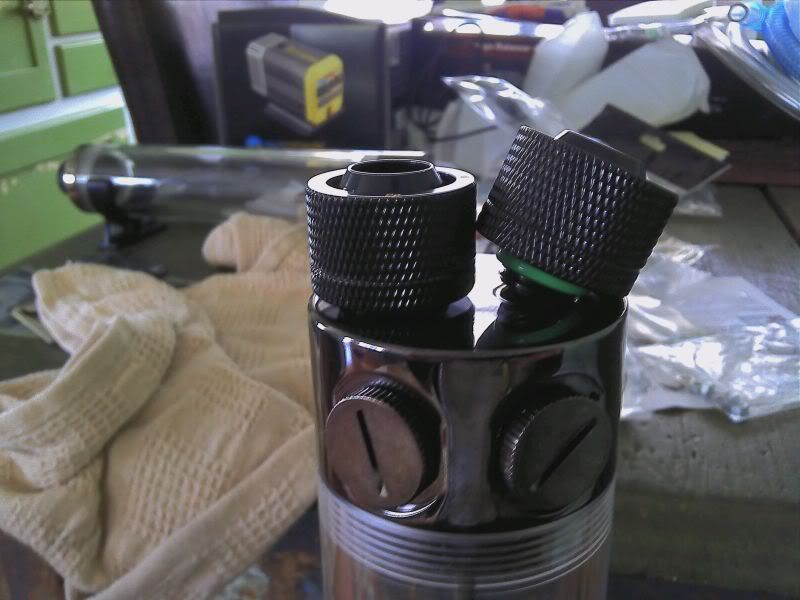
next, the thermal probes...
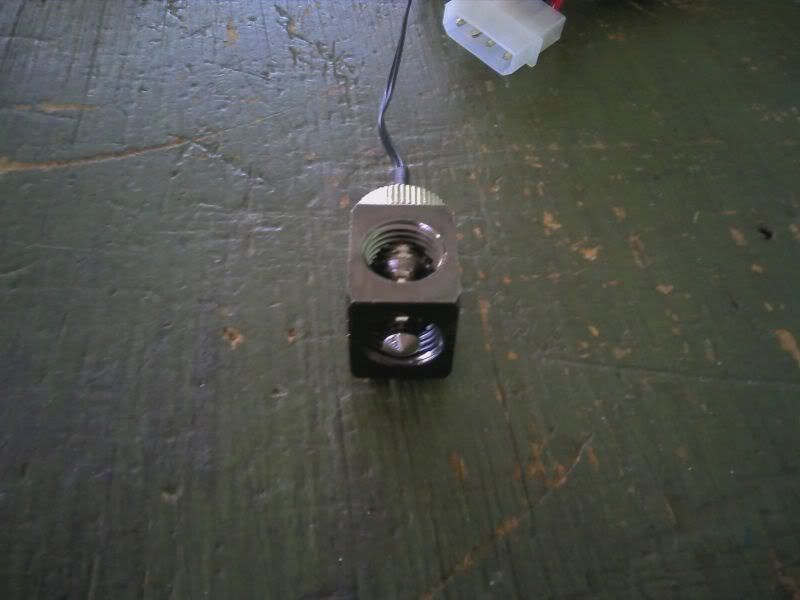
crap, another problem, the idea was to mount the PHOBYA temp probes into the PHOBYA 4 way blocks, however, as you can see, the probe sticks right out out the other end! Time for Sneaky Plan C.
SNEAKY PLAN C:
I was intending to have the blocks with the probes mounted directly before, and after the CPU block, to get an accurate reading of the temps before and after the cooling, however, this discovery proved that idea defunct... instead, I have elected to mount the probes into two of the the ancilliary in/out ports on the Radiator.
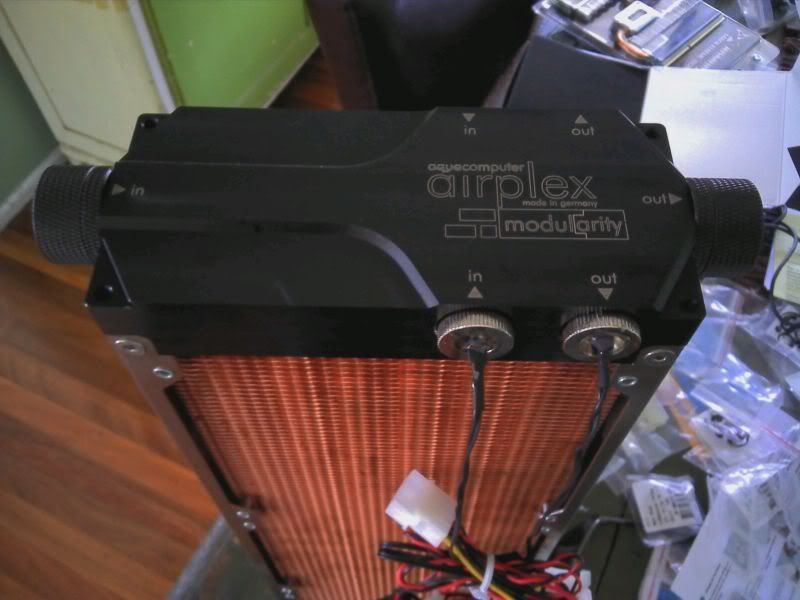
I'm kinda annoyed that i didn't think about this when I was puoring over the hardware before my purchase, however, there isn't a large myraid of infor available on the radiator, while I was screwing things into the radiator, I decided to for my 3/4 OD tubing Bitspower compression fittings, which led to my next problem... the recessed ports of the radiator meant that the large fittings won't seal, Time for Sneaky Plan D.
SNEAKY PLAN D:
Bitspower make extension Fittings, the shortest ones are 15mm long, so along with the 3x140mm fans, I'll have to order two of these too...
this then gave me the cold chill of that ohnosecond.
OHNOSECOND. noun. The moment when you realise a mistake has or may have been made, in realtime, the ohnosecond lasts only for a few ticks of the clock, however, for the person experiencing the ohnosecond a special form eternity has been encountered, one of pain, confusion, with wailing, and the gnashing of teeth.

yep, you see that faint sliver of green? that's the seal, well, in order for it to bee a seal, it's supposed to press tightly against the flat surface of the resivoir, but due to the immensly large size of the fittings, this seal is simply a rubber ring. Time for Sneaky Plan E.
SNEAKY PLAN E:
originally, the path of the coolant was to go out of the radiator, into the side mounted resivoir, down the side of the case, underneath the case, up the other side and into the next resivoir. however, to prevent kinking, I needed to have the tube come out of the side, but now, I can't, so I'll have to mount it in the bottom, and have the tube go along the top, over the side and into the bottom of the next resivoir.
Petty.
However, I then realised that there may be in issue with the other resivoirs...
yep, this sucks, Time for Sneaky Plan F.
SNEAKY PLAN F:
In Sneaky Plan E I wanted to daisy Chain the other resivoirs bottom to bottom, but this proved to be impossible, as only one of the massive, cumbersone, yet still completely awesome fittings could fit onto either side of the resivoir, so, I'll have to run the tube from the bottom of the last resivoir, into the top of the next. after some thinking and toying with liquid dynamics plus ordering a further 2M of tubing and kink spring, I would have to devise Sneaky Plan G.
SNEAKY PLAN G:
The Bitspower extension fittings come in a range of lengths up to 50mm, 4 x 25mm (one per resivoir) will allow me to use the bottom of the resivoir for both fittings, cheaper, better, harder, better, faster, stronger.
I know the CPU block handles 3/4OD compression fittings...


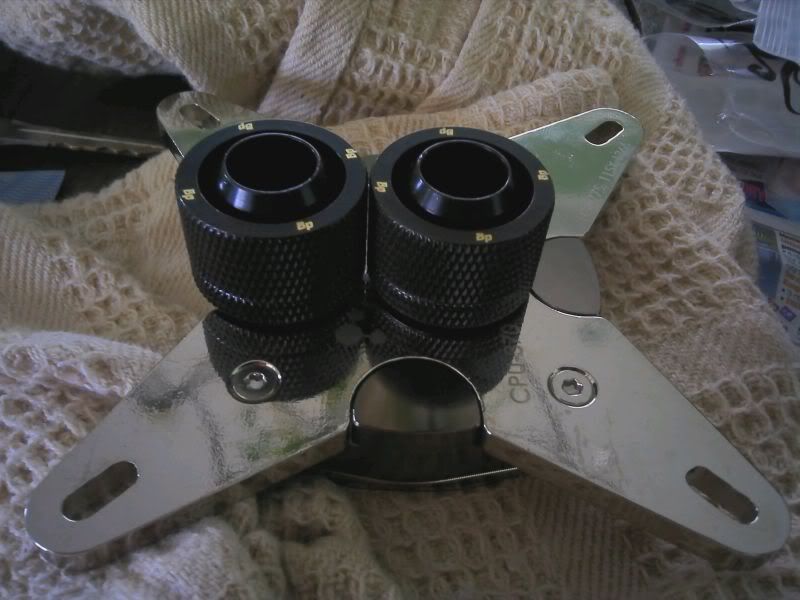
so pretty.
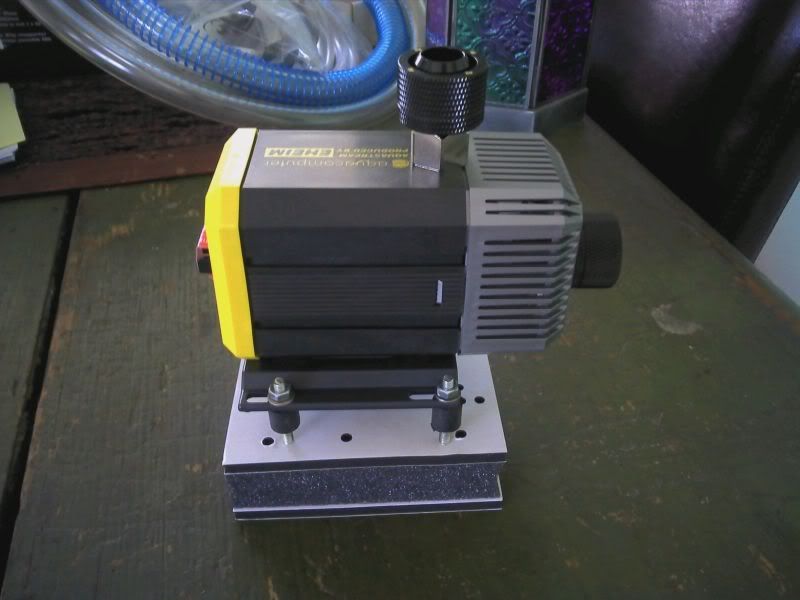
and the pump
and the Liquid
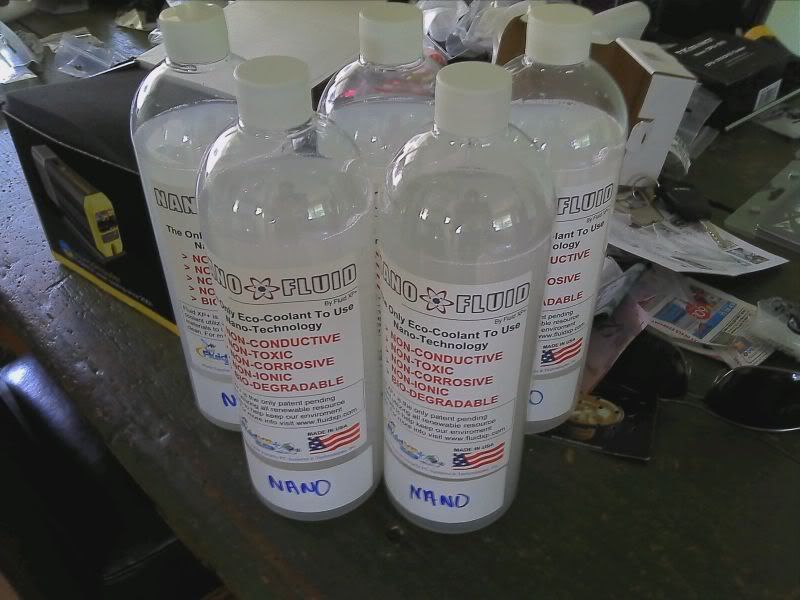
5L of Nano-Fluid, a lot, I know, I miscalculated the amount needed for the tubing, but I learned the hard way that there's only a single decimal place between 300ml, and 3L... my research showed that the liquid would not allow light to pass through it, but my own experiments say different, so I'll be getting a lighting kit aswell.
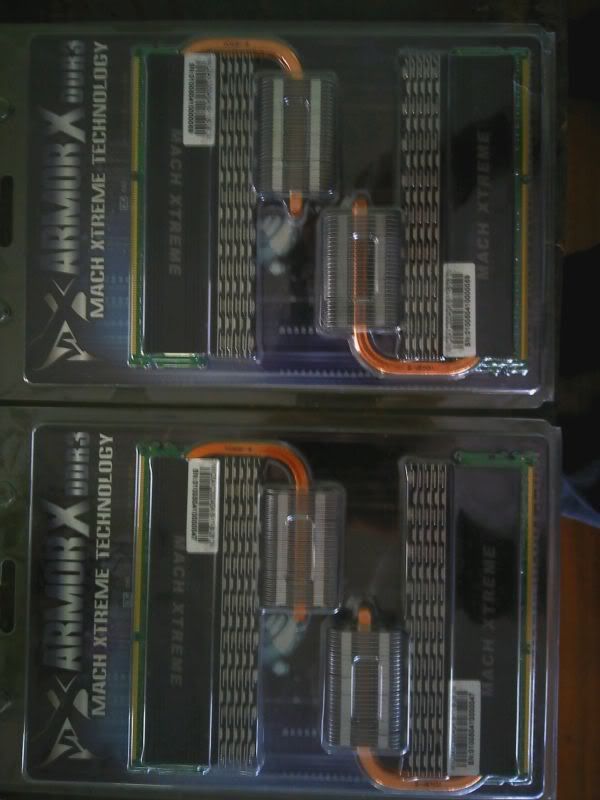
Honestly, this RAM is just sex.
So, I've had my cake, but I yet cannot eat it...
Almost all the parts were built with supreme quality, they screwed together nicely and smoothly, and I had a brilliant experience with both the stores ( www.thekoolroom.com www.pccasegear.com ).
I say almost because nearly all the problems I encountered come from phobya parts, the build quality of the phobya parts was acceptable, but clearly lower than all the other brands and parts I purchased, and every thread on every phobya part had a tight spot with the bitspower fittings, none of the other parts had this.
so, I'm saving for the next lot of parts I'm going to need, Fans, Lights, Bolts, Extension Fittings... but at the moment, I can't do much else...
I was so excited!
and I took heaps of photo's for you all.
PLAN A:
as you can clearly see (thanks to my monumental MS Paint skills) the setup is a mounted, external build, with an internal pump and CPU block, with an external radiator, and 5 resivoirs (four more than neccessary I know, but I like the aesthetics)
IT"S HUGE!
unpacked...
FREE STUFF!!!
The first thing I noticed was the enormity of the radiator, it was HUGE...
This is why... either I ordered -or recieved- the 3x140... Hrmmm I'll have to formulate Sneaky plan B.
SNEAKY PLAN B:
I shan't bless you with further proof of my MS Paint mastery just yet, but the original plan ws to mount the 3x120 radiator using the mounting holes provided by the HAF 932 case, this meant that the side resivoir would have to be custom mounted (possibly to the removeable steel wall of the radiator) but now, due to the fact that exchanging the radiator would probably be more trouble and money than custom mounting and getting new fans, I've decided to mount the radiator off centre, this allows the first resivoir to be mounted in existing holes, and also removes the need to modify any of the new parts.
next, the thermal probes...
crap, another problem, the idea was to mount the PHOBYA temp probes into the PHOBYA 4 way blocks, however, as you can see, the probe sticks right out out the other end! Time for Sneaky Plan C.
SNEAKY PLAN C:
I was intending to have the blocks with the probes mounted directly before, and after the CPU block, to get an accurate reading of the temps before and after the cooling, however, this discovery proved that idea defunct... instead, I have elected to mount the probes into two of the the ancilliary in/out ports on the Radiator.
I'm kinda annoyed that i didn't think about this when I was puoring over the hardware before my purchase, however, there isn't a large myraid of infor available on the radiator, while I was screwing things into the radiator, I decided to for my 3/4 OD tubing Bitspower compression fittings, which led to my next problem... the recessed ports of the radiator meant that the large fittings won't seal, Time for Sneaky Plan D.
SNEAKY PLAN D:
Bitspower make extension Fittings, the shortest ones are 15mm long, so along with the 3x140mm fans, I'll have to order two of these too...
this then gave me the cold chill of that ohnosecond.
OHNOSECOND. noun. The moment when you realise a mistake has or may have been made, in realtime, the ohnosecond lasts only for a few ticks of the clock, however, for the person experiencing the ohnosecond a special form eternity has been encountered, one of pain, confusion, with wailing, and the gnashing of teeth.
yep, you see that faint sliver of green? that's the seal, well, in order for it to bee a seal, it's supposed to press tightly against the flat surface of the resivoir, but due to the immensly large size of the fittings, this seal is simply a rubber ring. Time for Sneaky Plan E.
SNEAKY PLAN E:
originally, the path of the coolant was to go out of the radiator, into the side mounted resivoir, down the side of the case, underneath the case, up the other side and into the next resivoir. however, to prevent kinking, I needed to have the tube come out of the side, but now, I can't, so I'll have to mount it in the bottom, and have the tube go along the top, over the side and into the bottom of the next resivoir.
Petty.
However, I then realised that there may be in issue with the other resivoirs...
yep, this sucks, Time for Sneaky Plan F.
SNEAKY PLAN F:
In Sneaky Plan E I wanted to daisy Chain the other resivoirs bottom to bottom, but this proved to be impossible, as only one of the massive, cumbersone, yet still completely awesome fittings could fit onto either side of the resivoir, so, I'll have to run the tube from the bottom of the last resivoir, into the top of the next. after some thinking and toying with liquid dynamics plus ordering a further 2M of tubing and kink spring, I would have to devise Sneaky Plan G.
SNEAKY PLAN G:
The Bitspower extension fittings come in a range of lengths up to 50mm, 4 x 25mm (one per resivoir) will allow me to use the bottom of the resivoir for both fittings, cheaper, better, harder, better, faster, stronger.
I know the CPU block handles 3/4OD compression fittings...
so pretty.
and the pump
and the Liquid
5L of Nano-Fluid, a lot, I know, I miscalculated the amount needed for the tubing, but I learned the hard way that there's only a single decimal place between 300ml, and 3L... my research showed that the liquid would not allow light to pass through it, but my own experiments say different, so I'll be getting a lighting kit aswell.
Honestly, this RAM is just sex.
So, I've had my cake, but I yet cannot eat it...
Almost all the parts were built with supreme quality, they screwed together nicely and smoothly, and I had a brilliant experience with both the stores ( www.thekoolroom.com www.pccasegear.com ).
I say almost because nearly all the problems I encountered come from phobya parts, the build quality of the phobya parts was acceptable, but clearly lower than all the other brands and parts I purchased, and every thread on every phobya part had a tight spot with the bitspower fittings, none of the other parts had this.
so, I'm saving for the next lot of parts I'm going to need, Fans, Lights, Bolts, Extension Fittings... but at the moment, I can't do much else...
Dieser Beitrag wurde bereits 1 mal editiert, zuletzt von »Bradstone« (13. November 2011, 23:13)
gah.
I think I'm up to Sneaky Plan Gamma12 now...
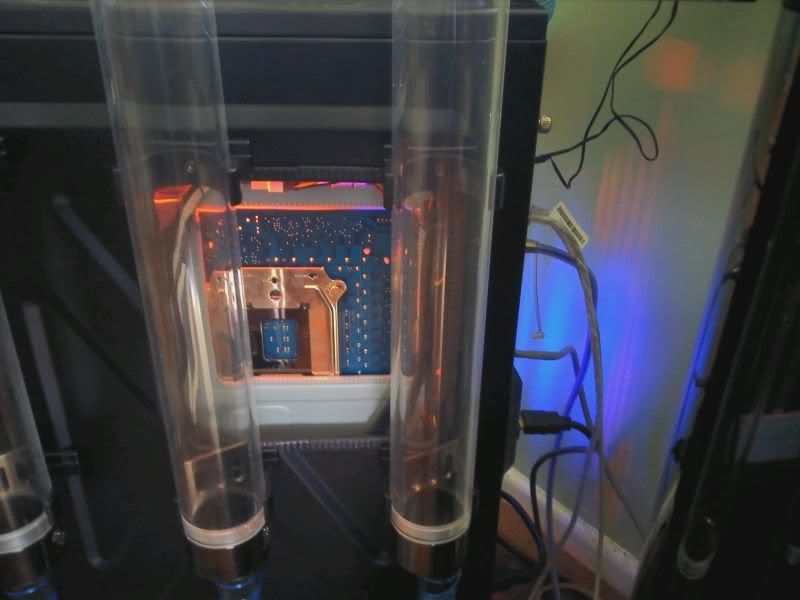
I decided to add a back of mobo cooling fan to help stabilize the voltages I'm going to be hitting, plus, it will look awesome. for those who don't know, the voltage regulators and many other components dissipate heat into the motherboard, cooling the back of the motherboard helps with stability. for those who do know, yes, I understand that the effort makes for minimal improvement and is mostly for peace of mind and bragging rights.
I've had to place a few orders for more parts:
3 x 140mm noiseblocker fans - I had to get low wattage fans because of the 5W limit for the fan controller on the pump
Bitspower Extension fittings - for the resivoir and radiator
5 x dual blue LED lighting kits w acryllic plugs - I was told that the nano-fluid wouldn't let light through, however my own testing proved that it was quite good at letting light through, so, I got LED's
Magnetic fan screws for the pump - I always wanted to try these, I thought a third decouple would help with the pump too...
2m of Tygon 3603 w bitspower coil - as I said, I underestimated the length.
5m black cable sheathing - something else I always wanted to try...
2 x 30cm UV CCFL (I now have over 8 feet of CCFL lighiting!) - the blue coil is UV reactive, and these will come through the radiator.
1 x 140mm Enermax red LED fan - the back of mobo fan, the red will also come through two of the resivoirs.
Stuff I need, stuff I wanted...
I severely underestimated how much extra length the turns of the tubing will take. I thought I'd have 50cm or so extra, I ended up being 2m down!
Photo's will come soon, I've mounted the 4 x 450mm resivoirs in the back panel, cut the hole for the back of mobo fan.
My totally non computer literate girlfriend (who has shown an amazing amount of enthusiasm and understanding) said: "it looks steampunk" - personally I think that this is amazing proof that I'm doing well, seeing as she was once quoted as saying "I put songs on my iPod, I'm practically a programmer"
I think I'm up to Sneaky Plan Gamma12 now...
I decided to add a back of mobo cooling fan to help stabilize the voltages I'm going to be hitting, plus, it will look awesome. for those who don't know, the voltage regulators and many other components dissipate heat into the motherboard, cooling the back of the motherboard helps with stability. for those who do know, yes, I understand that the effort makes for minimal improvement and is mostly for peace of mind and bragging rights.
I've had to place a few orders for more parts:
3 x 140mm noiseblocker fans - I had to get low wattage fans because of the 5W limit for the fan controller on the pump
Bitspower Extension fittings - for the resivoir and radiator
5 x dual blue LED lighting kits w acryllic plugs - I was told that the nano-fluid wouldn't let light through, however my own testing proved that it was quite good at letting light through, so, I got LED's
Magnetic fan screws for the pump - I always wanted to try these, I thought a third decouple would help with the pump too...
2m of Tygon 3603 w bitspower coil - as I said, I underestimated the length.
5m black cable sheathing - something else I always wanted to try...
2 x 30cm UV CCFL (I now have over 8 feet of CCFL lighiting!) - the blue coil is UV reactive, and these will come through the radiator.
1 x 140mm Enermax red LED fan - the back of mobo fan, the red will also come through two of the resivoirs.
Stuff I need, stuff I wanted...
I severely underestimated how much extra length the turns of the tubing will take. I thought I'd have 50cm or so extra, I ended up being 2m down!
Photo's will come soon, I've mounted the 4 x 450mm resivoirs in the back panel, cut the hole for the back of mobo fan.
My totally non computer literate girlfriend (who has shown an amazing amount of enthusiasm and understanding) said: "it looks steampunk" - personally I think that this is amazing proof that I'm doing well, seeing as she was once quoted as saying "I put songs on my iPod, I'm practically a programmer"
Dieser Beitrag wurde bereits 1 mal editiert, zuletzt von »Bradstone« (18. November 2011, 22:26)
Ähnliche Themen
-
 Hardware, allgemein »
-
 Farbnummer für Chieftec
(10. Februar 2003, 19:32)
Farbnummer für Chieftec
(10. Februar 2003, 19:32)
-