 18.04.2024, 15:34
 Sprache ändern
 Registrieren
 Anmelden
Sie sind nicht angemeldet.
Lieber Besucher, herzlich willkommen bei: Aqua Computer Forum. Falls dies Ihr erster Besuch auf dieser Seite ist, lesen Sie sich bitte die Hilfe durch. Dort wird Ihnen die Bedienung dieser Seite näher erläutert. Darüber hinaus sollten Sie sich registrieren, um alle Funktionen dieser Seite nutzen zu können. Benutzen Sie das Registrierungsformular, um sich zu registrieren oder informieren Sie sich ausführlich über den Registrierungsvorgang. Falls Sie sich bereits zu einem früheren Zeitpunkt registriert haben, können Sie sich hier anmelden.

Okay I guess after all the pushing and prodding I should start a project log for my latest creation. So I have decided to call my project "Feeding Frenzy" and if you can't figure out why you will by the end of the finishing touches. 
So what I am doing started out with a hybrid DIY/Koolance design in a Lian-Li PC-601B case. You can see what I was originally doing at my home page. Got a little crowded so I then went to a V1200 case, which I became unhappy with. So now I am doing a Lian-Li V2000 black case and mostly Aqua Computer parts. I don't have any stock photos of what it originally looked like so visit the Lian-Li site if that interests ya. I also was originally going to do one loop, but it seemed more fun to do 2 loops. Now I am going with three loops
So here are a couple of pics to tantalize your taste buds:
This was the initial AC order I received back in April 05. Since then I went hog wild.

Forgot to mention what I'm doing in the way of computer components.
Asus A8N-SLI
Winchester OEM 3500
Two sticks of matched 512 MB of Corsair XMS 3200XL Pro (with the LED lights)
Two Asus 6600GT's
Sound Blaster Audigy2 ZS
Three 74Gb and two 36Gb WD Raptor drives
Pioneer DVR-109 DVD-RW
Lite-On DVD ROM
Lian-Li card drive
PCP&C 510 SLI
Hey I just found this way to make some $$ with this money sink ahh...project :

So what I am doing started out with a hybrid DIY/Koolance design in a Lian-Li PC-601B case. You can see what I was originally doing at my home page. Got a little crowded so I then went to a V1200 case, which I became unhappy with. So now I am doing a Lian-Li V2000 black case and mostly Aqua Computer parts. I don't have any stock photos of what it originally looked like so visit the Lian-Li site if that interests ya. I also was originally going to do one loop, but it seemed more fun to do 2 loops. Now I am going with three loops
So here are a couple of pics to tantalize your taste buds:
This was the initial AC order I received back in April 05. Since then I went hog wild.
Forgot to mention what I'm doing in the way of computer components.
Asus A8N-SLI
Winchester OEM 3500
Two sticks of matched 512 MB of Corsair XMS 3200XL Pro (with the LED lights)
Two Asus 6600GT's
Sound Blaster Audigy2 ZS
Three 74Gb and two 36Gb WD Raptor drives
Pioneer DVR-109 DVD-RW
Lite-On DVD ROM
Lian-Li card drive
PCP&C 510 SLI
Hey I just found this way to make some $$ with this money sink ahh...project :
Well the first thing that changed for me was that I ditched the Aqua Computer Evo 240 radiator. It's a very nice radiator and if I had the room I would have used it. So I decided that some commercial heater core style 120's were in order. You will see as I go that my main emphasis is on using the geometry of the case to my best abilities. IOW I don't just start cutting stuff, but think about how I can do the most with the case and retain the natural lines of the V series cases.
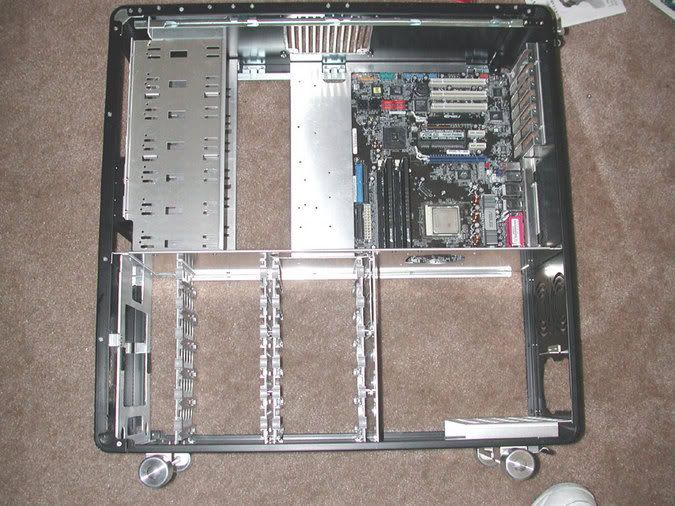
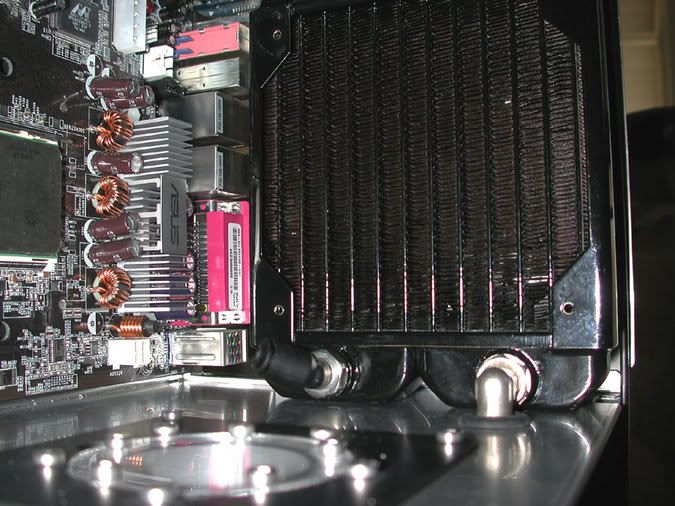
So the first radiator to go in was in the front bottom of the case. This was a natural as there was already a 120mm fan sitting there. But would it fit without taking the front HD rack out? I am not sure how many HD's I am going to put in so I was determined to do what I could to make it fit.
It is always a good idea when doing these kinds of projects to put the motherboard in to get the proper perspective:
So here was my first go at getting the radiator into the stock fan mount:
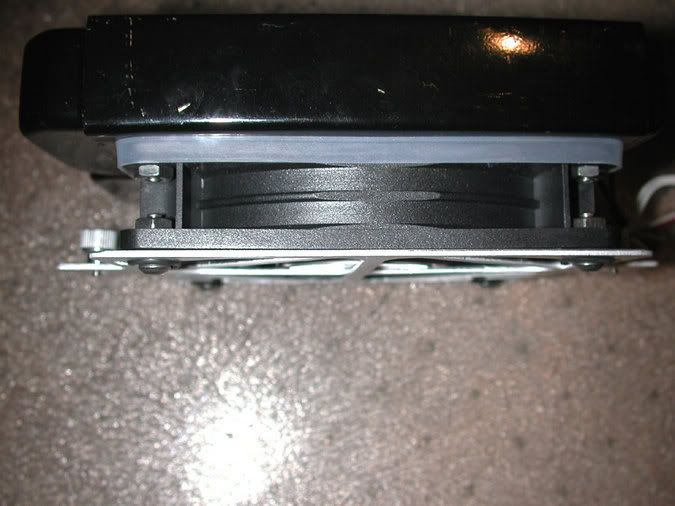
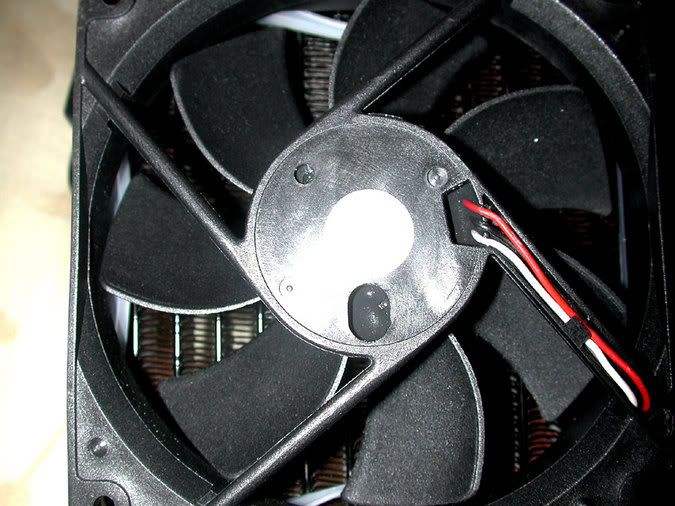
I drilled all the way through the radiator core and this fan is mounted to the radiator by use of some 6-32 x 2" round head machine screws. The fan is then mounted to the stock fan mount with 6-32 x 1/2" button head socket cap stainless steel screws, washers, and nuts. I also put in a Vantec 120mm fan gasket for vibration issues and better air flow. Here you can see it in the case:
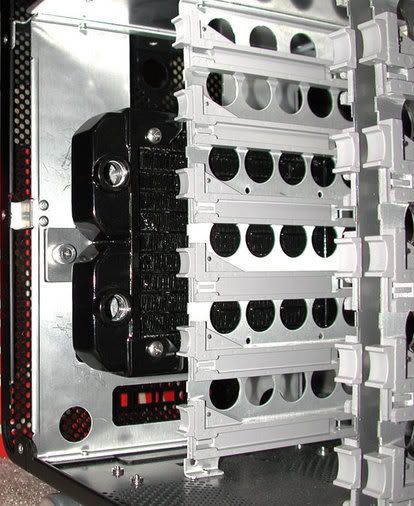
Here are a couple of close up pics of the mounting details:
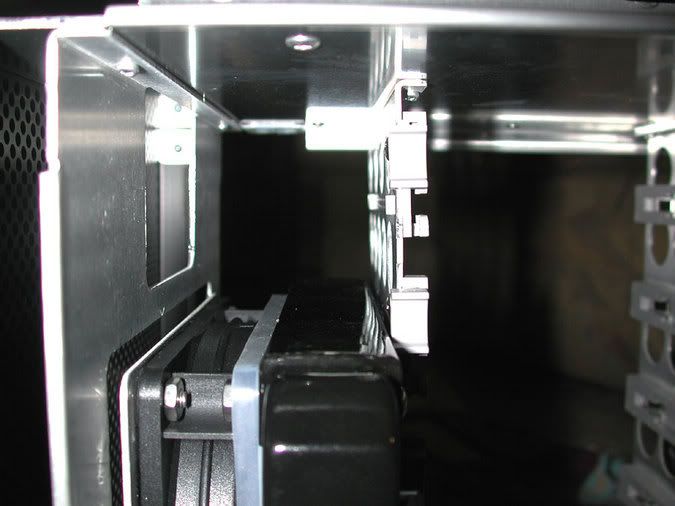
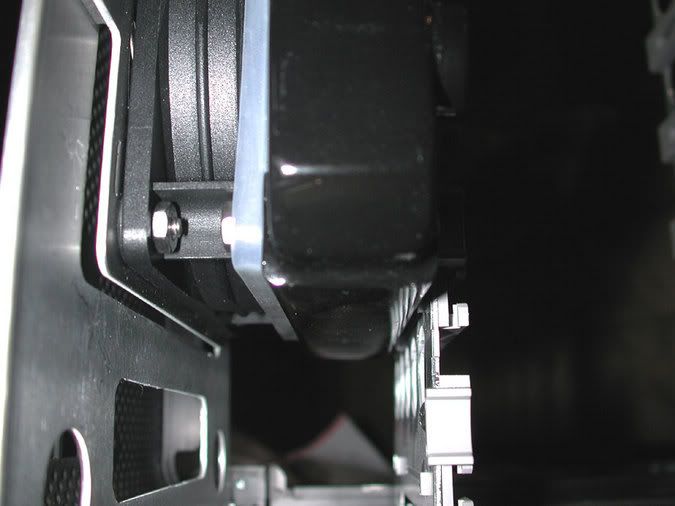
Yeah it is definitely a close fit and it does bow the front HD rack a tiny bit, but the HD's can still be put in without to much trouble. If I can mount with some flat head machine screws I might be able to clear everything. While it may seem that there won't be good air flow I should note that the airflow is from the front of the case going to the HD area. The HD racks have lots of holes in them and it doesn't seem to be a problem. However, there was one problem that you will see in the next pic.
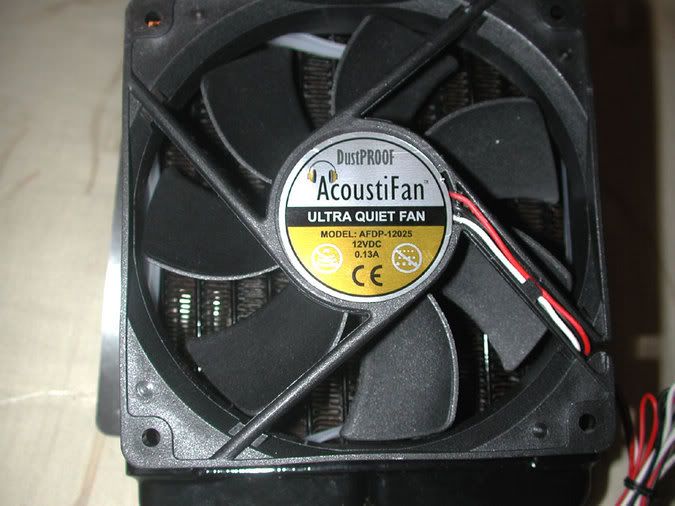
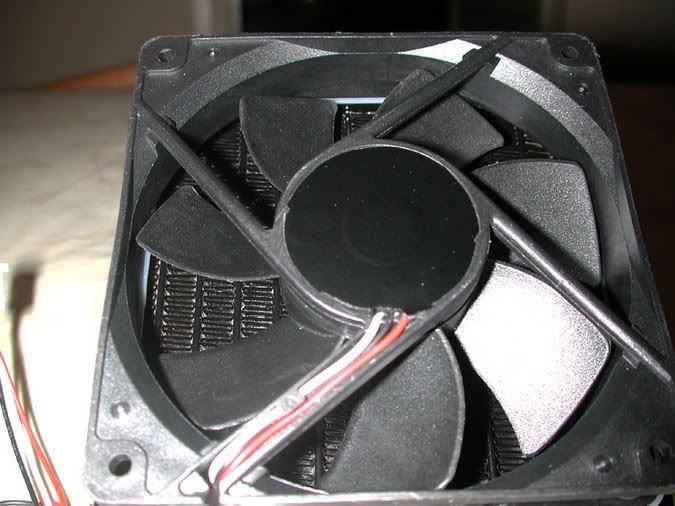
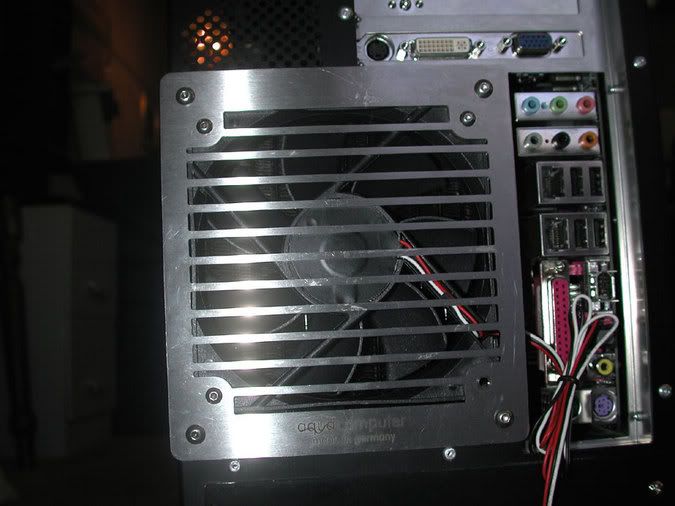
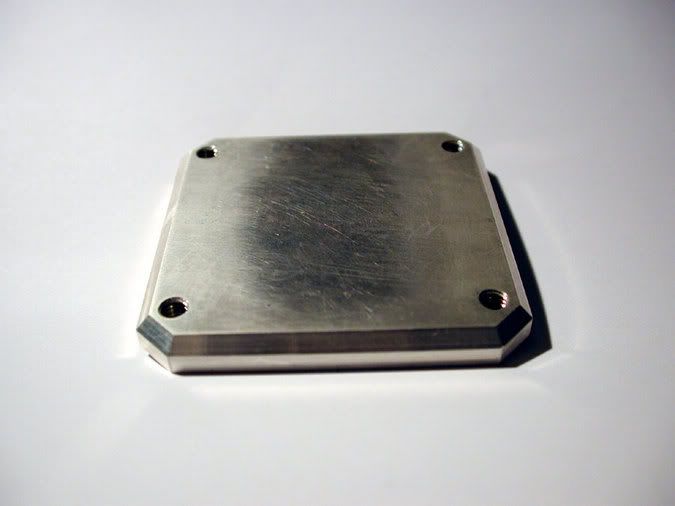
The fan logo does not fit my motif and it sticks out enough that it does not allow the fan to be laid flat against another surface. So being the intrepid soul that I am I decided to blow the warranty away and take off the metal plate, which you can see here:
While this was a bit better, it wasn't quite what I had in mind. So off I went to my favorite computer modding store: Staples Office Supply After roaming the isles a while I finally found what I needed. Some large black vinyl lettering sets. The middle of the # 6 was perfect for my purposes of having a nice basic black with a little trimming with an X-acto blade:
So things are shaping up, but those red, black, and white wires got to go as well. Still thinking about what I will do here because they kind of glued them into the channel
So the first radiator to go in was in the front bottom of the case. This was a natural as there was already a 120mm fan sitting there. But would it fit without taking the front HD rack out? I am not sure how many HD's I am going to put in so I was determined to do what I could to make it fit.
It is always a good idea when doing these kinds of projects to put the motherboard in to get the proper perspective:
So here was my first go at getting the radiator into the stock fan mount:
I drilled all the way through the radiator core and this fan is mounted to the radiator by use of some 6-32 x 2" round head machine screws. The fan is then mounted to the stock fan mount with 6-32 x 1/2" button head socket cap stainless steel screws, washers, and nuts. I also put in a Vantec 120mm fan gasket for vibration issues and better air flow. Here you can see it in the case:
Here are a couple of close up pics of the mounting details:
Yeah it is definitely a close fit and it does bow the front HD rack a tiny bit, but the HD's can still be put in without to much trouble. If I can mount with some flat head machine screws I might be able to clear everything. While it may seem that there won't be good air flow I should note that the airflow is from the front of the case going to the HD area. The HD racks have lots of holes in them and it doesn't seem to be a problem. However, there was one problem that you will see in the next pic.
The fan logo does not fit my motif and it sticks out enough that it does not allow the fan to be laid flat against another surface. So being the intrepid soul that I am I decided to blow the warranty away and take off the metal plate, which you can see here:
While this was a bit better, it wasn't quite what I had in mind. So off I went to my favorite computer modding store: Staples Office Supply
After roaming the isles a while I finally found what I needed. Some large black vinyl lettering sets. The middle of the # 6 was perfect for my purposes of having a nice basic black with a little trimming with an X-acto blade:So things are shaping up, but those red, black, and white wires got to go as well. Still thinking about what I will do here because they kind of glued them into the channel
Well I have decided to put off the fixing of the wiring on the fans till I get further into the project and do all the cable sleeving and custom wiring.
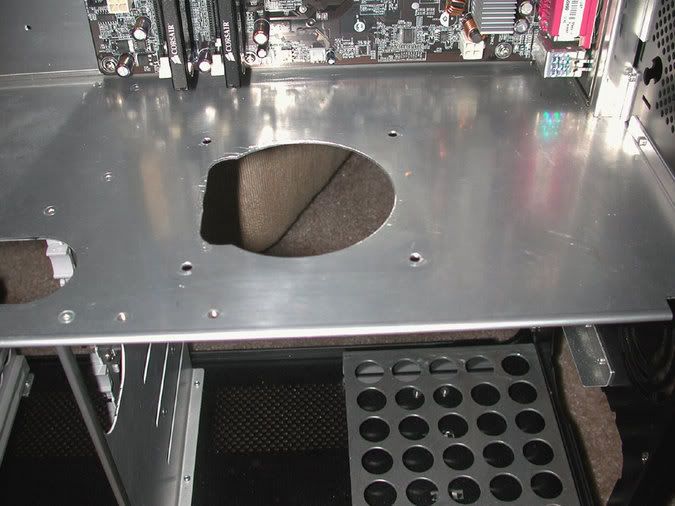
So I guess it is time to do some more case drilling. I have never been to enthused about putting my computer on it's back to fill a horizontally mounted Aquatube. So the perfect solution seems to be a Fillport that allows me to bleed and fill the GPU loop from a normal position outside the case.
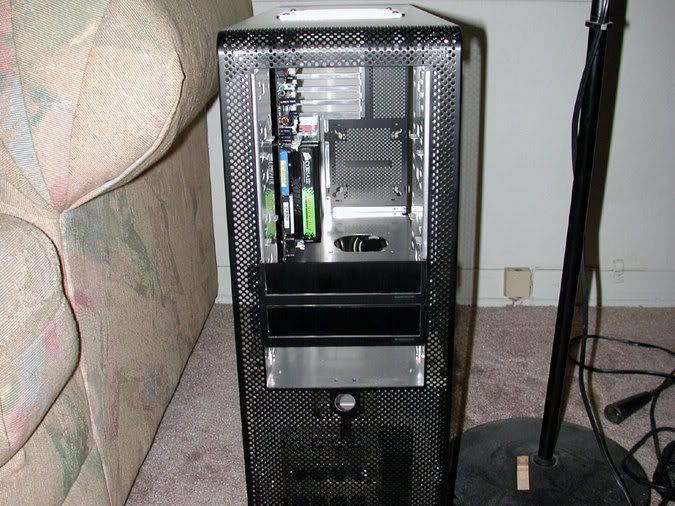
BTW, did I mention that there are three 120's going in to this case? I suppose some are wondering why I would put three (3) 120's in when I obviously have the room for one 360, correct? The reason is that I wanted to maximize the use of all my PCI slots and 5 1/4" slots as well. The way the top mounted grill is set in it does a lot of important things. It allows me to use all my 5 1/4" slots AND I have full use of all my PCI slots as well (excepting full length cards). Due to the case design it also makes it really simple to hide a great deal of the wiring and plumbing in the top of the case to boot.
So here is a pic of the hole for the Fillport and the hole I cut for the top mounted 120 rad:
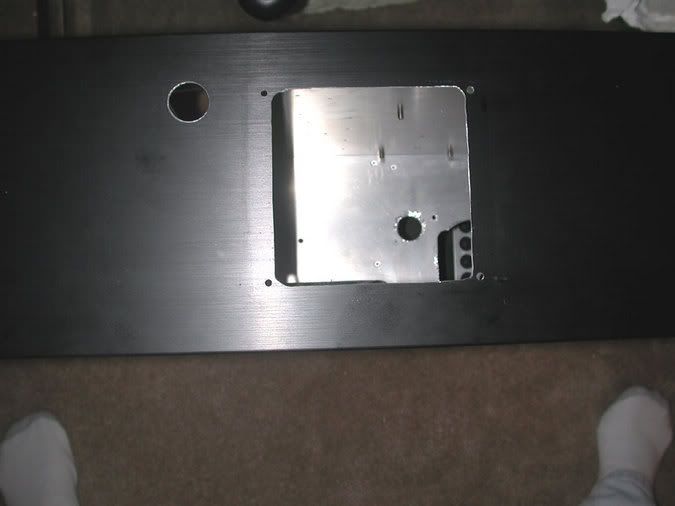
You can see a couple of holes I also drilled in the middle case partition. Now I wonder what those could be for? Here is the AC Evo 120 grill in and the Fillport:
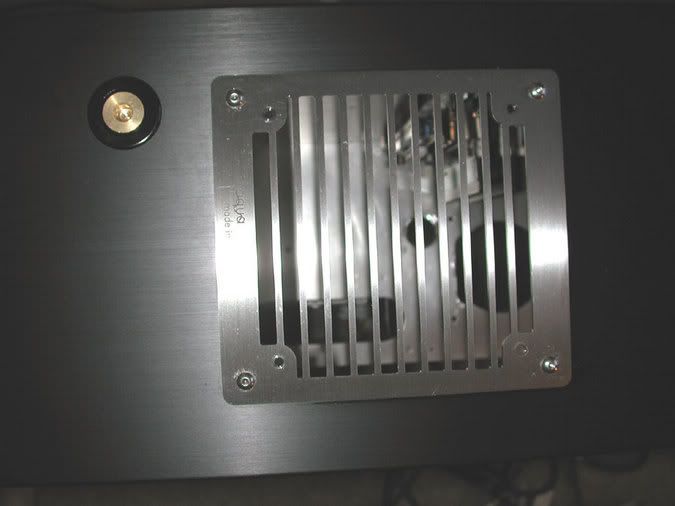
The brass Fillport plug will eventually have a satin nickel plate applied to it. BTW, if you are observant you have probably noticed I don't like the low profile socket head screws that come with most of the AC equipment. So looks like some more stainless button head socket screws here. ;D
So I guess it is time to do some more case drilling. I have never been to enthused about putting my computer on it's back to fill a horizontally mounted Aquatube. So the perfect solution seems to be a Fillport that allows me to bleed and fill the GPU loop from a normal position outside the case.
BTW, did I mention that there are three 120's going in to this case? I suppose some are wondering why I would put three (3) 120's in when I obviously have the room for one 360, correct? The reason is that I wanted to maximize the use of all my PCI slots and 5 1/4" slots as well. The way the top mounted grill is set in it does a lot of important things. It allows me to use all my 5 1/4" slots AND I have full use of all my PCI slots as well (excepting full length cards). Due to the case design it also makes it really simple to hide a great deal of the wiring and plumbing in the top of the case to boot.
So here is a pic of the hole for the Fillport and the hole I cut for the top mounted 120 rad:
You can see a couple of holes I also drilled in the middle case partition. Now I wonder what those could be for? Here is the AC Evo 120 grill in and the Fillport:
The brass Fillport plug will eventually have a satin nickel plate applied to it. BTW, if you are observant you have probably noticed I don't like the low profile socket head screws that come with most of the AC equipment. So looks like some more stainless button head socket screws here. ;D
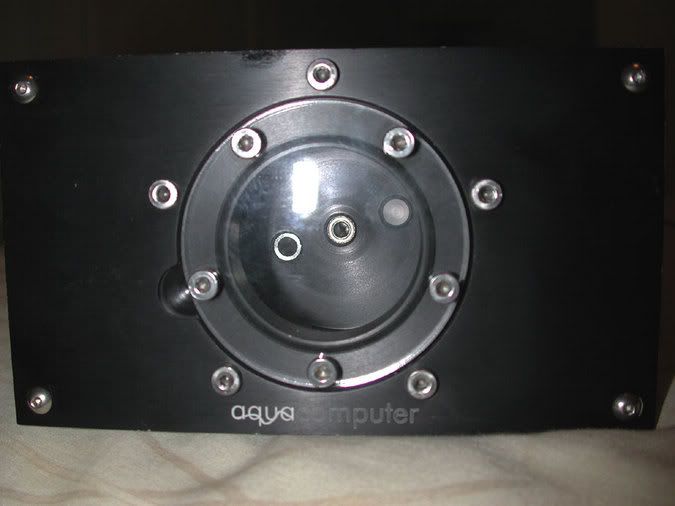
Okay here is the reason for that big ole hole you saw in the above pic. This is an Aqua Computer Aquatube. I decided on using the silver tube with a black mounting plate as it gave a nice distinctive flair to the install. As you probably notice there is no AC logo on this plate. I did that because I wanted the fittings to be pointing to the side of the case that won't have a window and I really don't want AC's name all over my case as I have something special planned with the AC logo down the line.
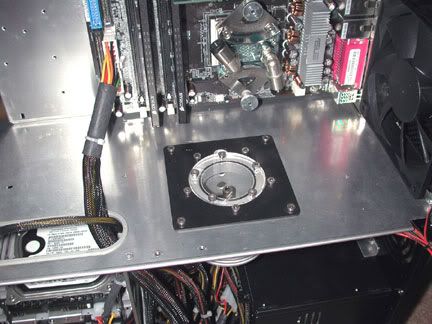
Well it is off to the store to get some more button head sockets. You can also see the hard drives below and a trial fit of the AC Cuplex XT. The PSU wire is just for show as it makes a major disappearance down the line.
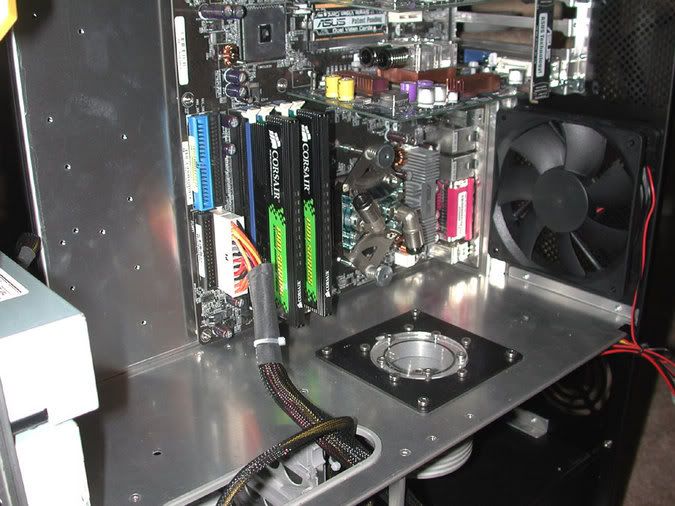
Here you can see the trial fit of the Asus 6600 GT's with the AC TwinPlex GPU cooler.

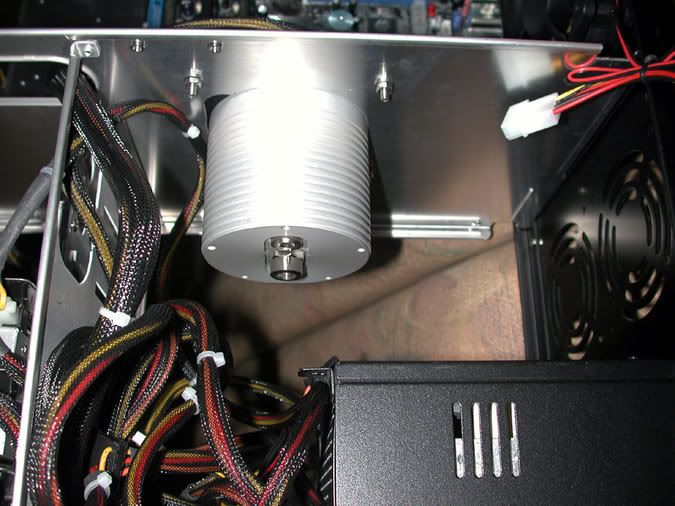
Just a few more pics of the bottom of the Aquatube mounted in the middle case partition. I can see that my Dremel cut-off saw is going to have to put in another star performance in cutting those screws down to size.
Another view of the Aquatube looking towards the back of the case, which brings us to the installation of the rear mounted radiator.
Well decided to take some time out from doing case work. You can only breathe in so much aluminum dust at a time. So I decided to do some work on my front mounted Aquatube in an AquaBay AT:
The center mounted fitting is for the return line and the one to the left is for the Fillport. On the right side I put in a LED mount. Not positive what I am going to do with that one yet, but it is difficult to put it in after you fill with H20.
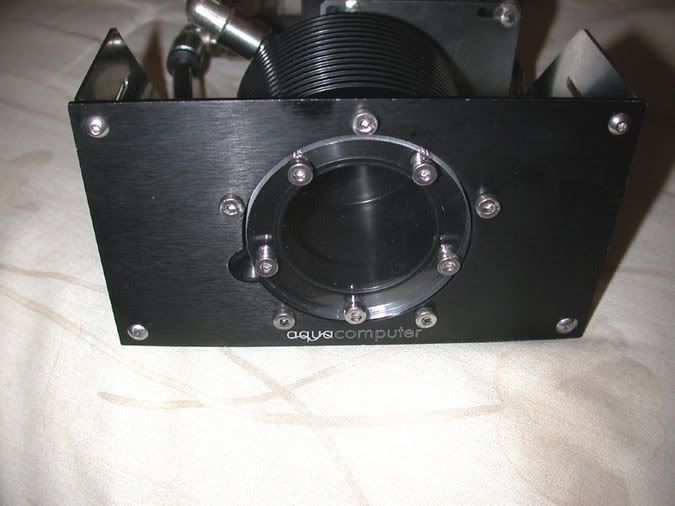
As you can tell this one is all black because the whole front of the case is black. So no contrasting look is possible here. Looks like another trip to McMaster Carr for some more metric buttonhead socket screws.
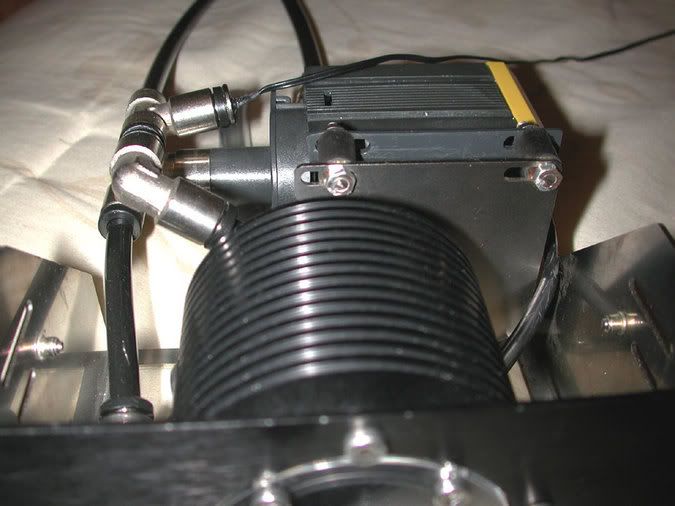
You can see that my Dremel tool cut-off saw has been busy again cutting screws on the Aquastream mount.
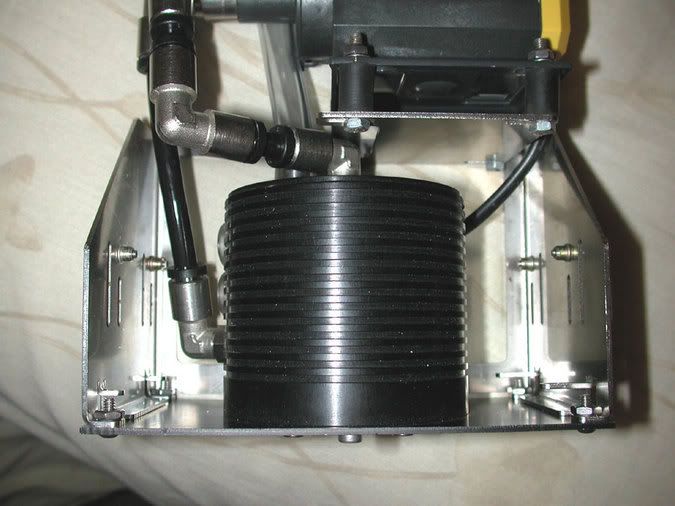
Top view of the GPU cooling sub-assembly. The two LED mounts on the left side will be for the Aquaero Vario-LED assembly. Color of coolant will be green at start-up, yellow at normal temps, and red if it gets to hot. I was thinking of using the back LED mount for a flashing white strobe LED in case I get critical temps. The reason I side mounted the Vario-LED assembly was so that I got a nice subdued coolant color and no bright lights pointing out the front of the case.
The clear tube goes to the Fillport. Will probably change that to black as well once my tubing arrives. The screws you see on the back pump mount will be cut off later on, like the front ones already are.
So I decided to do some work on my front mounted Aquatube in an AquaBay AT:The center mounted fitting is for the return line and the one to the left is for the Fillport. On the right side I put in a LED mount. Not positive what I am going to do with that one yet, but it is difficult to put it in after you fill with H20.
As you can tell this one is all black because the whole front of the case is black. So no contrasting look is possible here. Looks like another trip to McMaster Carr for some more metric buttonhead socket screws.
You can see that my Dremel tool cut-off saw has been busy again cutting screws on the Aquastream mount.
Top view of the GPU cooling sub-assembly. The two LED mounts on the left side will be for the Aquaero Vario-LED assembly. Color of coolant will be green at start-up, yellow at normal temps, and red if it gets to hot. I was thinking of using the back LED mount for a flashing white strobe LED in case I get critical temps. The reason I side mounted the Vario-LED assembly was so that I got a nice subdued coolant color and no bright lights pointing out the front of the case.
The clear tube goes to the Fillport. Will probably change that to black as well once my tubing arrives. The screws you see on the back pump mount will be cut off later on, like the front ones already are.
All right for today we are back to working on my Alzheimer's program of breathing aluminum dust. All kidding aside I wear a mouth/nose respirator whenever I am cutting aluminum and safety glasses over my reading glasses.
So after getting some experience with the top and front mounted radiators I decided to do it a bit different. First change was getting away from the cut-off saw and cut with a jig saw. This was a lot faster, but I still had to do some detail work with the Dremel.
Here we are looking forward and I also decided that reaching around with my fingers to install the grill was a major PITA. So I drilled and tapped for 8-32 threads in the four corners.
This pic is looking down towards the case partition. Hey what is that crazy woman doing now with that blue thingy? Not another hole :o
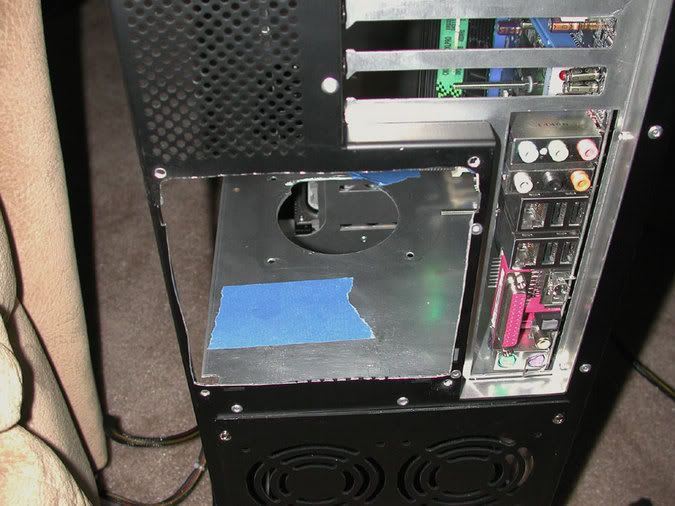
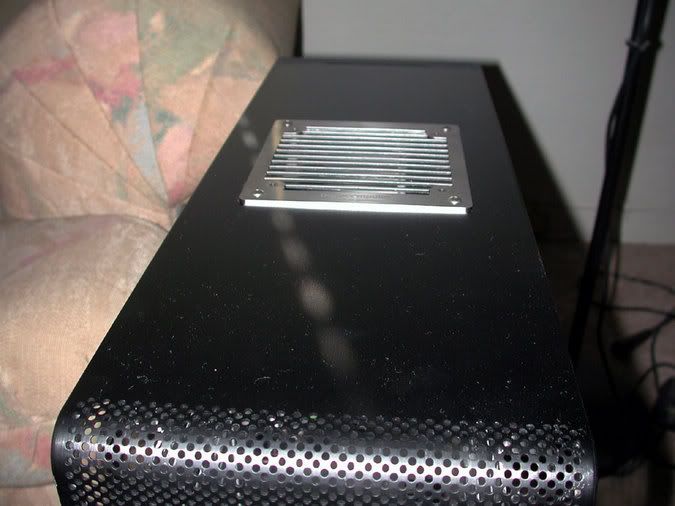
Bottom's up ;D Here you can see the grill I put in top of the case and the Fillport.

Now what could that hole be possibly for? And what the heck is that blue thing over on the left?
Here is the back of the grill installed. This fan got the vinyl patch as well and the wires will be worked on later as I red, white, and black don't make it IMHO. Hmmm....looks like I need another application of SS polish.
All kidding aside I wear a mouth/nose respirator whenever I am cutting aluminum and safety glasses over my reading glasses.So after getting some experience with the top and front mounted radiators I decided to do it a bit different. First change was getting away from the cut-off saw and cut with a jig saw. This was a lot faster, but I still had to do some detail work with the Dremel.
Here we are looking forward and I also decided that reaching around with my fingers to install the grill was a major PITA. So I drilled and tapped for 8-32 threads in the four corners.
This pic is looking down towards the case partition. Hey what is that crazy woman doing now with that blue thingy? Not another hole :o
Bottom's up ;D Here you can see the grill I put in top of the case and the Fillport.
Now what could that hole be possibly for? And what the heck is that blue thing over on the left?
Here is the back of the grill installed. This fan got the vinyl patch as well and the wires will be worked on later as I red, white, and black don't make it IMHO. Hmmm....looks like I need another application of SS polish.
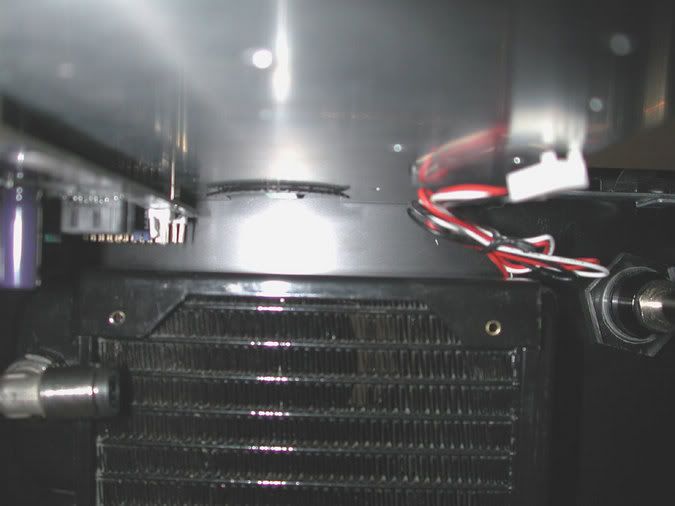
Well forgot to mention that if you have one of these cases and were thinking about using an Evo 120 griil on the back that there are a few problems. A picture is worth a thousand words, so:
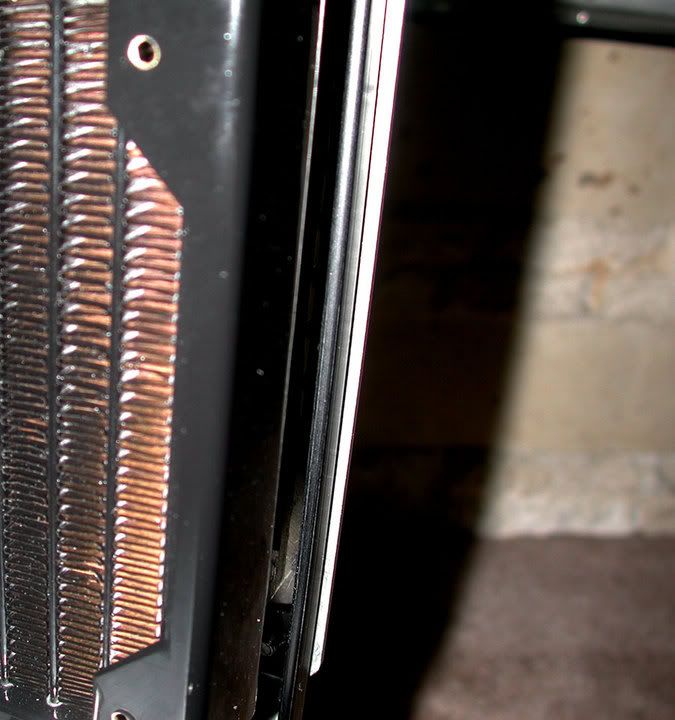
As you can see above the grill does not fit exactly. However, one of the things about getting older is that you start to know a lot more people. So this is not a problem as I have a couple of friends who are machinists and it only needs about .100" off the top, left, and right sides.
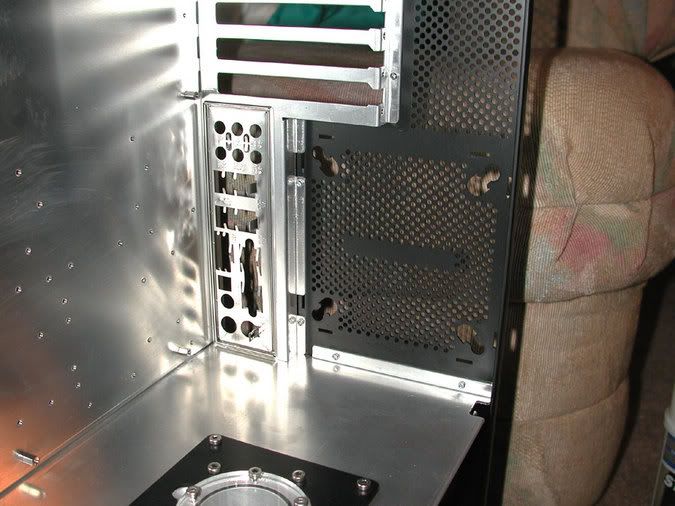
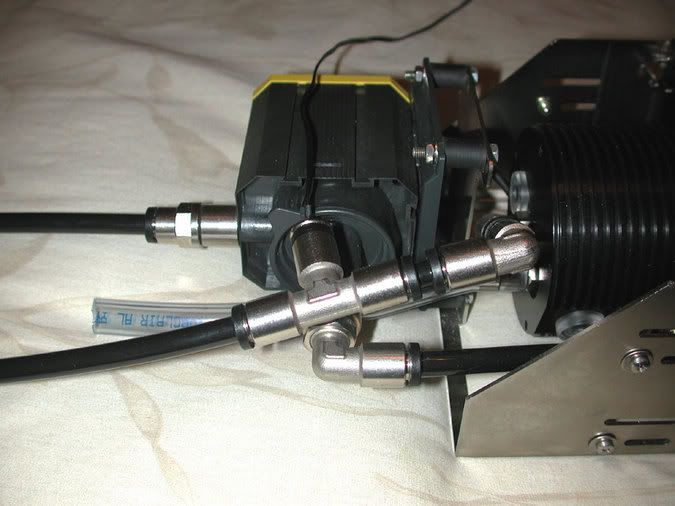
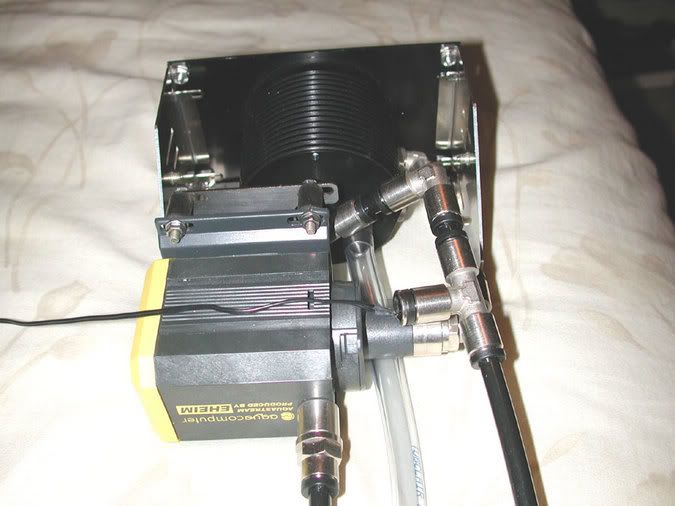
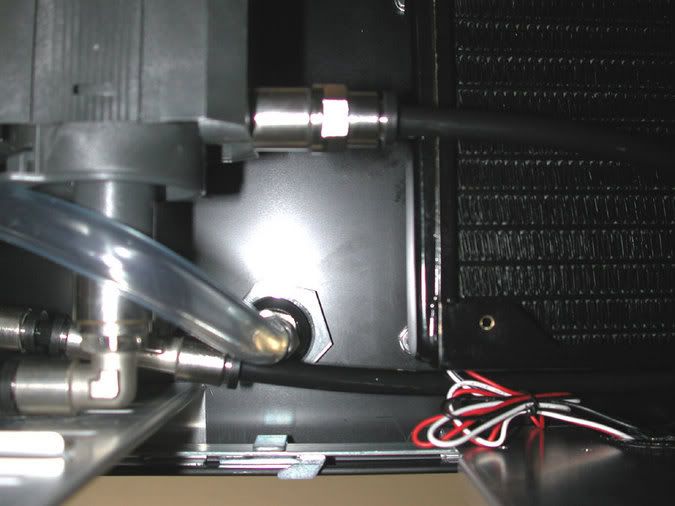
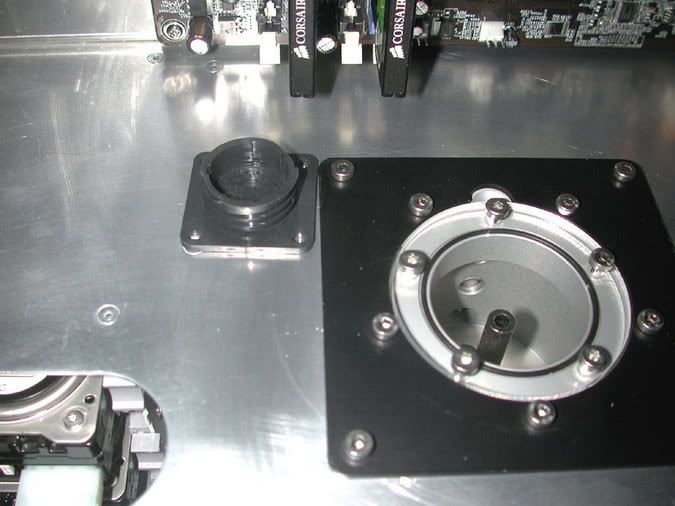
Okay now I have the back rad in and you can see below why that little hole was there a few pics back. This gives me a much better look with a rubber grommet and I won't be having any vibration problems here. The other fitting is a 45* and goes over to the Cuplex XT which will also have a 45* fitting as well.
Here is a closeup pic of the fitting going through the middle partition.
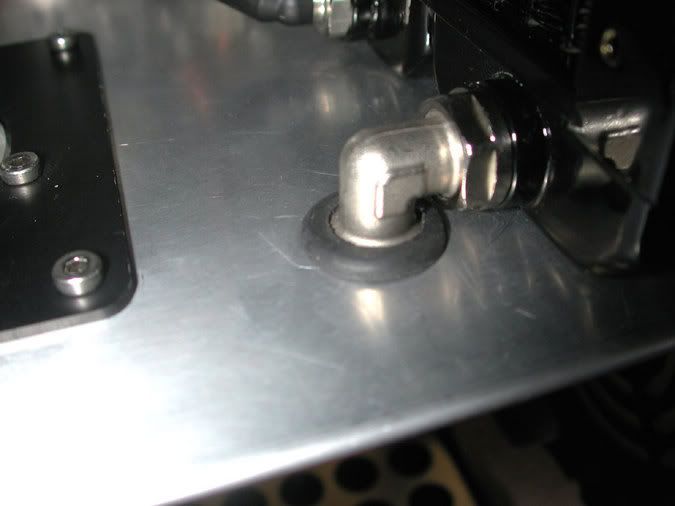
A side view of the fitting that will attach to the Aquastream and Aquatube below.
Looking at the fitting from the bottom up.
As you can see above the grill does not fit exactly. However, one of the things about getting older is that you start to know a lot more people.
So this is not a problem as I have a couple of friends who are machinists and it only needs about .100" off the top, left, and right sides.Okay now I have the back rad in and you can see below why that little hole was there a few pics back. This gives me a much better look with a rubber grommet and I won't be having any vibration problems here. The other fitting is a 45* and goes over to the Cuplex XT which will also have a 45* fitting as well.
Here is a closeup pic of the fitting going through the middle partition.
A side view of the fitting that will attach to the Aquastream and Aquatube below.
Looking at the fitting from the bottom up.
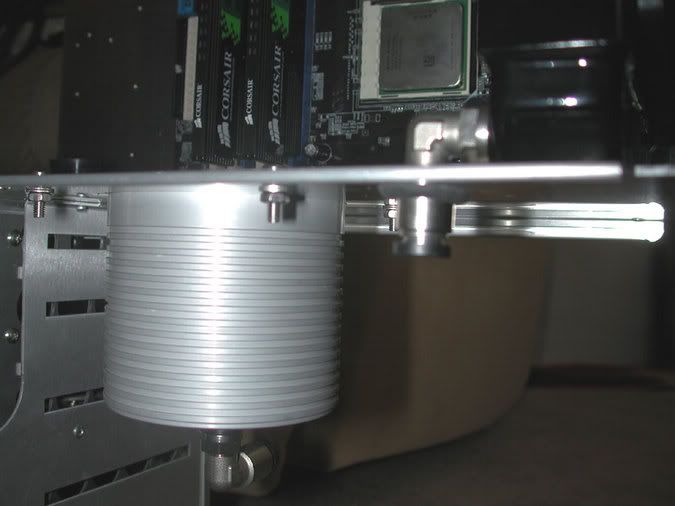
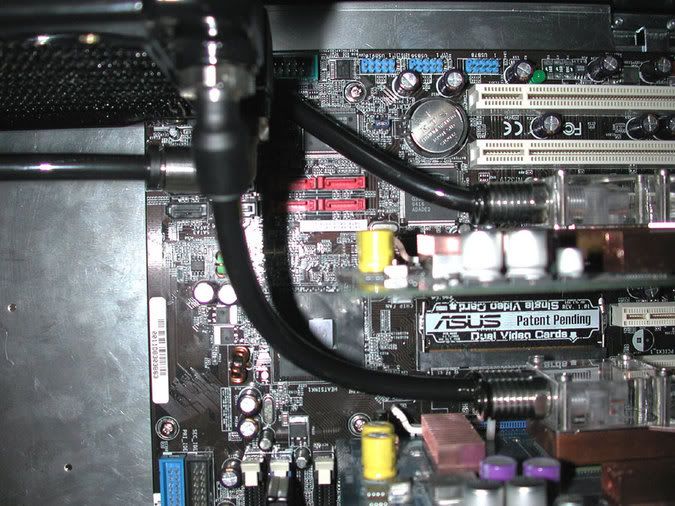
Okay the top mounted 120 is in and this pic shows just how tight things are in this case. The 90* elbow goes to the pump output and the 45* elbow goes to GPU 1.
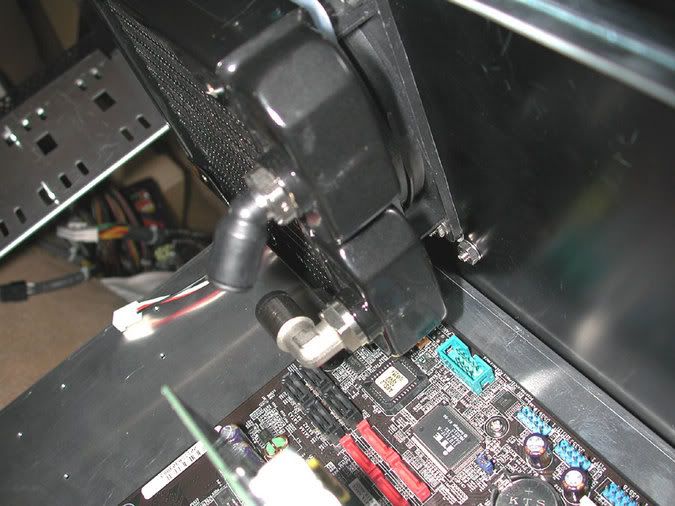
This pic shows the front of the 120 in the top and you can also see the GPU Aquastream/Aquatube/Fillport sub-assembly. The unconnected fitting is the pump output connector that goes to the radiator.
What you are seeing here is a look straight up between the MB mounting tray and the top 120 radiator. Just a little better perspective about how much room there is to hook-up any of the MB/Case connectors. There really is enough room...really! See that black thingy at the top of the case? More about that later :-X
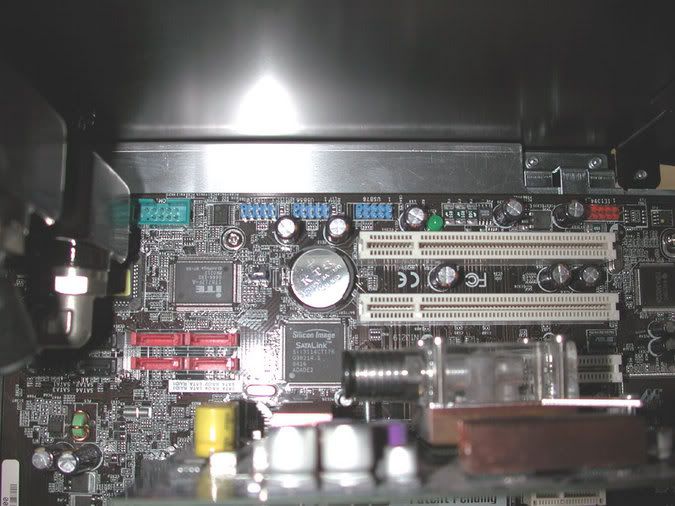
Okay here is a pic of the room available between the top PCI slot and GPU 2. One of my initial design goals was to utilize the case geometry wherever possible to make lines sleek and keep the business away from the inherrent beauty of the case. So with the Audigy2 ZS sound board in the top PCI slot all wires coming off the MB are almost completely hidden as they all go to the front of the case along the top between the radiator and the case side. The GPU cooling loop return line is also hidden up there as well. Actually the only wires you should see up top are the HD cables and then you will only see about 2 1/2".
Here you see some of the tubing hooking up to the GPU's from the top 120 radiator. Slight problem here as the AC tubing will not make a sharp bend without kinking between GPU 1 and GPU 2. So when some other black tubing gets here there will be a total revamp of my tubing in this area.
Okay last, but not least here is another pic of my Aquatube in the center partition. 3 points if you know what that thingy is to the left of it?
This pic shows the front of the 120 in the top and you can also see the GPU Aquastream/Aquatube/Fillport sub-assembly. The unconnected fitting is the pump output connector that goes to the radiator.
What you are seeing here is a look straight up between the MB mounting tray and the top 120 radiator. Just a little better perspective about how much room there is to hook-up any of the MB/Case connectors. There really is enough room...really! See that black thingy at the top of the case? More about that later :-X
Okay here is a pic of the room available between the top PCI slot and GPU 2. One of my initial design goals was to utilize the case geometry wherever possible to make lines sleek and keep the business away from the inherrent beauty of the case. So with the Audigy2 ZS sound board in the top PCI slot all wires coming off the MB are almost completely hidden as they all go to the front of the case along the top between the radiator and the case side. The GPU cooling loop return line is also hidden up there as well. Actually the only wires you should see up top are the HD cables and then you will only see about 2 1/2".
Here you see some of the tubing hooking up to the GPU's from the top 120 radiator. Slight problem here as the AC tubing will not make a sharp bend without kinking between GPU 1 and GPU 2.
So when some other black tubing gets here there will be a total revamp of my tubing in this area.Okay last, but not least here is another pic of my Aquatube in the center partition. 3 points if you know what that thingy is to the left of it?
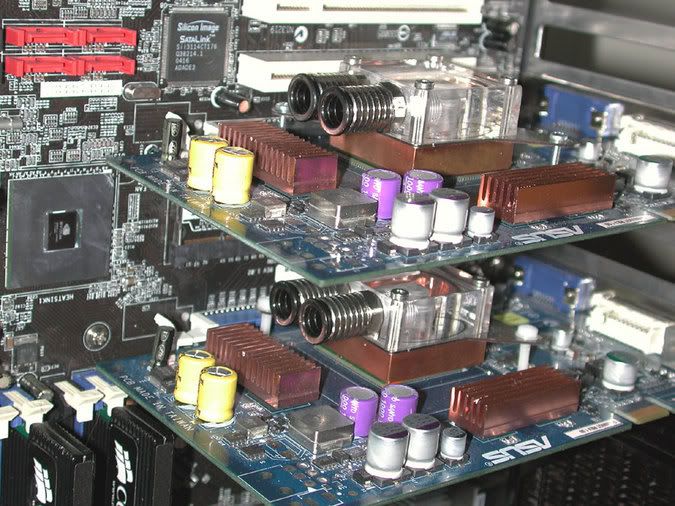
Thought I would put up another pic of the Asus 6600 GT's that shows a little more clarity. When my new fittings get here the top GPU block will get one of the 45 degree fittings so it will be less stress on the cooler from making the bend up to the top of the case.
This is where I do my best thinking. When I get stuck in a thought I flip on some old Sci-Fi movies for some inspiration. My favorite is Forbidden Planet. Jeez...now I gotta clean up this mess.
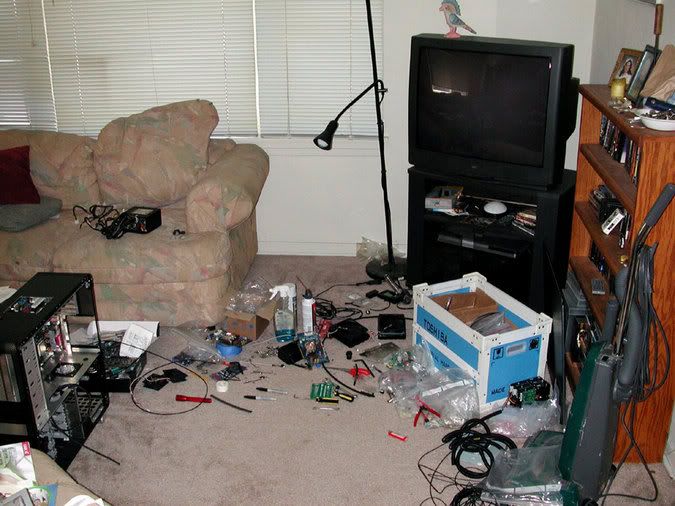
This is where I do my best thinking.
When I get stuck in a thought I flip on some old Sci-Fi movies for some inspiration. My favorite is Forbidden Planet. Jeez...now I gotta clean up this mess.
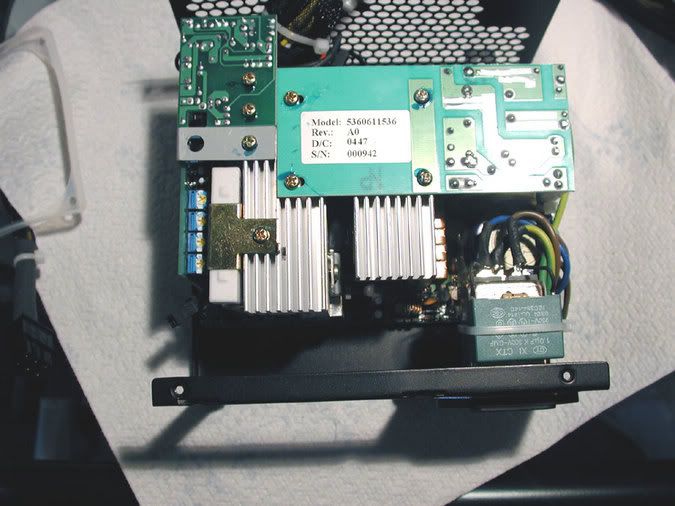
Okay today I have a few new things that showed up this week. The first is my new PSU. With all the things I have heard about the noise this thing makes I'm ready to do whatever it takes to quiet it down. Here is what they look like inside. Yes they do know how to pack the circuitry in there don't they?
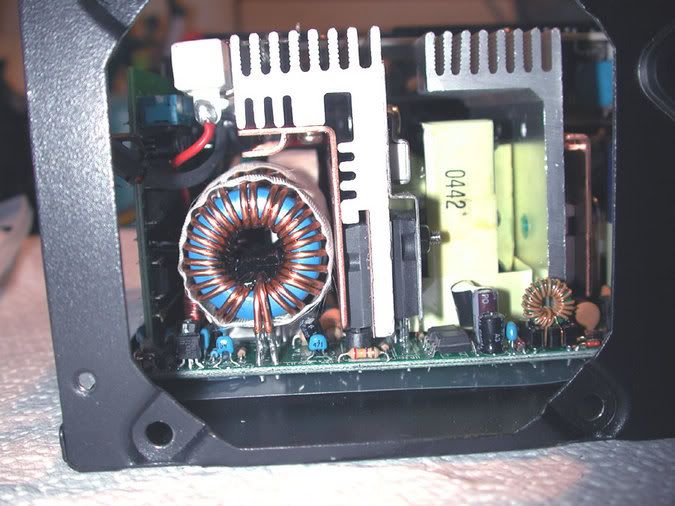
Here is another shot of the business part of the supply after I took the fan out.
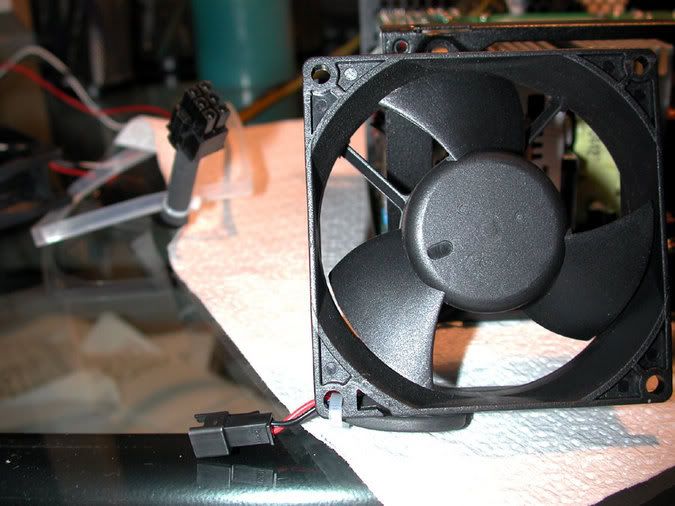
And here you can really see why this fan is so noisy. They put a boat prop inside the box :o
So anyway the plan was to use a low noise fan and control it via my Aquaero (more about that later this week) and using a temp sensor on the PSU heatsink. So I got on the phone with the PSU manufacturer for a little chit chat and ended up having a 30 minute conversation with one of their engineer's.
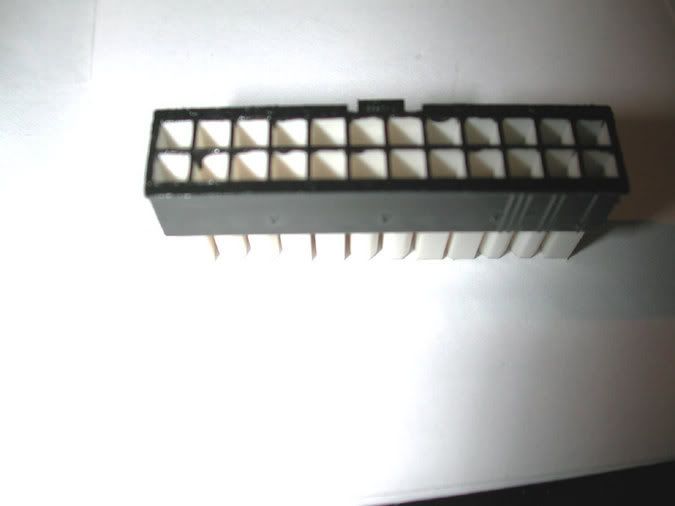
Anyway the long and short of it was that what I wanted to do wasn't going to work with all the hardware I am putting into Feeding Frenzy. The bottom line is that it really does need like 50-60 CFM of air to keep the thing cooled enough that it will run 24/7 without any hiccups. So scratch that idea. I also had originally planned to use an Amptron circular bulkhead connector to run power to my MB and that also got shot down to unacceptable loss of current on each pin. So I guess I got to go back to the old idea of taking the pins out of the molex and see about routing them in a less conspicuous way. More case work it seems...
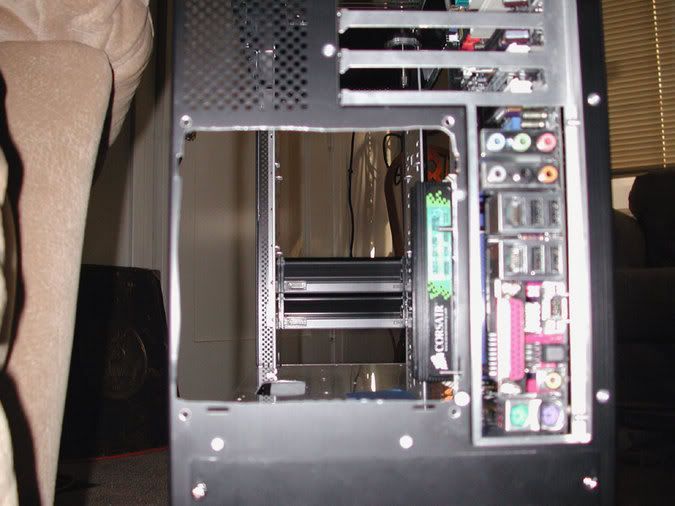
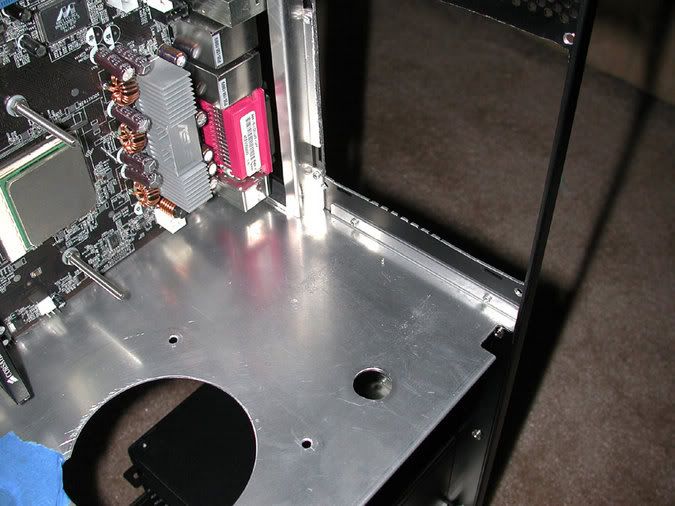
Well while I was doing all this I disassembled everything so I could do some more case work. I wanted to be able to run the SATA cables through a little hole up in the top of the case, but it just wasn't big enough. So I got out my Dremel tool and opened it up and then added some moulding to the case so there wouldn't be any problems with cut wires.
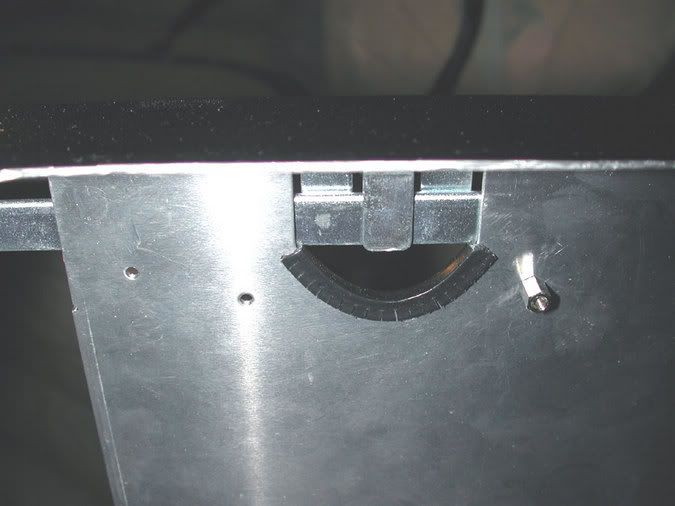
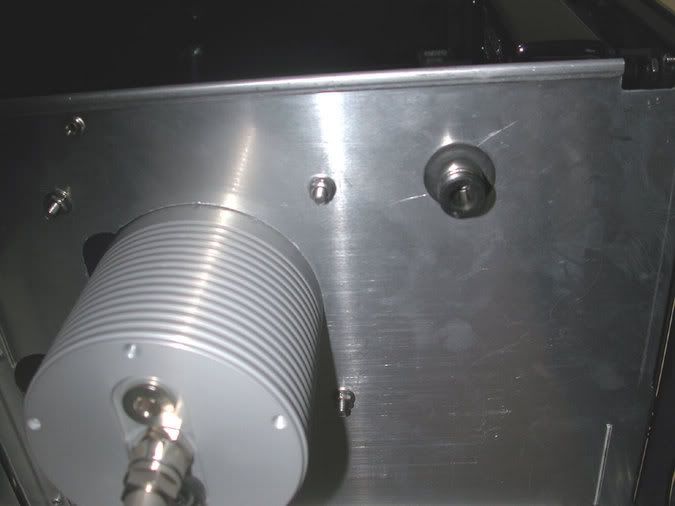
While I was doing this I decided to drill some more holes. If you are a water cooler then you will know why these holes are here behind the MB.
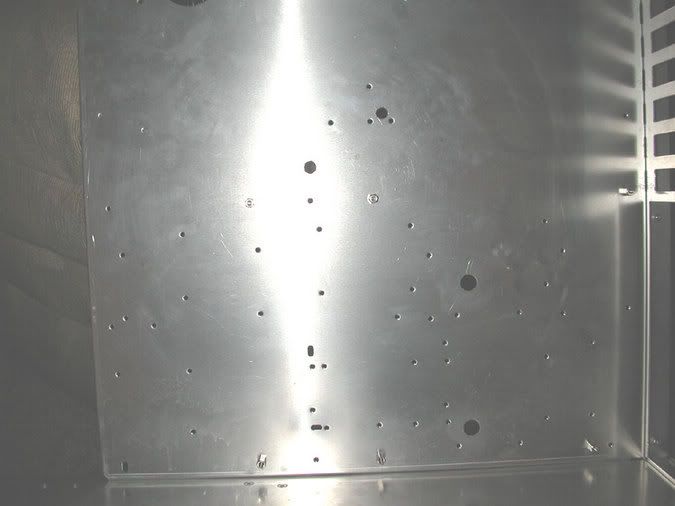
Can't figure it out? They are so you don't have to remove the MB to take the water blocks on and off. The holes give you easy access to the screws that hold the water blocks on.
More new toys have arrived ! So here is what I am using to cool off my three 74 Gb WD Raptors. Another Aquastream and an AquaInlet will be going into the area to the left of the HD's. The 120 radiator you see here will be used to just cool off my Raptor's.
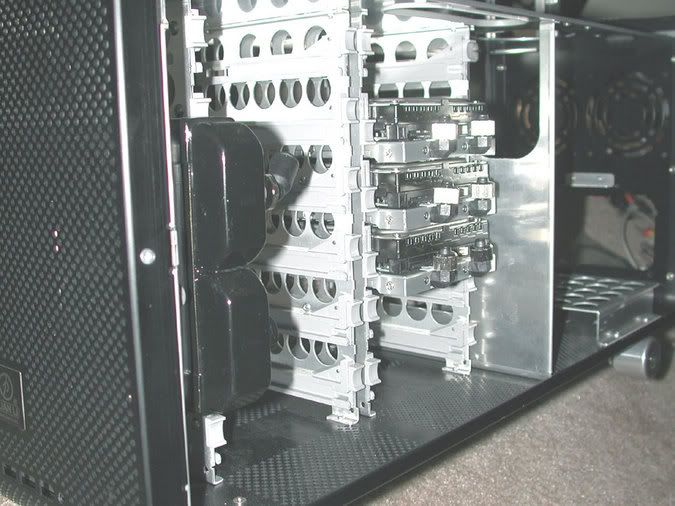
The connectors are 6mm ID so I was hoping it would easily be adaptable to my 6mm Aqua Computer system. Unfortunately that appears to somewhat problematic without using some adapters. So I have decided to take another look at the AC Aquadrive Micro or the the Dual Aquadrive's when they come into stock again later this month in the USA. I wonder what it would take to get AC to make some silver and black AquaDrives? :-*
Here is another shot of the business part of the supply after I took the fan out.
And here you can really see why this fan is so noisy. They put a boat prop inside the box :o
So anyway the plan was to use a low noise fan and control it via my Aquaero (more about that later this week) and using a temp sensor on the PSU heatsink. So I got on the phone with the PSU manufacturer for a little chit chat and ended up having a 30 minute conversation with one of their engineer's.
Anyway the long and short of it was that what I wanted to do wasn't going to work with all the hardware I am putting into Feeding Frenzy. The bottom line is that it really does need like 50-60 CFM of air to keep the thing cooled enough that it will run 24/7 without any hiccups. So scratch that idea. I also had originally planned to use an Amptron circular bulkhead connector to run power to my MB and that also got shot down to unacceptable loss of current on each pin. So I guess I got to go back to the old idea of taking the pins out of the molex and see about routing them in a less conspicuous way. More case work it seems...
Well while I was doing all this I disassembled everything so I could do some more case work. I wanted to be able to run the SATA cables through a little hole up in the top of the case, but it just wasn't big enough. So I got out my Dremel tool and opened it up and then added some moulding to the case so there wouldn't be any problems with cut wires.
While I was doing this I decided to drill some more holes. If you are a water cooler then you will know why these holes are here behind the MB.
Can't figure it out? They are so you don't have to remove the MB to take the water blocks on and off. The holes give you easy access to the screws that hold the water blocks on.
More new toys have arrived ! So here is what I am using to cool off my three 74 Gb WD Raptors. Another Aquastream and an AquaInlet will be going into the area to the left of the HD's. The 120 radiator you see here will be used to just cool off my Raptor's.
The connectors are 6mm ID so I was hoping it would easily be adaptable to my 6mm Aqua Computer system. Unfortunately that appears to somewhat problematic without using some adapters. So I have decided to take another look at the AC Aquadrive Micro or the the Dual Aquadrive's when they come into stock again later this month in the USA. I wonder what it would take to get AC to make some silver and black AquaDrives? :-*
Here is a short synopsis of my planned cooling loops.
GPU Circuit:
Aquatube 1 > Aquastream 1 > 120 Rad 1 > GPU 1 > GPU 2 > Flowmeter 1 > Temp Sensor 1 >
CPU/NB Circuit:
Aquatube 2 > Aquastream 2 or DDC > Flowmeter 2 > 120 Rad 2 > CPU > NB > Temp Sensor 2 >
HD Circuit:
AquaInlet > Aquastream 3 > 120 Rad 3 > Temp Sensor 3 > HD 1 > HD 2 > HD 3 > HD 4 > HD 5 >
Pretty straightforward, heh?
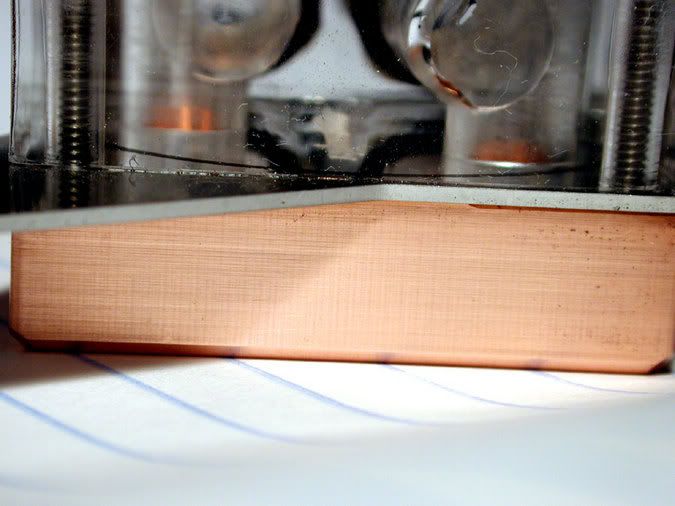
Okay a little tiny update today. Decided to do a little work on my Aqua Computer TwinPlex cooler for my NB. Can't run tubes and drill more holes without having the NB attached to the board. So the first few pics show what it was like when I got it.
Okay here is the bottom of the block. As you can see this part was cut with a facemill due to the characteristic circular cut marks.
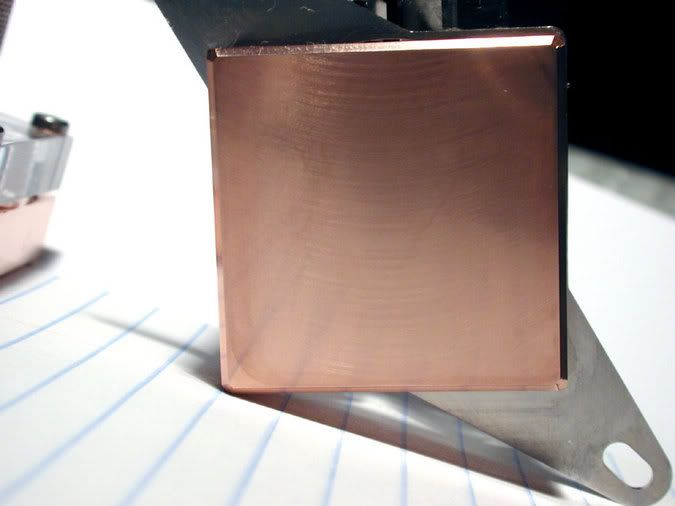
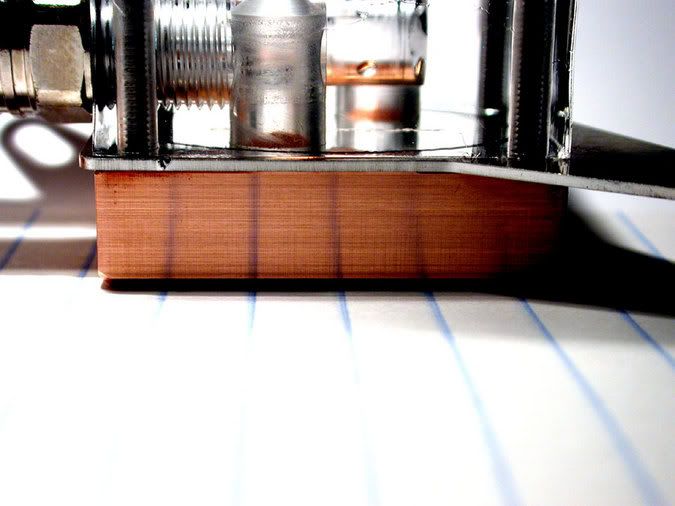
Here you can see that the lined paper shows some squiggly lines. Definite sign of a not so flat block. However keep in ming that when I checked with a gage block and leaf gauges it was less than about 0.001 from being flat. This appears to be within industry standards and within the capability of Artic Silver to provide a good thermal transference. But I like things better so...
Here is a pic of the side of the TwinPlex.
And another view of the side before lapping.
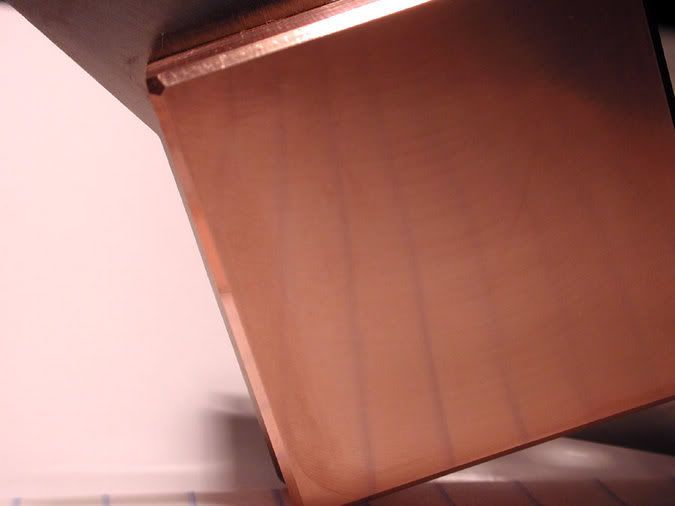
This pic is after lapping with 800, 1000, 1500, and 2000 grit wet and dry sandpaper. I used a new piece of glass and used the kitchen marble countertop to sit the glass on as I think it is reasonably flat. As you can see I was able to remove all the facemilling marks and get a much better degree of flatness as there are no squiggly lines anymore. I suppose I could have gone for the mirror finish, but I was looking for flatness.
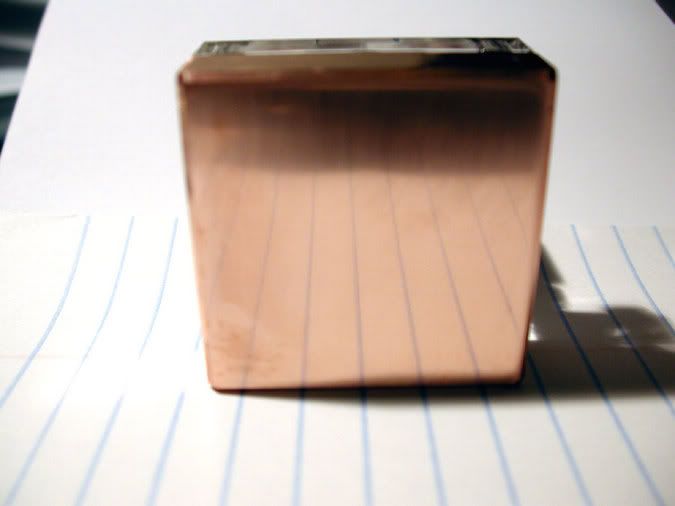
After doing the bottom I decided to also do the sides as well. This does nothing for thermal transference and is pure bling on my part. I did it just because I liked the look. Obviously I didn't spend the time on the sides that I did on the bottom, but it definitely improved in the looks department.
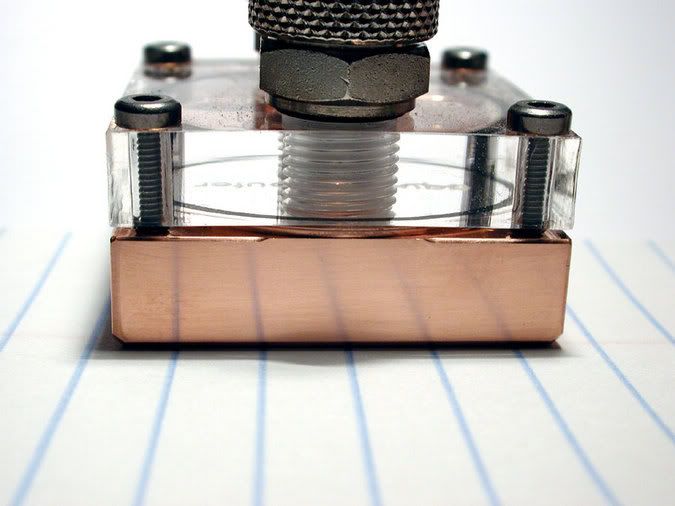
BTW, what do you do with a brand new PSU? In the next update I will show you what I did that most people would be hesitant to do for fear of voiding the warranty. :o
Okay here is the bottom of the block. As you can see this part was cut with a facemill due to the characteristic circular cut marks.
Here you can see that the lined paper shows some squiggly lines. Definite sign of a not so flat block. However keep in ming that when I checked with a gage block and leaf gauges it was less than about 0.001 from being flat. This appears to be within industry standards and within the capability of Artic Silver to provide a good thermal transference. But I like things better so...
Here is a pic of the side of the TwinPlex.
And another view of the side before lapping.
This pic is after lapping with 800, 1000, 1500, and 2000 grit wet and dry sandpaper. I used a new piece of glass and used the kitchen marble countertop to sit the glass on as I think it is reasonably flat. As you can see I was able to remove all the facemilling marks and get a much better degree of flatness as there are no squiggly lines anymore. I suppose I could have gone for the mirror finish, but I was looking for flatness.
After doing the bottom I decided to also do the sides as well. This does nothing for thermal transference and is pure bling on my part. I did it just because I liked the look. Obviously I didn't spend the time on the sides that I did on the bottom, but it definitely improved in the looks department.
BTW, what do you do with a brand new PSU? In the next update I will show you what I did that most people would be hesitant to do for fear of voiding the warranty. :o

 ;D
;D
Zitat von »Ze@lot«
looking gooood. nice work tn
are you planning on connecting all 3 loops to aquaero ?
where are you goona put 3 pumps in a v2000 case ?
Unfortunately unless AC tells me that there is some way to hook up my 3rd Aquastream to the Aquaero somehow (Multi-Switch maybe?) I would use one of the version 3.5 controllers for the HD loop not connected to the Aquaero. However, if I decide to use the AC DDC variant then that issue would be moot as there is no way to hook up the DDC AFAIK.
Three pumps are a piece of pie! One goes in the Aquabay AT that feeds the GPU's, the second one goes under the back mounted Aquatube in the PSU area, and the third pump will go into the HD compartment. ;D
Wow man!! Very nice work for now! I am really interested in seeing the final work done.
-=[ !! LN2 / DICE Kühler !!]=-
(\_/)
(x.x)
(><)/)
This is totgeschossenes Drecksvieh. Copy totgeschossenes Drecksvieh into your signature to help him on his way to world domination.
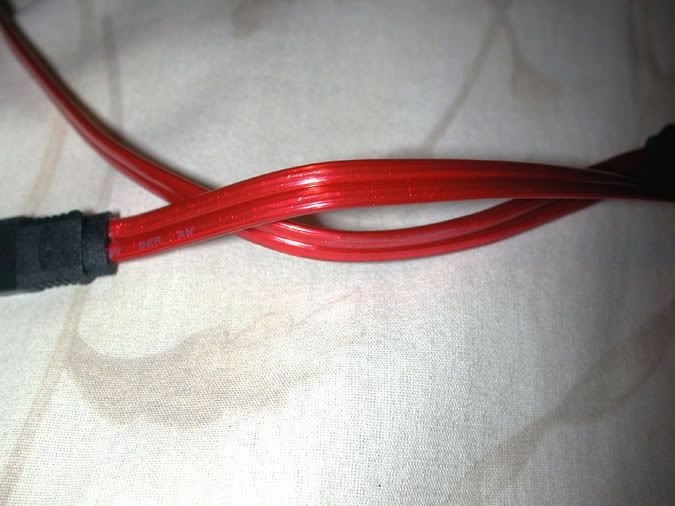
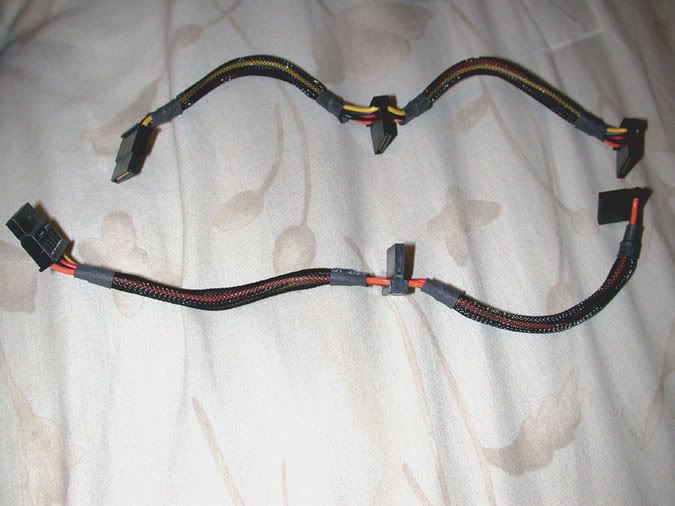
Well I have had a lull in the boxes I was building for a friend due to a bad PSU so I have some free time to play around. I have been looking around for some long black SATA cables, but alas this was not to be. Found red, blue, and green. Why no basic black? So here is a pic of what I started out with. Nice translucent candy apple red color. ;D
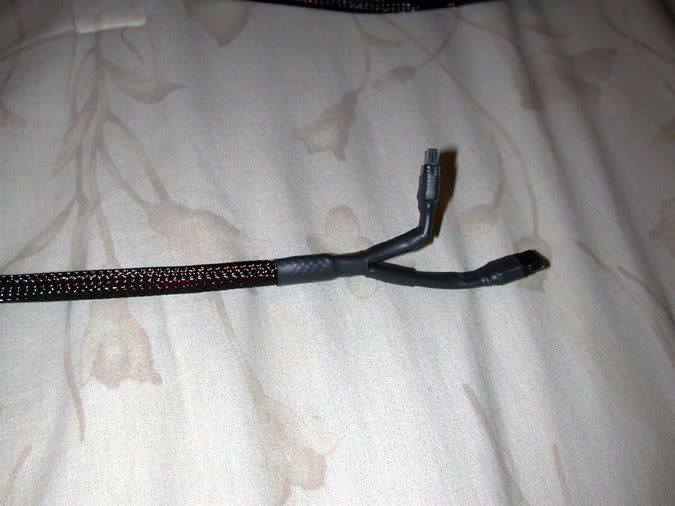
Unfortunately this wasn't going to make it so it was time to go scrounging the local electronic shops to get some nice basic black sleeving material and heatshrink. Here is with the sleeving put on. Yes I did them two at a time to cut down on the case clutter.
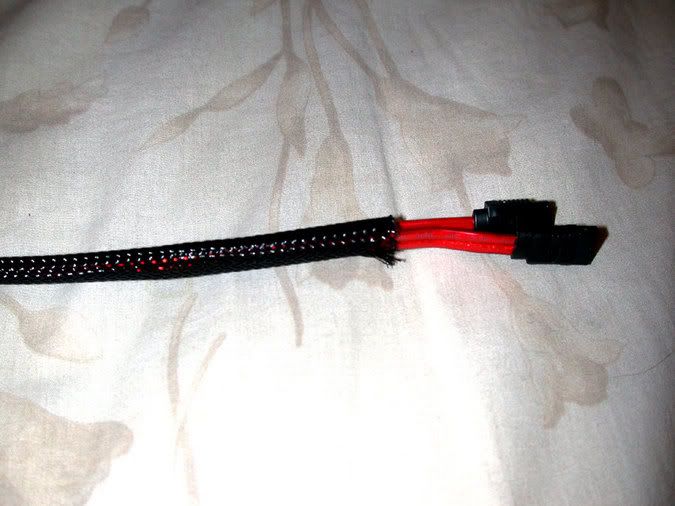
Here is one of the completed assemblies. Notice the evil red glint?
Well as you know I am also working on lapping all my waterblocks. So the next set of pic's is a work in progress. Here is my Silver Cuplex XT block. Came with a super finish, but it wasn't as flat as I wanted. Here is the way it came to me.
Here is a pic of the inside showing the internal pin array.
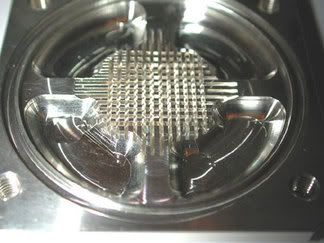
Here is a pic showing the condition after about 20 laps with 800 grit wet and dry sandpaper. You can see that the sandpaper is only touching the outside of the block. The center was concave about .002 of an inch. I was kind of bummed about this till I also saw a post on another forum from someone with the same problem on a G5. So grin and lap it.
So what do you do with a PSU when you get it? Some people use it, but I decided to mod it seeing how it wasn't exactly what I wanted. So the first thing to do was to ditch all the molex conncectors.
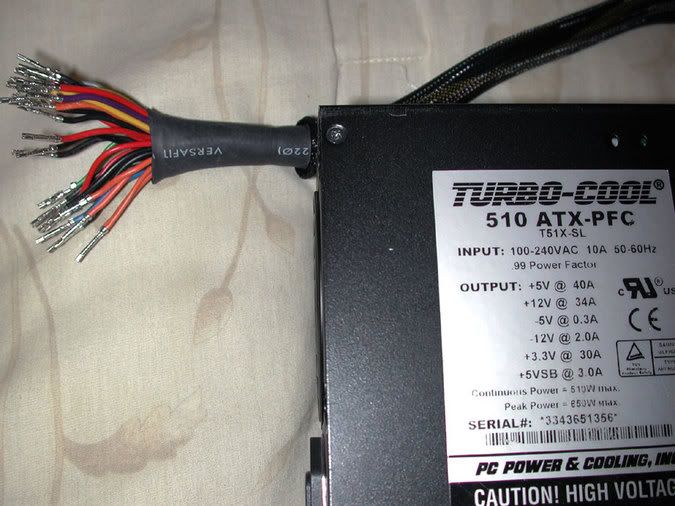
Oh yeah I also decided I didn't need the SATA power connectors. snip snip
The other molex connectors need to go as well and what could you possibly need a floppy drive connector for?
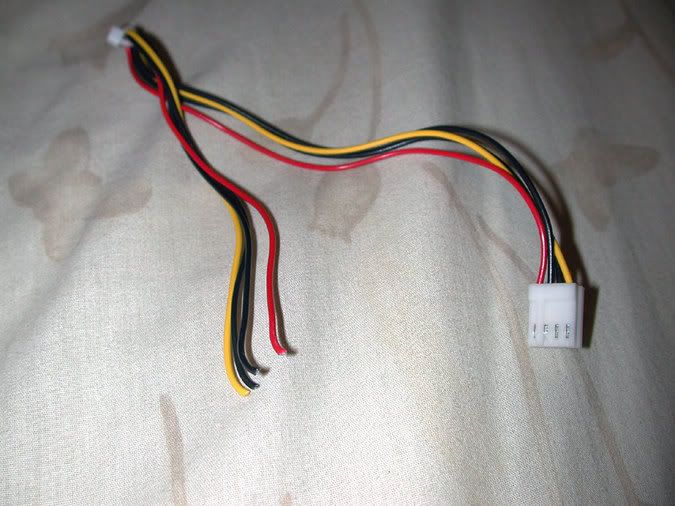
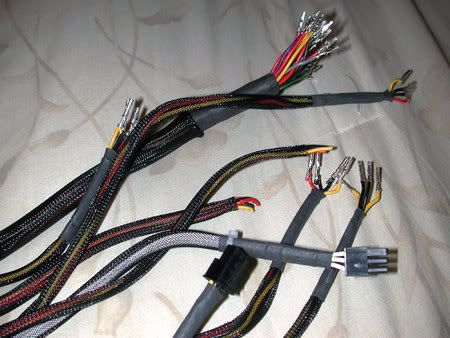
Since I had all the molex connectors off I decided to try my hand at a little painting with a black Dykem Mark & Code pen. Black molex connectors are hard to come by. :-/
So now that I had fun with my dikes it is time to catch some zzzz's. Now that everything is cut off I can get busy doing all the custom wiring. Every piece of wire on Feeding Frenzy is totally custom. I either snip snip to size, solder, or make up my own custom cable assemblies. Oh one last thing.
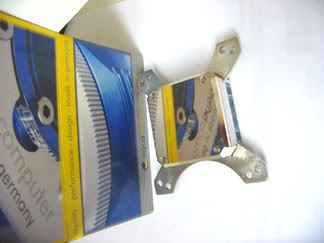
I recently acquired a pair of interesting fan grills in 80mm and 120mm size. Well actually they were a gift.
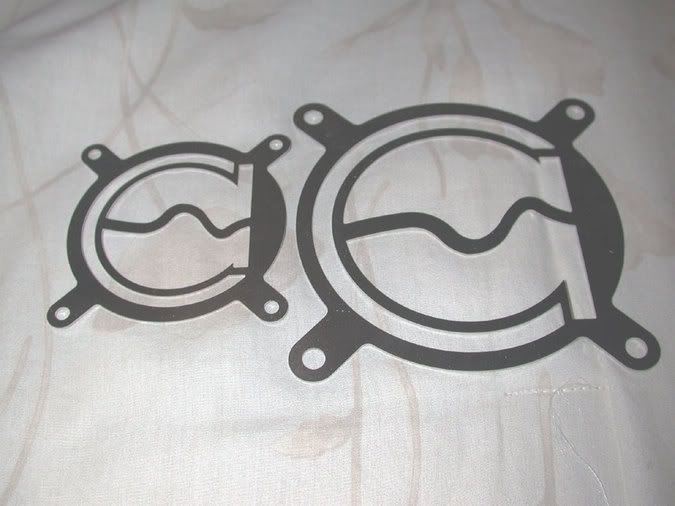
My plans for these are a bit of a secret, but I will give you a hint. They won't be used as fan grills and it will be truly something unique to go on Feeding Frenzy.
Unfortunately this wasn't going to make it so it was time to go scrounging the local electronic shops to get some nice basic black sleeving material and heatshrink. Here is with the sleeving put on. Yes I did them two at a time to cut down on the case clutter.
Here is one of the completed assemblies. Notice the evil red glint?
Well as you know I am also working on lapping all my waterblocks. So the next set of pic's is a work in progress. Here is my Silver Cuplex XT block. Came with a super finish, but it wasn't as flat as I wanted. Here is the way it came to me.
Here is a pic of the inside showing the internal pin array.
Here is a pic showing the condition after about 20 laps with 800 grit wet and dry sandpaper. You can see that the sandpaper is only touching the outside of the block. The center was concave about .002 of an inch. I was kind of bummed about this till I also saw a post on another forum from someone with the same problem on a G5. So grin and lap it.
So what do you do with a PSU when you get it? Some people use it, but I decided to mod it seeing how it wasn't exactly what I wanted. So the first thing to do was to ditch all the molex conncectors.
Oh yeah I also decided I didn't need the SATA power connectors. snip snip
The other molex connectors need to go as well and what could you possibly need a floppy drive connector for?
Since I had all the molex connectors off I decided to try my hand at a little painting with a black Dykem Mark & Code pen. Black molex connectors are hard to come by. :-/
So now that I had fun with my dikes it is time to catch some zzzz's. Now that everything is cut off I can get busy doing all the custom wiring. Every piece of wire on Feeding Frenzy is totally custom. I either snip snip to size, solder, or make up my own custom cable assemblies. Oh one last thing.
I recently acquired a pair of interesting fan grills in 80mm and 120mm size. Well actually they were a gift.
My plans for these are a bit of a secret, but I will give you a hint. They won't be used as fan grills and it will be truly something unique to go on Feeding Frenzy.
-