 25.04.2024, 10:56
 Sprache ändern
 Registrieren
 Anmelden
Sie sind nicht angemeldet.
Lieber Besucher, herzlich willkommen bei: Aqua Computer Forum. Falls dies Ihr erster Besuch auf dieser Seite ist, lesen Sie sich bitte die Hilfe durch. Dort wird Ihnen die Bedienung dieser Seite näher erläutert. Darüber hinaus sollten Sie sich registrieren, um alle Funktionen dieser Seite nutzen zu können. Benutzen Sie das Registrierungsformular, um sich zu registrieren oder informieren Sie sich ausführlich über den Registrierungsvorgang. Falls Sie sich bereits zu einem früheren Zeitpunkt registriert haben, können Sie sich hier anmelden.

Zitat von »MUFFDIVER«
Also how many pumps you using in this, You have 3 circuits so 3 pumps ?
Three Aquastream pumps. Two are connected to the Aquaero and the third one is connected to the Multiswitch. Alll are fully configurable by the Aquasuite software. Also have three Tubemeters and Aquatubes as well.
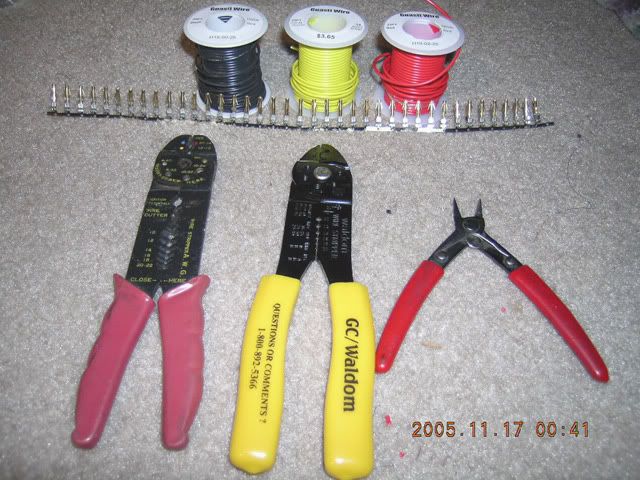
Okay time for another small update as I worked on the SLI power connector last night. I think you will like this different look in wiring as I wanted to test out my theory before tackling the PSU connector wires. Here are the tools and materials I needed to do the mod. I picked up some 25 foot rolls of 18 gauge multi stranded wire in black, yellow, and red colors. The gold pins I got from A.C. Ryan. Some of the cheaper PSU's use 20 gauge wiring, but this is for a PCP&C Turbo 510 SLI and I want the best.
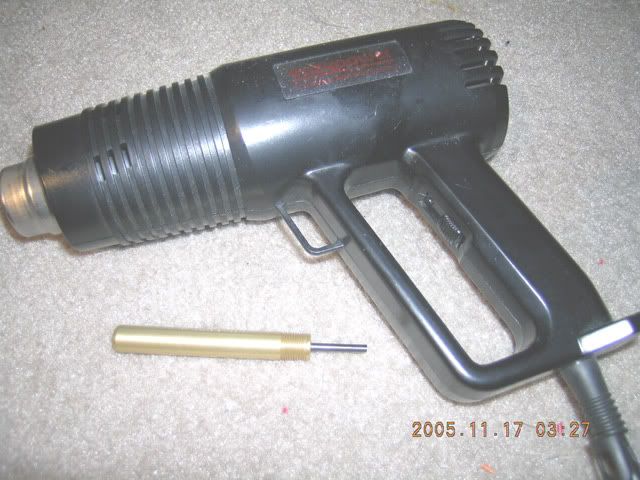
The heat gun needs it's own pic as it is the size of a big hair dryer. The little tube looking thing is a deluxe molex round pin remover. If you ever plan on doing this kind of work I highly recommend that you get this item. It makes removing molex pins a snap.
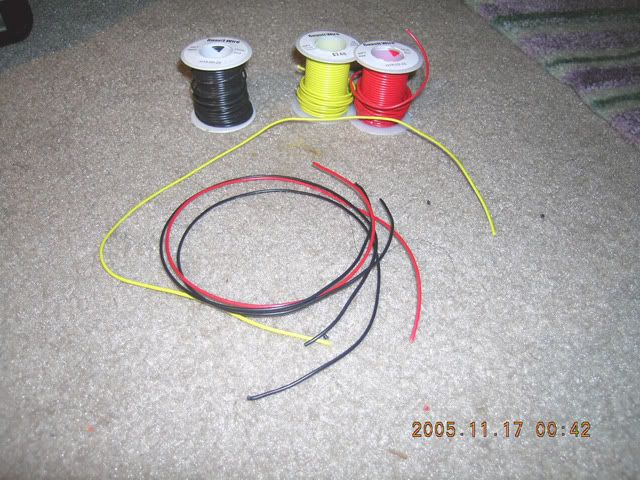
One of the first things I realized was that the stock cable loom wasn't going to be long enough. Since I had to splice and solder wires it was a question of where to do it. Sometimes it is easier to make things new rather than trying to just do an add on. This was the case here and I decided to make a new loom and solder directly to the PSU or close the the board. So the first thing to do is cut the wires to length.
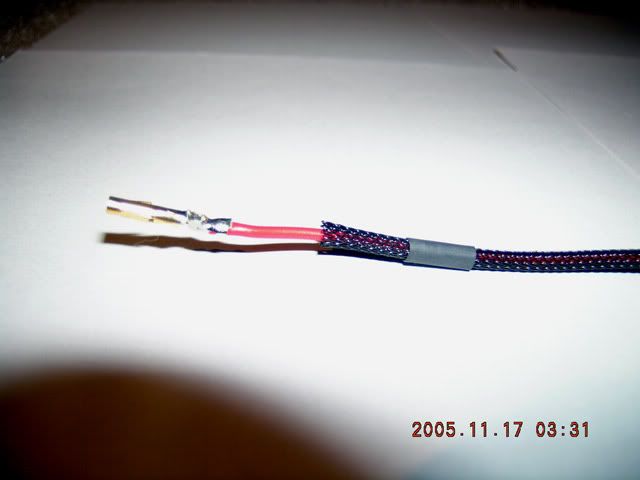
After crimping the connenctor it is time to attach the sleeving material (black of course) and prepare for heatshrinking it down. Here you can see the connector before sliding the sleeve to it's proper place.
Here is the finished look on the individual wires. I decided not to put a piece of heatshrink at the back end as it would have impaired the flexibility of the wire.
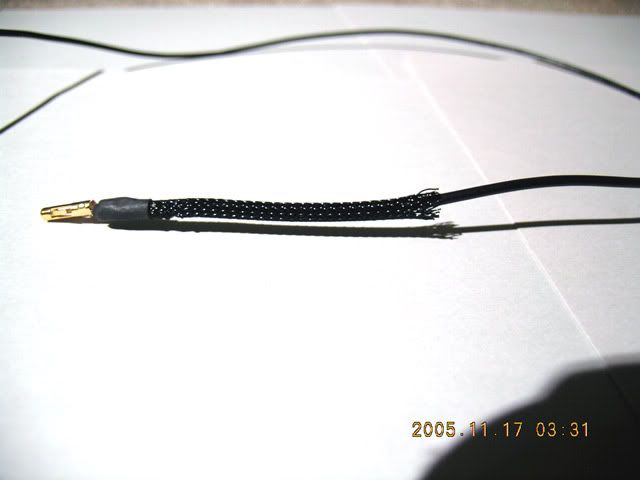
Here is the finished connector. I really like this method over using plain heatshrink as it looks very nice and I can ascertain the color of the wires at a later date by close inspection.
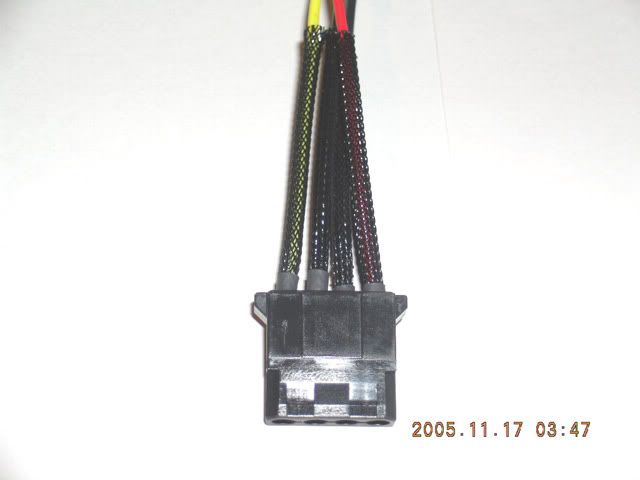
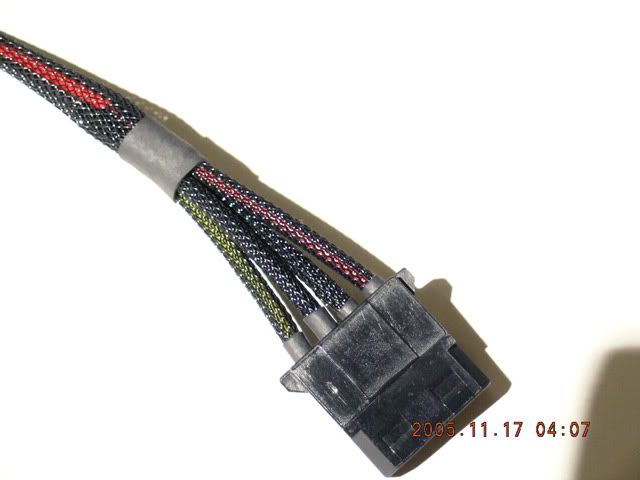
This pic shows the bigger sleeving material that covers all four wires and is secured by a small piece of heatshrink.
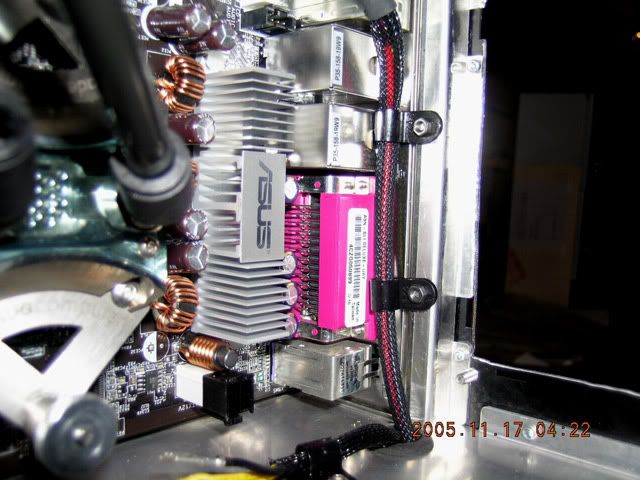
The next set of pics shows the finished mod. Now you can see why I drilled and tapped those holes in the back of the case. I am using some more of my buttonhead screws here so the only thing you see on the back of the case is a pair of screws that look somewhat like the stock rivets. These are the smaller cable clamps and are secured through the use of black (of course) hex nuts.
Well that is it till later today when I have a chance to work on the 4 pin ATX power connector.
The heat gun needs it's own pic as it is the size of a big hair dryer. The little tube looking thing is a deluxe molex round pin remover. If you ever plan on doing this kind of work I highly recommend that you get this item. It makes removing molex pins a snap.
One of the first things I realized was that the stock cable loom wasn't going to be long enough. Since I had to splice and solder wires it was a question of where to do it. Sometimes it is easier to make things new rather than trying to just do an add on. This was the case here and I decided to make a new loom and solder directly to the PSU or close the the board. So the first thing to do is cut the wires to length.
After crimping the connenctor it is time to attach the sleeving material (black of course) and prepare for heatshrinking it down. Here you can see the connector before sliding the sleeve to it's proper place.
Here is the finished look on the individual wires. I decided not to put a piece of heatshrink at the back end as it would have impaired the flexibility of the wire.
Here is the finished connector. I really like this method over using plain heatshrink as it looks very nice and I can ascertain the color of the wires at a later date by close inspection.
This pic shows the bigger sleeving material that covers all four wires and is secured by a small piece of heatshrink.
The next set of pics shows the finished mod. Now you can see why I drilled and tapped those holes in the back of the case. I am using some more of my buttonhead screws here so the only thing you see on the back of the case is a pair of screws that look somewhat like the stock rivets. These are the smaller cable clamps and are secured through the use of black (of course) hex nuts.
Well that is it till later today when I have a chance to work on the 4 pin ATX power connector.
Very nice sleeving! quite impressing and not so difficult as I thought 
3 Questions :
:
1. Where did you buy the sleeving "cloth"? I mean this black thing around the wires. I couldn't find it in our DIYstore :-/
2. What is the advantage of these gold AC ryan pins? You don't see them ???
3. What is the heat gun used for?
sry maybe you already answered some of these questions in your post, but my english is very bad
Zen
3 Questions
:1. Where did you buy the sleeving "cloth"? I mean this black thing around the wires. I couldn't find it in our DIYstore :-/
2. What is the advantage of these gold AC ryan pins? You don't see them ???
3. What is the heat gun used for?
sry maybe you already answered some of these questions in your post, but my english is very bad
Zen
that tbh it just one of the cleanest wiring i have seen ;D
how much bandwidth have you used now on photobucket lol
Thanks for the compliment on my wiring.
 Learned that kind of work from Korean era military surplus electronics.
Well since October 19th I have used about 60 GB of bandwidth and have had about 3/4 of a million hits on my Photobucket account. :o
Very nice sleeving! quite impressing and not so difficult as I thought
3 Questions
1. Where did you buy the sleeving "cloth"? I mean this black thing around the wires. I couldn't find it in our DIYstore :-/
2. What is the advantage of these gold AC ryan pins? You don't see them ???
3. What is the heat gun used for?
sry maybe you already answered some of these questions in your post, but my english is very bad
Hi Zen...
Thanks for the kind words on my humble project.
1. You can get the sleeving material from just about any well stocked industrial electronics store.
2. The reason I used the gold pins is two fold. First I needed the pins and they are difficult to find in small quantities. Secondly the gold plating helps transfer current better than the regular ones. Who cares whether anyone else will see it.

3. You need a heat source to shrink the heatshrink material. A BIC lighter works in a pinch as well, but a heat gun is much more controlable.
u finished yet?
Not a chance

I suppose I should do a little review of where I am at. I ruined a molex connector pin and I am awaiting replacements from A.C. Ryan. Quick tip: Always order extra pins

I am basically down to the wiring issues to get this project up and running. If I did my wiring like most people do I would be running tomorrow. However, that is not the case as I like things nice and neat. There is a lot of intricate case mods left to do so the wiring will look neat. Lots of holes to drill and tap, custom sleeving. My Tubemeter, Aquaero, and Multiswitch are all getting mods done to them in one manner or another.
Once I get done with the mechanical stuff and can turn it on I still probably will have another couple of months of external case mods. Getting the side panels laser or water cut will probably take the longest time as I am still working on the art designs in Photoshop.
The one problem I had with the IDE cable for the optical drives looks like it may be resolvable as A.C. Ryan is sending me one of their new black Roundcable2-FX units. Sometimes it is better to hide cables in plain sight.
Well as I said in some other threads I really wasn't pleased with the way AC put the pins on the bottom of the Tubemeter as it was going to be problematic with my space constraints. I need to be able to put three Tubemeters in FF. For a quick review I will post some pics of the Tubemeter I shot for a little review here on the [H]ardForum.
Okay so let's get down to the business of modding the Tubemeter. The first thing to go was the pins they had soldered on the end of the Tubemeter. :o
If you want to see how I do this custom wiring you can go back a few posts and I went into detail about how to do all this. So here is my homemade USB wiring cable soldered in.
Here is the completed mod sleeved and heatshrink applied. Got a chance to use another buttonhead and a cable clamp here.
Some more views here.
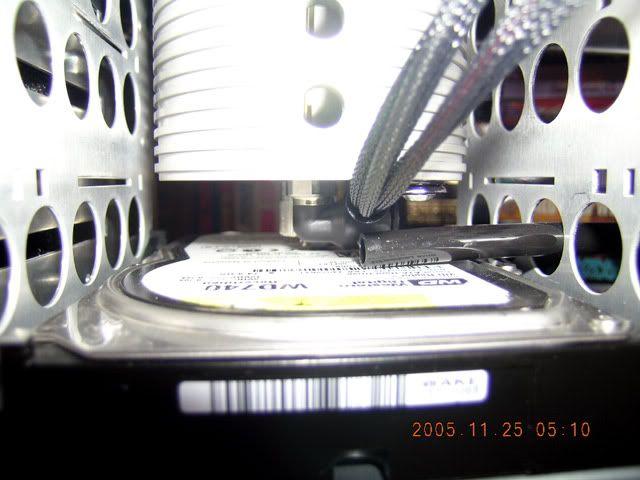
As they say a miss is a miss. Just clears my top HD.

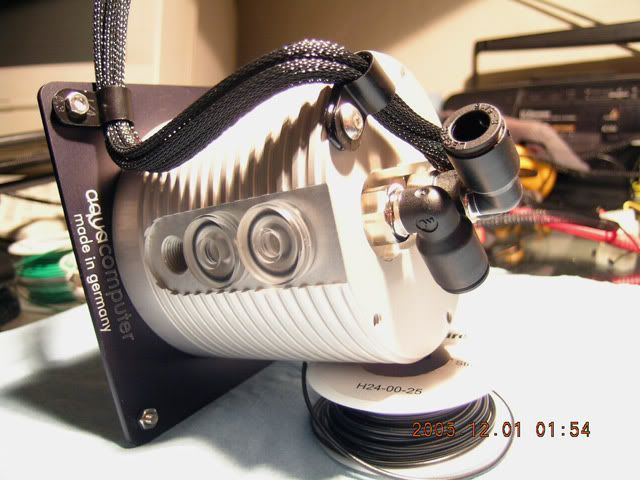
Here is the back side of the Aquatube.
Still have to solder up the 5 pin connector and make up a custom length USB cable so it can go all the way to the Aquaero, but that will be for another day.
Okay so let's get down to the business of modding the Tubemeter. The first thing to go was the pins they had soldered on the end of the Tubemeter. :o
If you want to see how I do this custom wiring you can go back a few posts and I went into detail about how to do all this. So here is my homemade USB wiring cable soldered in.
Here is the completed mod sleeved and heatshrink applied. Got a chance to use another buttonhead and a cable clamp here.
Some more views here.
As they say a miss is a miss. Just clears my top HD.
Here is the back side of the Aquatube.
Still have to solder up the 5 pin connector and make up a custom length USB cable so it can go all the way to the Aquaero, but that will be for another day.
and will the 2 6600s get replaced by 2 7800s (or 6800s) ;D even one 6800 ultra is better than 2 6600s
Well I think two 6600GT's in the hand is worth one 6800 that's at the store. ;D However, the 6600 GT's don't require a separate power cable and they were relatively inexpensive at $220 a piece. So I suppose there is a possibility of a pair of 7800's or 8800's down the line. :o
I am speechless .. :o Fantastic job !!
-=[ !! LN2 / DICE Kühler !!]=-
(\_/)
(x.x)
(><)/)
This is totgeschossenes Drecksvieh. Copy totgeschossenes Drecksvieh into your signature to help him on his way to world domination.
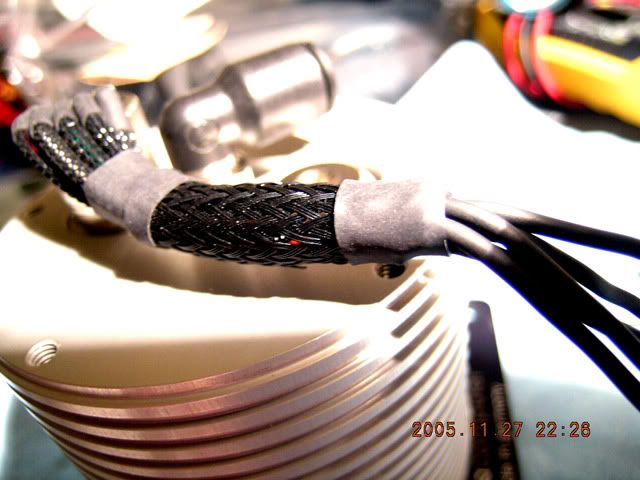
Well time for a little more wiring fun. Didn't like the way I did the HD Tubemeter wiring as it was difficult to get it to bend around the Aquatube and was worried about the strain on the connector. So I try to mod the mod. The problem was that I was going to be using up a lot of precious cable space the way I last left it here. The other issue was that the cable wasn't going around the Aquatube well.
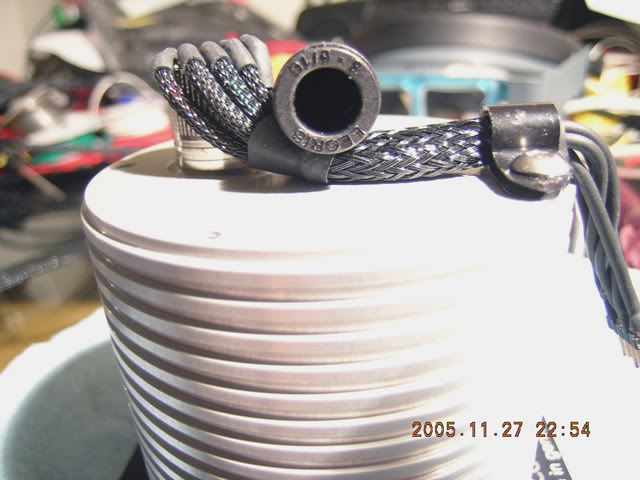
So the first thing I decided to do was to reduce the bulk by cutting back the sleeving on all 5 wires and adding a single piece of bigger sleeving.
So I started soldering on the pins so I could have a connection to the USB cable and be able to easily remove it without having to rip out a lot of cable. I haven't done this in a while so I forgot that those pins heat up real fast and have a tendency to melt the connector blocks.
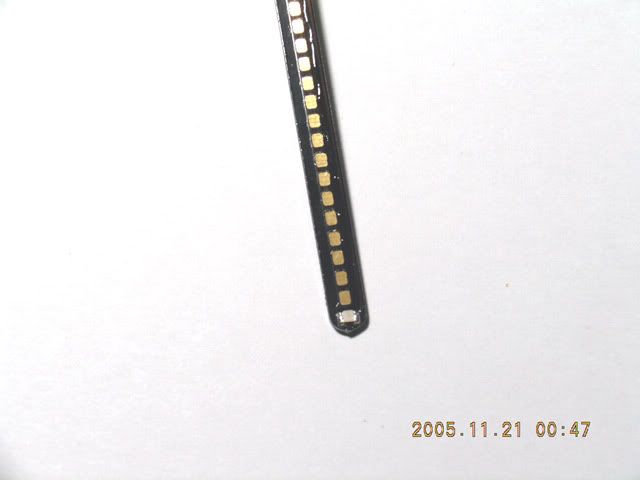
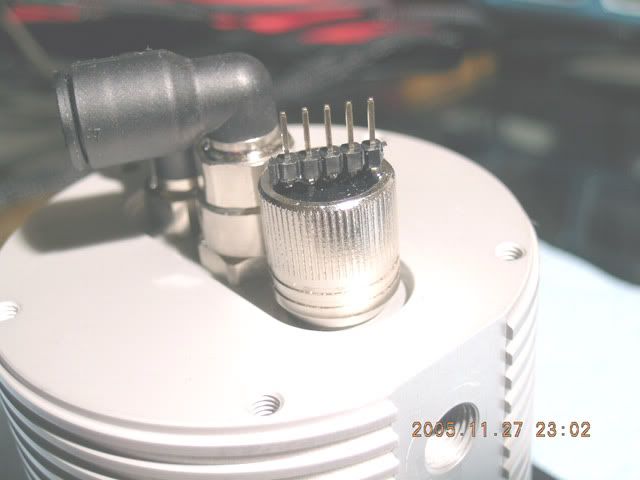
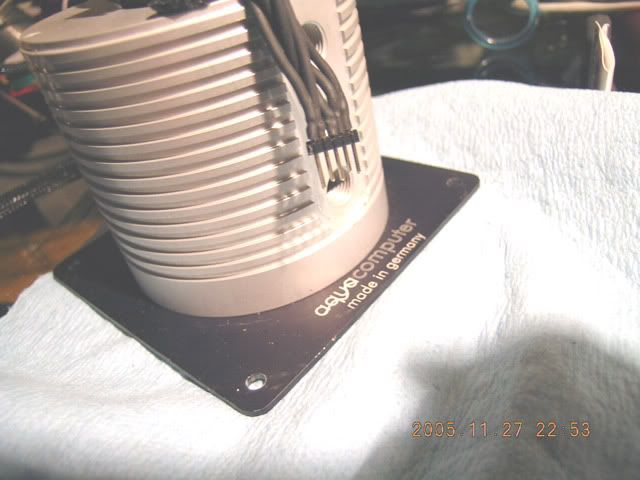
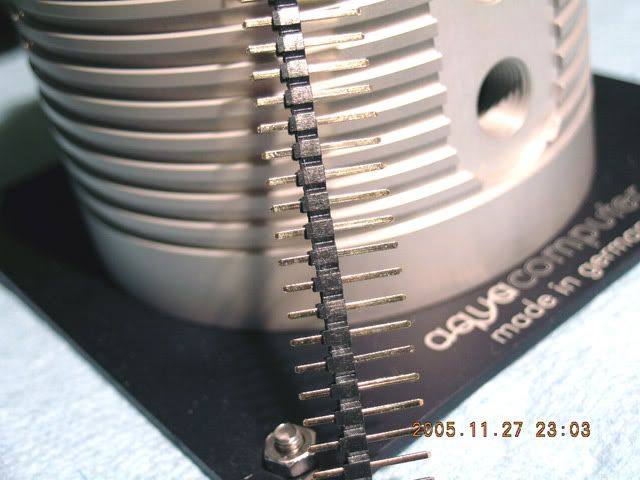
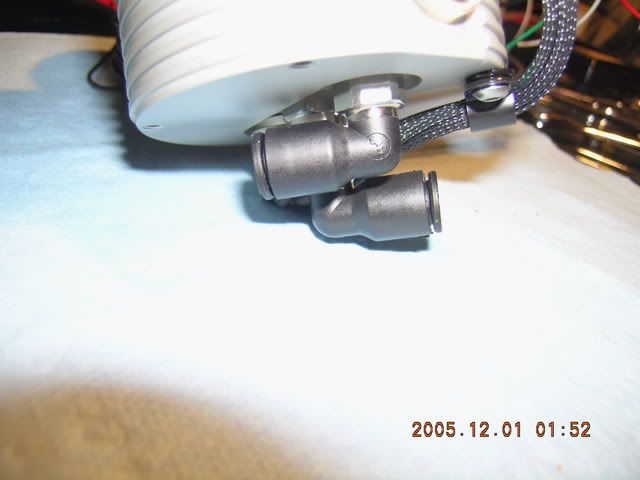
So I guess a little tutorial is warranted here so others can feel good about making their own USB cables. I can best show this by showing you how to get rid of the pins off the Tubemeter at the same time. Here is a Tubemeter with the pins still on it. See the black plastic connector block at the bottom of the pins?
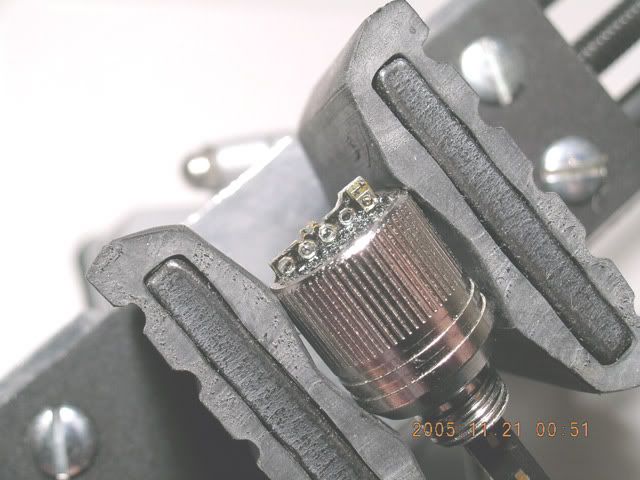
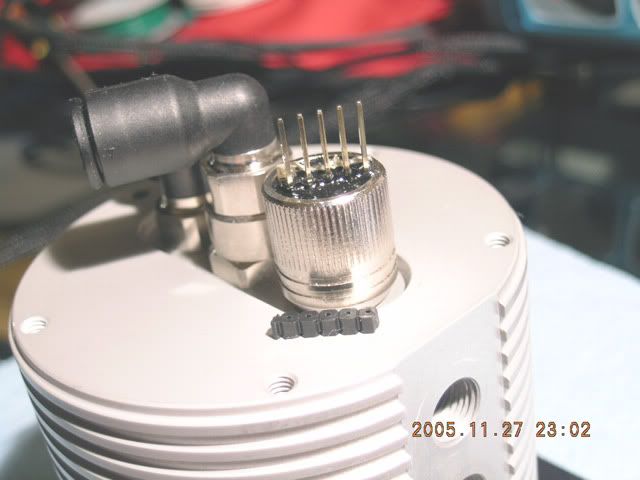
Here is the Tubemeter with the connector block removed. You can just slip it off with some moderate pressure.
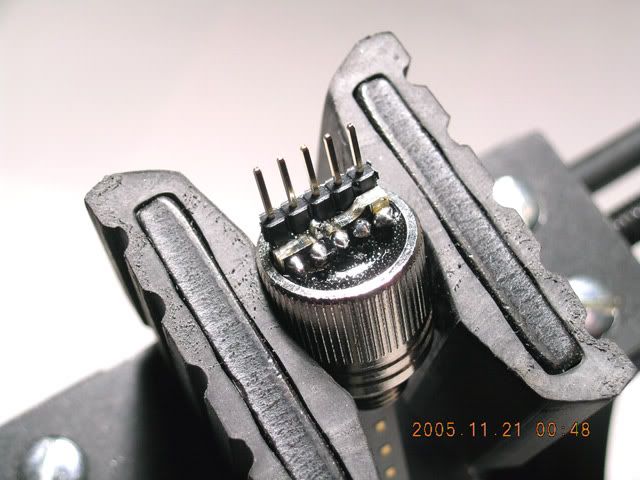
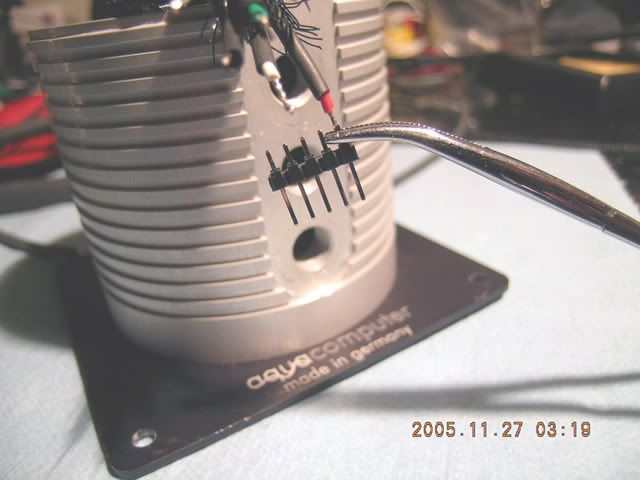
To remove the pins use your favorite work holding device to grab a hold of one pin at a time. My choice for this kind of stuff is a pair of hemostats.
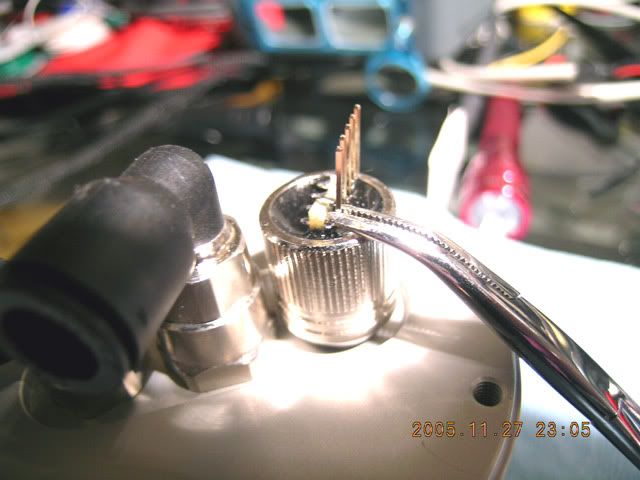
Just apply your solding iron briefly to the pin and pull at the same time and the pins come off lickety split. I took off three of those pins in about 45 seconds.

Now that we covered the basics we can get back to the job at hand. However, this new look had me sitting uneasy as it was starting to look a bit ragged.
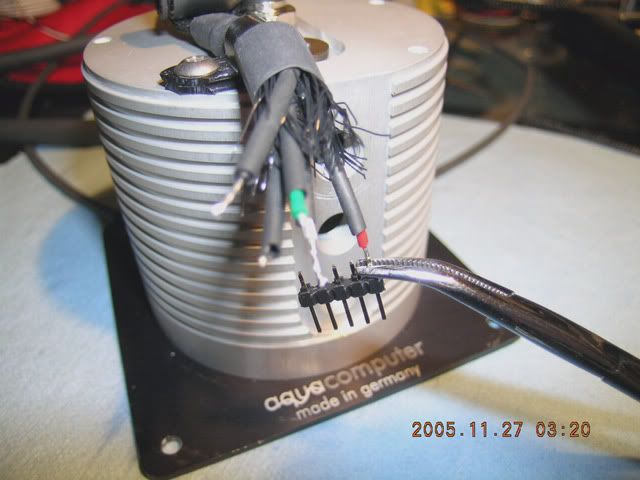
So I decided to tear it apart again and try something different. Here I am getting ready to solder a pin onto the wire. You really will need to use an Optivisor for this close up stuff. The trick is to use your work holding tool to grab both the pin and the wire and at the same time solder it together.
In the background you can see my DVM (Digital Volt Meter) as it is essential for checking out your work as you go. Mine has a nice sound option so you hear a beep when you have continuity on a particular wire. Also nice after you get it all wired up and forgot which wire was which when you get ready to re-pin the connector block.
So the first thing I decided to do was to reduce the bulk by cutting back the sleeving on all 5 wires and adding a single piece of bigger sleeving.
So I started soldering on the pins so I could have a connection to the USB cable and be able to easily remove it without having to rip out a lot of cable. I haven't done this in a while so I forgot that those pins heat up real fast and have a tendency to melt the connector blocks.
So I guess a little tutorial is warranted here so others can feel good about making their own USB cables. I can best show this by showing you how to get rid of the pins off the Tubemeter at the same time. Here is a Tubemeter with the pins still on it. See the black plastic connector block at the bottom of the pins?
Here is the Tubemeter with the connector block removed. You can just slip it off with some moderate pressure.
To remove the pins use your favorite work holding device to grab a hold of one pin at a time. My choice for this kind of stuff is a pair of hemostats.
Just apply your solding iron briefly to the pin and pull at the same time and the pins come off lickety split. I took off three of those pins in about 45 seconds.
Now that we covered the basics we can get back to the job at hand. However, this new look had me sitting uneasy as it was starting to look a bit ragged.
So I decided to tear it apart again and try something different. Here I am getting ready to solder a pin onto the wire. You really will need to use an Optivisor for this close up stuff. The trick is to use your work holding tool to grab both the pin and the wire and at the same time solder it together.
In the background you can see my DVM (Digital Volt Meter) as it is essential for checking out your work as you go. Mine has a nice sound option so you hear a beep when you have continuity on a particular wire. Also nice after you get it all wired up and forgot which wire was which when you get ready to re-pin the connector block.
I think I had too long a post. :-/
So here is the rest of it. ;D
If you don't have three hands or a friend to help you then you just have to improvise. You can see here why I like using hemostats for this kind of work.
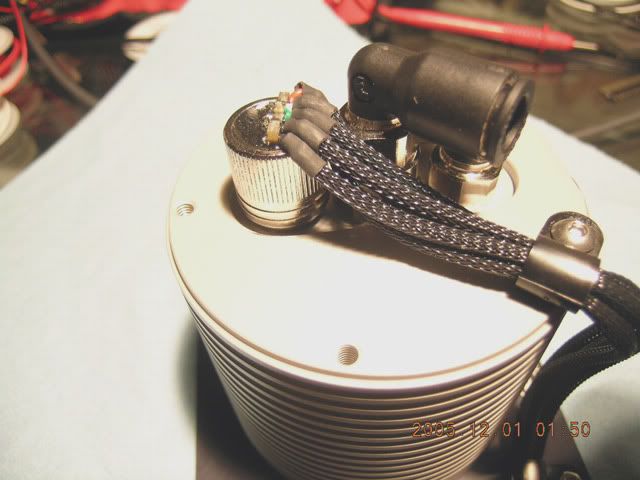
All the pins are soldered on and I am getting ready to do some heatshrink work. Rarely does function overcome form, but in this instance it was necessary. I would have preferred to do have sleeved the wires here, but heatshrink was second best as it allows me to easily bend the wire around the Aquatube.
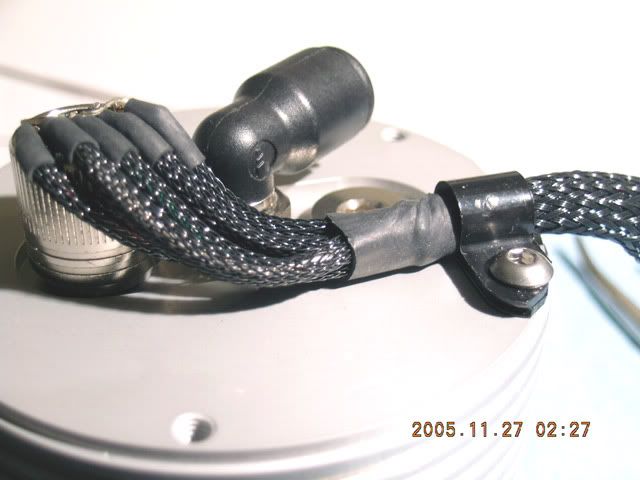
Here I have shrunk down the small wires and have shrunk down a bigger piece so I get a nice looking transition from the big sleeving.
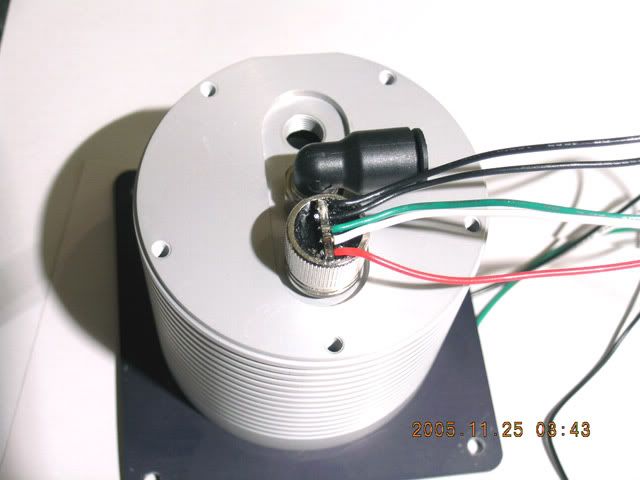
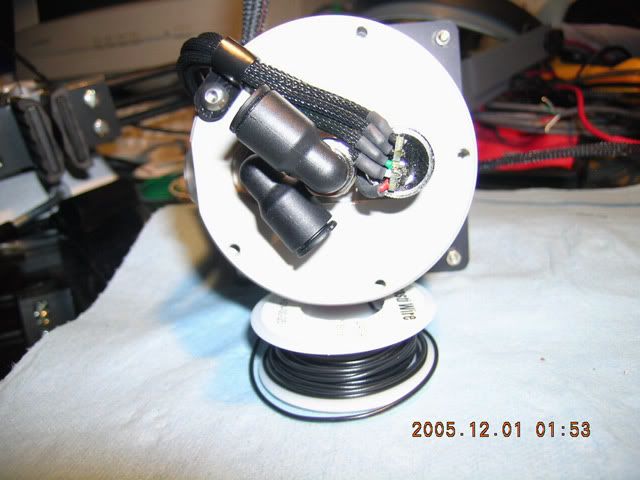
Here is what it looks like when it is all done with the connector block added back on. Now you can see why I did it this way as the cable hugs fairly close to the Aquatube now.
Here's the big picture. You can also see where I trimmed the cable clamp so it has the same countour as the Aquatube.
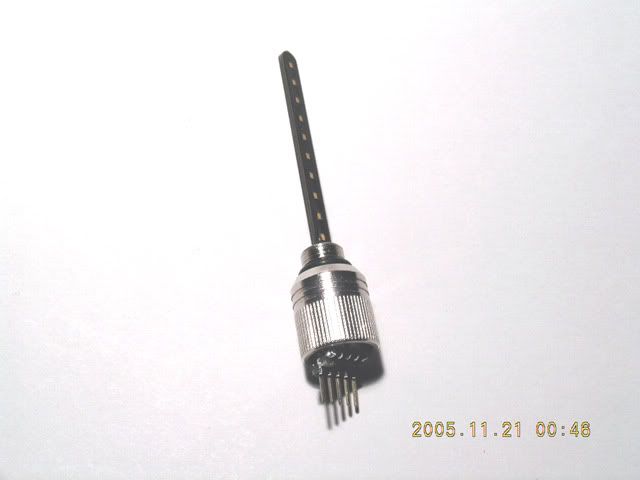
If your wondering where to get the connector pins here is a bigger pic of what they look like when you get them from the electronic store. You simply use a pair of dykes to cut off the size you need.
Well tomorrow I will be working on the other two Tubemeters and re-doing the HD cables while I wait for my molex parts from A.C. Ryan.
So here is the rest of it. ;D
If you don't have three hands or a friend to help you then you just have to improvise. You can see here why I like using hemostats for this kind of work.
All the pins are soldered on and I am getting ready to do some heatshrink work. Rarely does function overcome form, but in this instance it was necessary. I would have preferred to do have sleeved the wires here, but heatshrink was second best as it allows me to easily bend the wire around the Aquatube.
Here I have shrunk down the small wires and have shrunk down a bigger piece so I get a nice looking transition from the big sleeving.
Here is what it looks like when it is all done with the connector block added back on. Now you can see why I did it this way as the cable hugs fairly close to the Aquatube now.
Here's the big picture. You can also see where I trimmed the cable clamp so it has the same countour as the Aquatube.
If your wondering where to get the connector pins here is a bigger pic of what they look like when you get them from the electronic store. You simply use a pair of dykes to cut off the size you need.
Well tomorrow I will be working on the other two Tubemeters and re-doing the HD cables while I wait for my molex parts from A.C. Ryan.
Well tomorrow I will be working on the other two Tubemeters and re-doing the HD cables while I wait for my molex parts from A.C. Ryan.
You mentioned hd cables.i have never seen a moded hd cable or home made 1 as such. Prob wud get sum pics if i googledit but nope this wud be the first and yes after i posted i clicked and realised that it was plug and play sorrryyy.
Well I know a dog when I see one so I don't know how I let this one slip by me.
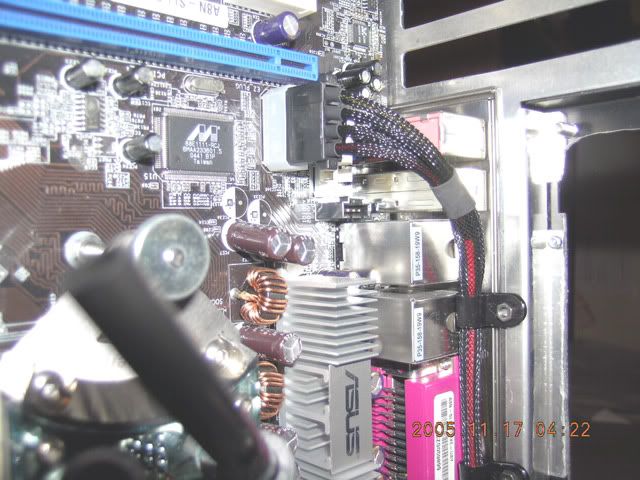
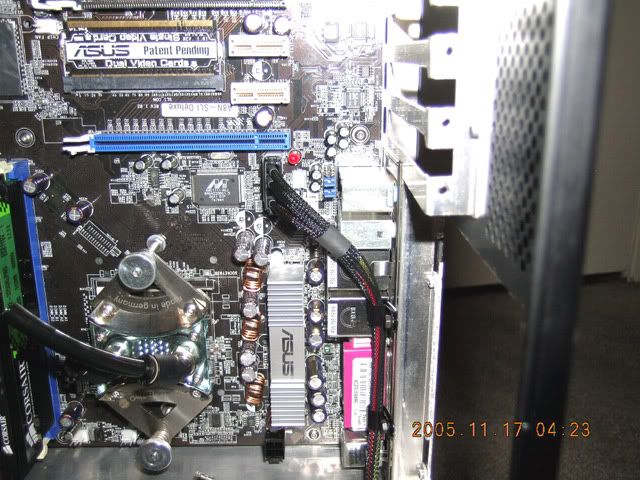
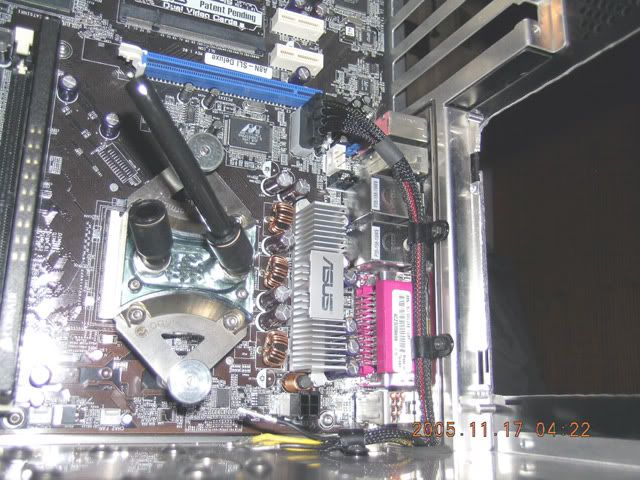
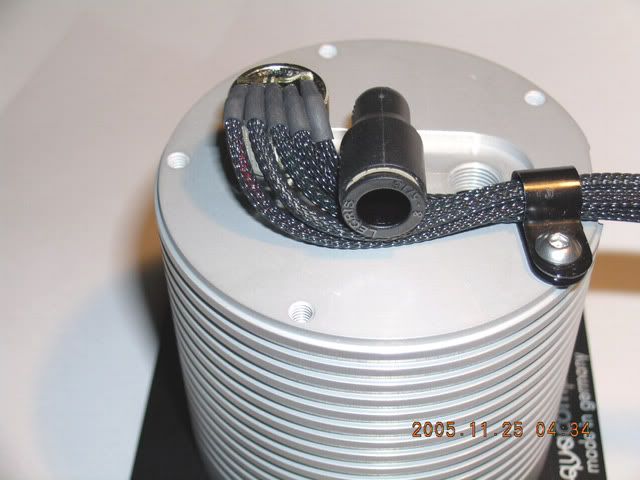
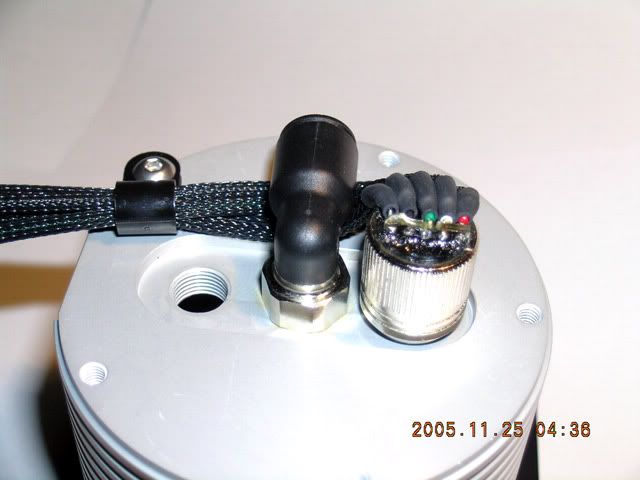
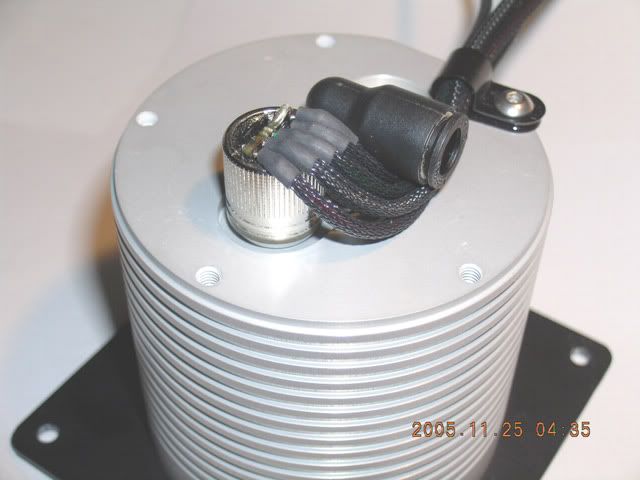
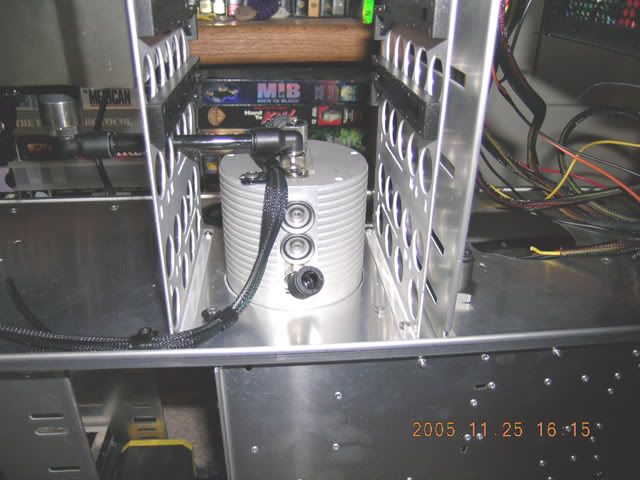
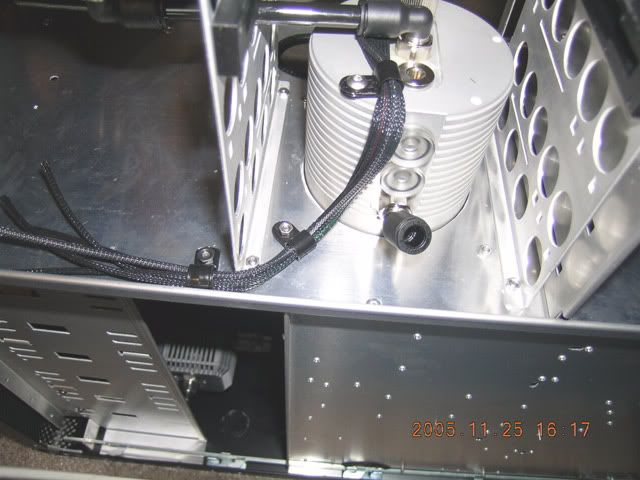
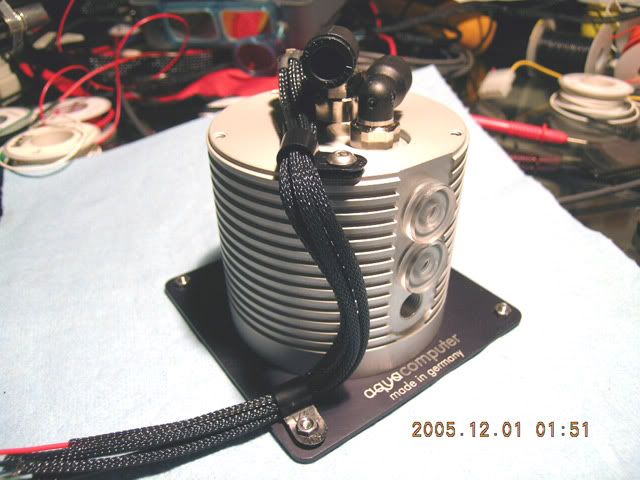
However, nice thing about rollin your own is that you can alway change your mind. So since I was doing my CPU Aquatube wiring today I decided to go back to the way I originally did it. I think this just looks much more sleek and has that coolness factor. So here are a few pics of the way it is going down.
Next up is case cutting time to route the custom USB cable I am making to connect the floor mounted Aquatubes to one dual MB header. Time to do some more unsoldering....
-