 20.04.2024, 00:07
 Sprache ändern
 Registrieren
 Anmelden
Sie sind nicht angemeldet.
Lieber Besucher, herzlich willkommen bei: Aqua Computer Forum. Falls dies Ihr erster Besuch auf dieser Seite ist, lesen Sie sich bitte die Hilfe durch. Dort wird Ihnen die Bedienung dieser Seite näher erläutert. Darüber hinaus sollten Sie sich registrieren, um alle Funktionen dieser Seite nutzen zu können. Benutzen Sie das Registrierungsformular, um sich zu registrieren oder informieren Sie sich ausführlich über den Registrierungsvorgang. Falls Sie sich bereits zu einem früheren Zeitpunkt registriert haben, können Sie sich hier anmelden.

Zitat von »Mr_modnaR«
:o how did you wangle that??!!! (did you offer them free private healthcare for a year? lol)
It pays to know the right people who know the right people. ;D The owners of the place I buy my cases from are related to one of the Lian-Li brothers IIRC.
the only trouble i can see with this method is that there will be no give in the top cover of the fmj, because as you know, it's a tight fit anyway, but with the added powder coating/black chrome, you're going to have to do some serious measuring before hand!!
(it's like the old saying: measure a million times, chrome your fmj once. ;D)
Actually I think it will be fine as there is at least .050 inch of space between the top of the pump and the FMJ.
Actually I think it will be fine as there is at least .050 inch of space between the top of the pump and the FMJ.
:-/ oops, i meant between the two halves of the FMJ! if you are just powder coating/black chroming and welding up the outer shell, then it shouldn't be a problem, it's just if there's no give in either part, you may find it difficult to put them back together again!
:-/ oops, i meant between the two halves of the FMJ! if you are just powder coating/black chroming and welding up the outer shell, then it shouldn't be a problem, it's just if there's no give in either part, you may find it difficult to put them back together again!
Oh! I see what you mean now.
 The outer shell has no seams that would be unsightly from being powder coated thus I see that the seams have to be filled with something. Perhaps JB Weld would also work well. The hot tip on these kinds of deals is to do the seam work with the FMJ bolted together (with no Aquastream if welding). I would have the powder coaters mask off the areas where the two parts have contact when assembled thus obliviating any assembly problems.
I'm back :
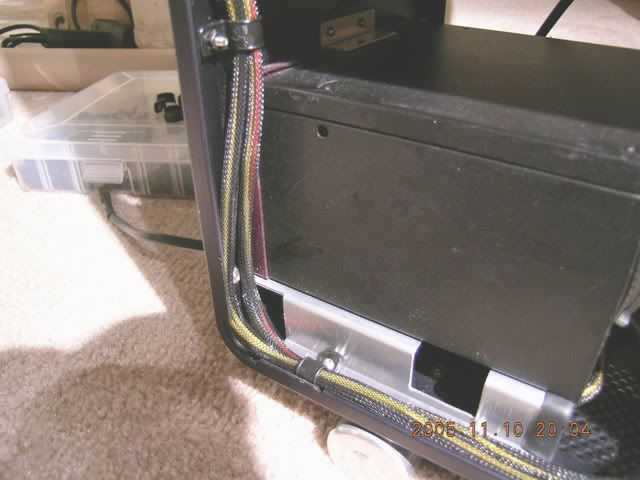
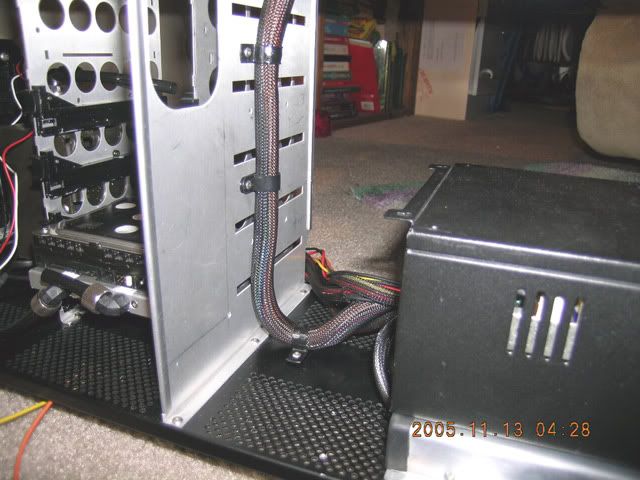
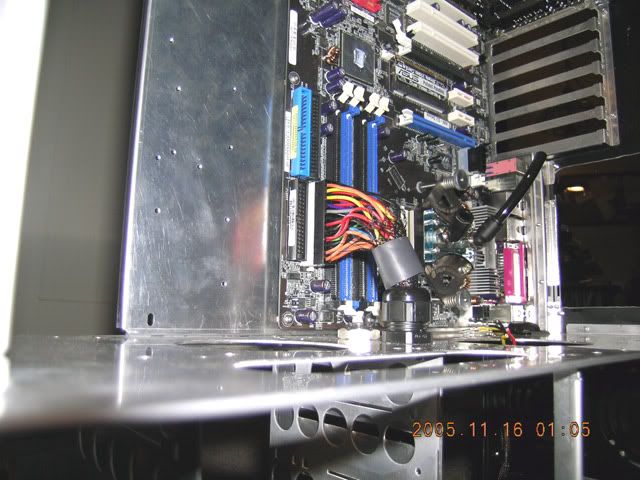
Today I started wiring up FF. Decided to start with the easy stuff. Believe it or not, but all of this is just a pre-wire job. After everything is soldered, extended, and crimped I will tear the whole thing apart again so I can sleeve and apply heatshrink. So here is a dual set of wires comiong off the PSU that will go to the ATX 4 pin MB connector and the Asus SLI power connector. Everything is being held down with cable clamps as I really want to avoid the use of cable ties unless absolutely necessary (necessary in my estimation is a cable hanging out in the middle of the case). Getting more use out of my available supply of buttonheads.
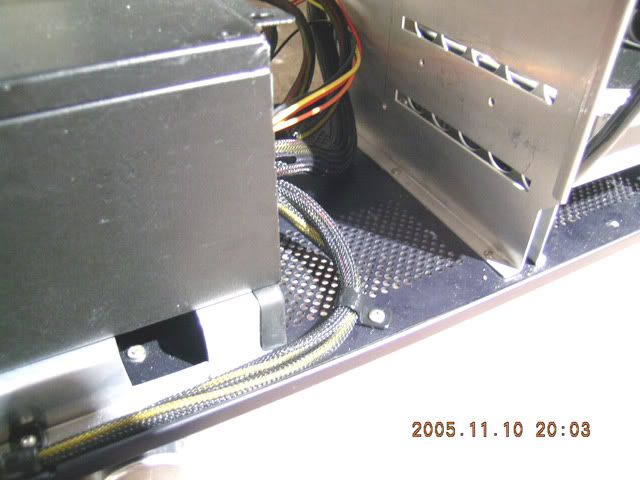
Here we are going up the back side of the case to the hole I drilled. Remember that when the new PSU plate arrives all those 80mm grills will go bye-bye.
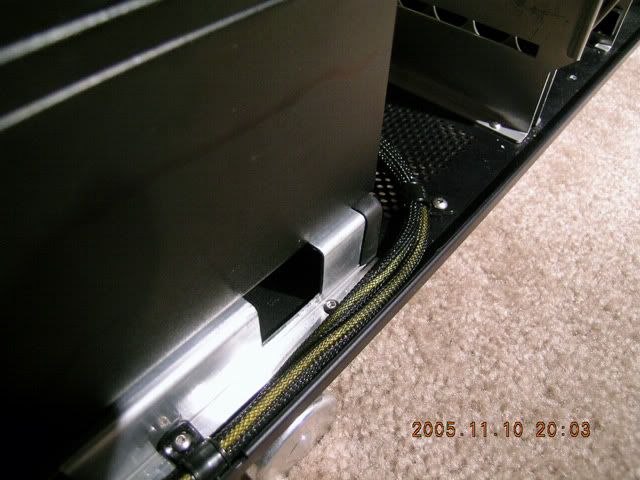
Bottom's up! The rubber grommet is not secured as yet because as I said earlier it is a pre-wire job.
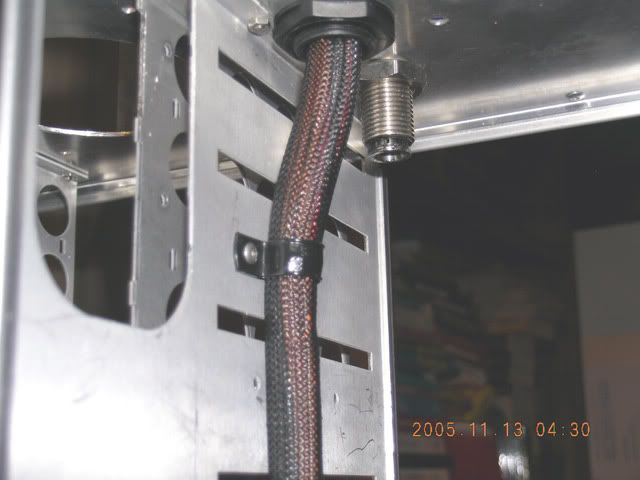
I decided I didn't like my bulkhead bushing so I found a new bulkhead at the electronics store. If your really paying attention you might notice the Tubemeter in the right Aquatube.
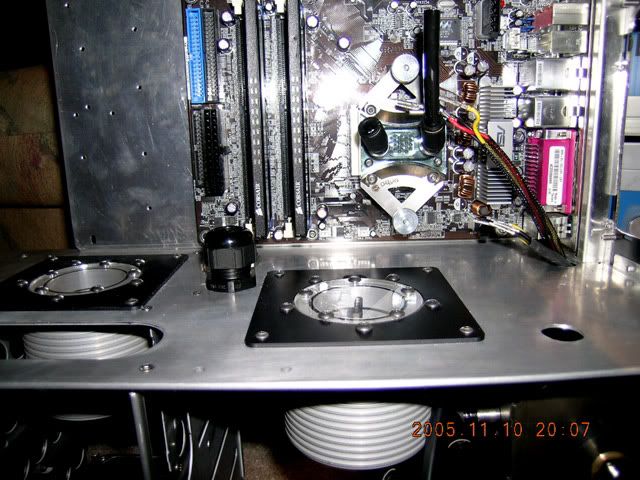
Time to get out the dykes, soldering iron, and crimping tools so I start having some more fun tonight. It's always the first cut that is the most anxiety producing. After that it is just snip snip.
Today I started wiring up FF. Decided to start with the easy stuff. Believe it or not, but all of this is just a pre-wire job. After everything is soldered, extended, and crimped I will tear the whole thing apart again so I can sleeve and apply heatshrink. So here is a dual set of wires comiong off the PSU that will go to the ATX 4 pin MB connector and the Asus SLI power connector. Everything is being held down with cable clamps as I really want to avoid the use of cable ties unless absolutely necessary (necessary in my estimation is a cable hanging out in the middle of the case). Getting more use out of my available supply of buttonheads.
Here we are going up the back side of the case to the hole I drilled. Remember that when the new PSU plate arrives all those 80mm grills will go bye-bye.
Bottom's up! The rubber grommet is not secured as yet because as I said earlier it is a pre-wire job.
I decided I didn't like my bulkhead bushing so I found a new bulkhead at the electronics store. If your really paying attention you might notice the Tubemeter in the right Aquatube.
Time to get out the dykes, soldering iron, and crimping tools so I start having some more fun tonight. It's always the first cut that is the most anxiety producing. After that it is just snip snip.
d**es
as in
D.I.K.E.S
If that is what you meant why the **, Its only offencive when used in a dif way>?
Because in English a side cutting pliers is called D*Y*K*E*S. However, in German I guess it is somekind of cuss word. :
BTW, I didn't type it that way with the **, the computer does it. :-X
I have been busy crimping gold connectors, soldering wires, drilling holes for wires, drilling and tapping holes for cable hold downs, and sleeving wires. Tedious work and it's going slow. 
Should have the MB wiring done in a few days though and then lots of pics. Now I thought there was a green wire somewhere...
Should have the MB wiring done in a few days though and then lots of pics. Now I thought there was a green wire somewhere...
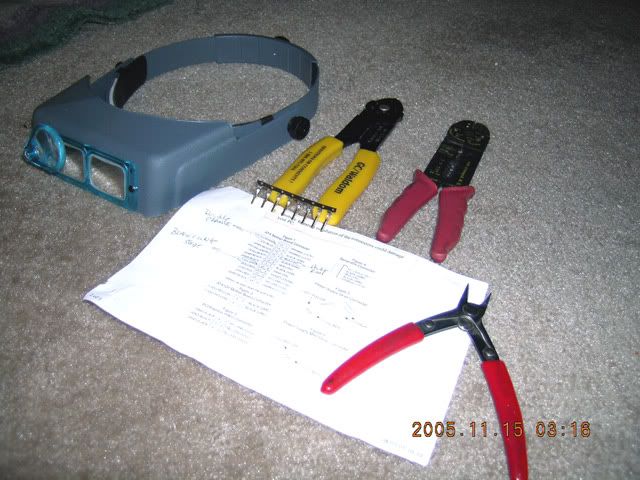
Well I think it is time for an update though all this wiring is a work in progress. Been busy using up my supply of gold plated molex pins that I got from A.C. Ryan a while back. As I have stressed in the past it is always a good idea to plan what you want to do at least three steps in advance so you don't flub things up and it always pays to use good tools for the job at hand.
Here are the kind of tools and stuff you will need to do this kind of ATX power cable re-wire job. The important one is the molex crimping tool. This one is made by GC Waldon, but if you got lots of scoots I would recommend the Paladin crimper as it will crimp the wire and the insulation at one time. My crimping tool requires you to crimp the wire and then crimp the insulation. The other thing is an Opti-Visor will be invaluable as the pins are pretty small if you are older than 40 years old.
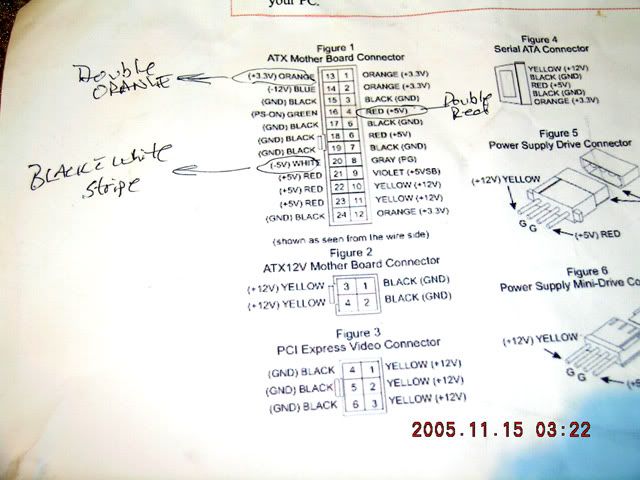
A blow up of the paper above. I made these notes when I took apart my PSU a few months ago and I highly suggest you do the same.
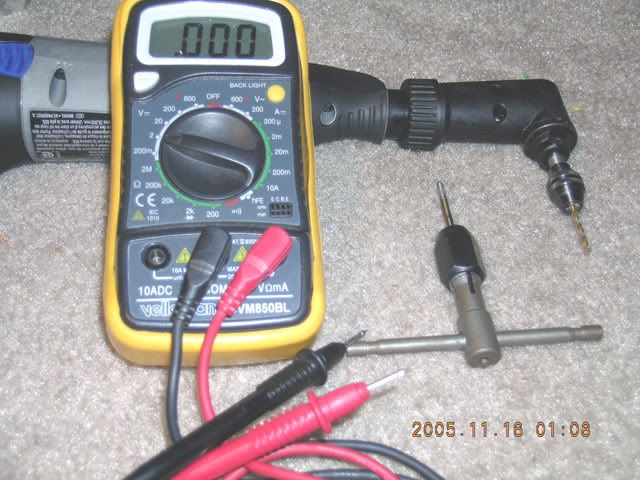
More tools for [H]ard modders. Hey what is the crazy woman doing with that drill again?
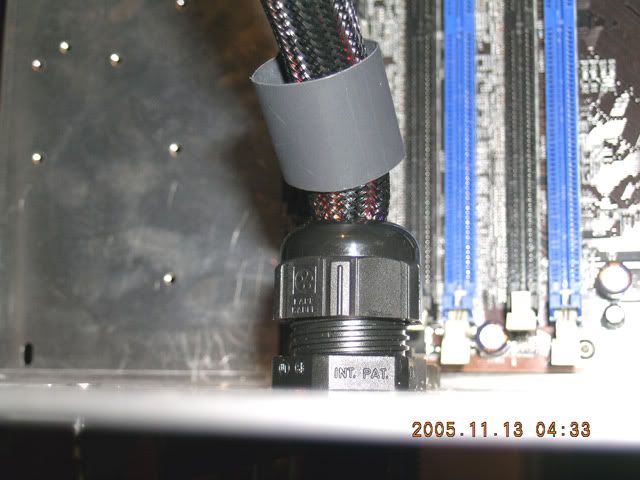
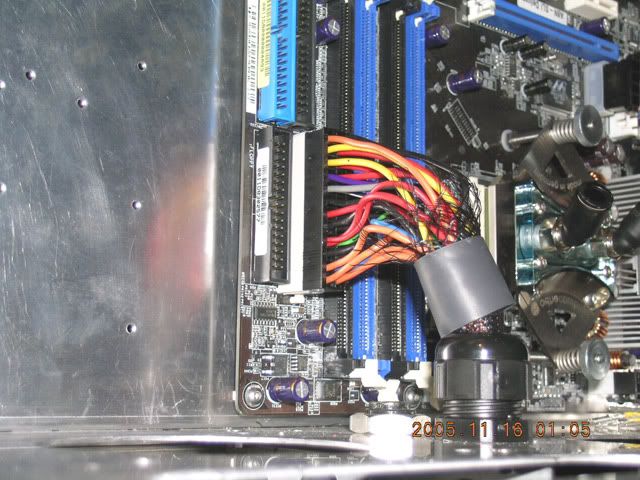
First thing to do is to route the ATX wires up through the case. That is why I drilled the hole and put that big black bulkhead fitting in a while back. This pic shows it going up the wall between the PSU and the HD racks. Drilled holes and tapped them for 3mm x 0.5mm threads. Then I used some of my supply of buttonheads to clamp it down with black plastic cable clamps.
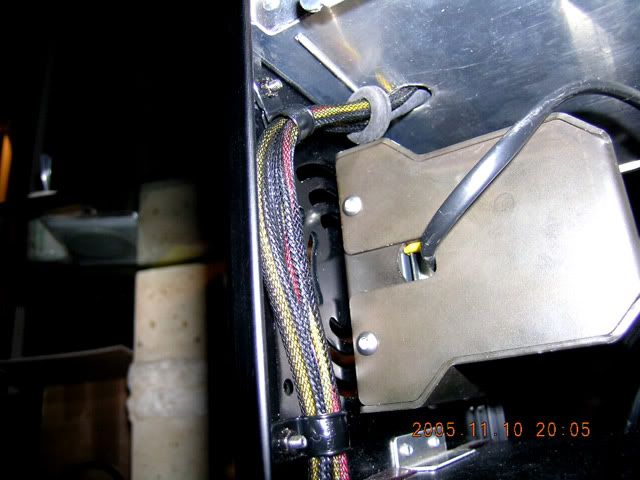
Here it is going up through the bulkhead connector.
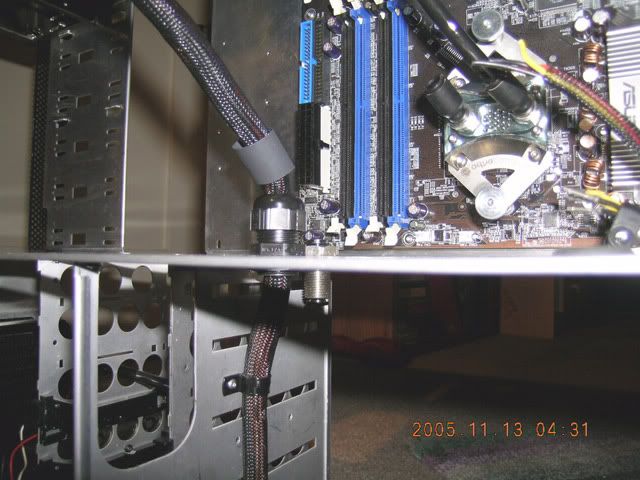
Here you can see the ATX cable as it comes out of the bulkhead connector into the MB compartment. The black connector housing I got from A.C. Ryan is already sitting on the MB.
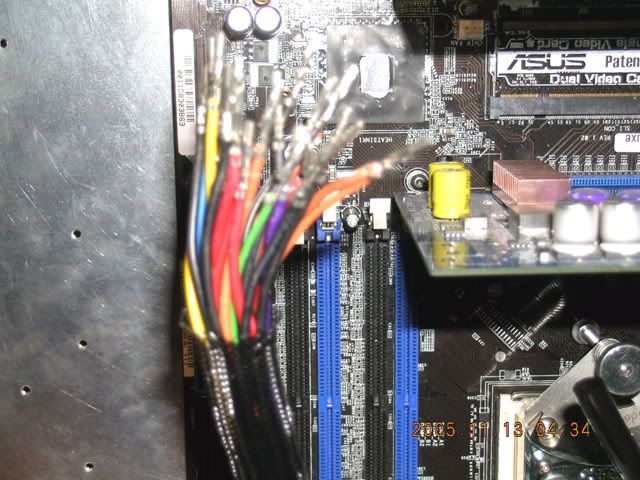
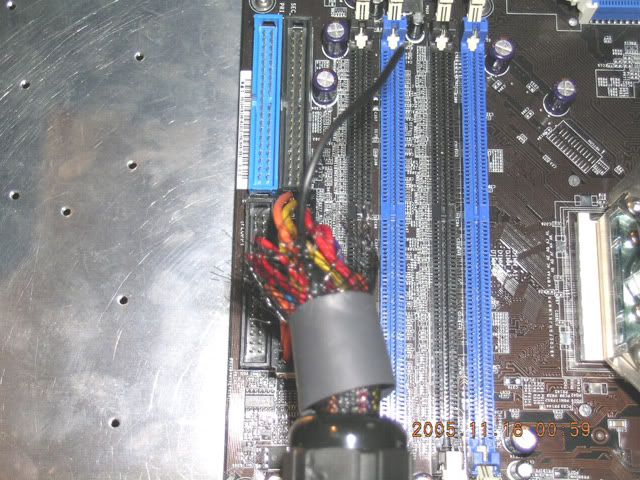
Lots of pretty colors, but the loom is way too long. So I think it's times to get out the dykes for a little snip snip action.
First thing to do is to slip on a piece of heatshrink so I can gauge where everything needs to be.
About 25% of the way through and I highly suggest you get some cheap molex pins to practice crimping before you start using the gold plated ones. There is a definite knack to crimping molex pins.

About half way though. Now where did that green wire get off to? Did I mention I am color blind? :
Last wire to do! Hmm....wasn't it supposed to be a red wire?
Gold on black certainly looks nice, huh?
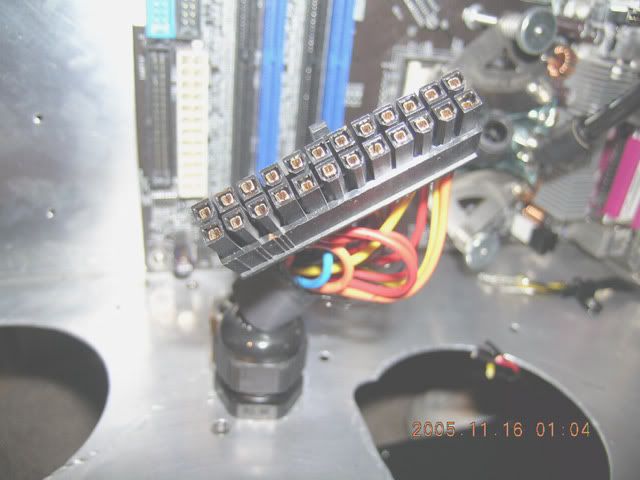
All wires crimped and in the connector housing.
So now what to do, huh? Time to take it all apart again so I can sleeve each of the wires. Some people use heatshrink, but I am somewhat leery of that because I want to be able to see what color is going where and I can see through the sleeving if I need to. Once I get it sleeved I can use that hunk of heastshrink to finish it off all uber sweet.
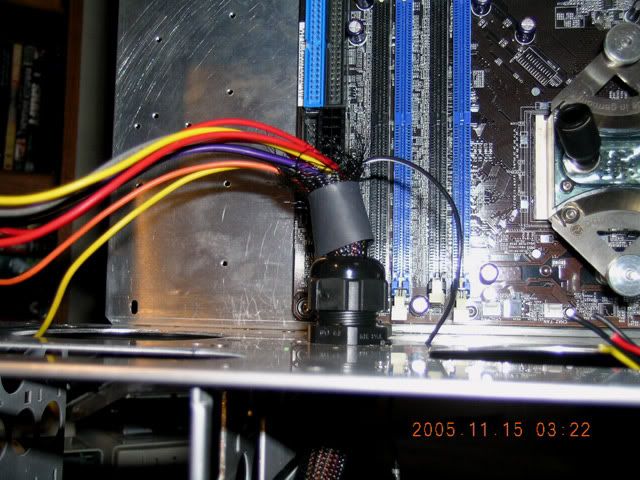
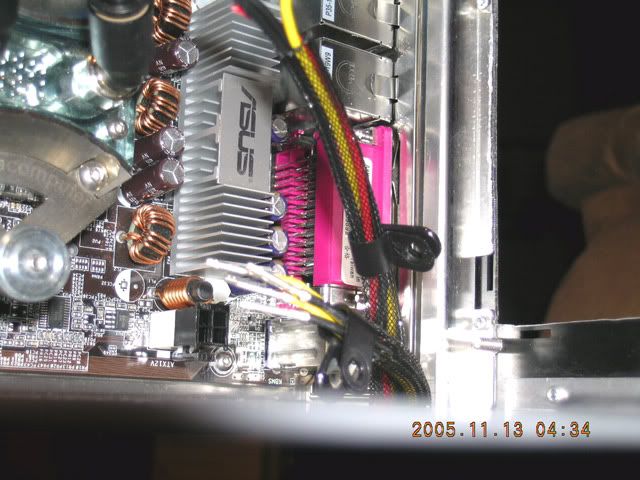
Okay how about a teaser on what I am doing with those wires on the other side of the MB? Here is the wires that will go to the SLI connector and the 4 pin ATX MB connector. You can see the black connector housing sitting in the MB which I also got from A.C. Ryan.
I think this suspiciously looks like a drilled and tapped hole.
More drilled and tapped holes! :
Here are the kind of tools and stuff you will need to do this kind of ATX power cable re-wire job. The important one is the molex crimping tool. This one is made by GC Waldon, but if you got lots of scoots I would recommend the Paladin crimper as it will crimp the wire and the insulation at one time. My crimping tool requires you to crimp the wire and then crimp the insulation. The other thing is an Opti-Visor will be invaluable as the pins are pretty small if you are older than 40 years old.
A blow up of the paper above. I made these notes when I took apart my PSU a few months ago and I highly suggest you do the same.
More tools for [H]ard modders. Hey what is the crazy woman doing with that drill again?
First thing to do is to route the ATX wires up through the case. That is why I drilled the hole and put that big black bulkhead fitting in a while back. This pic shows it going up the wall between the PSU and the HD racks. Drilled holes and tapped them for 3mm x 0.5mm threads. Then I used some of my supply of buttonheads to clamp it down with black plastic cable clamps.
Here it is going up through the bulkhead connector.
Here you can see the ATX cable as it comes out of the bulkhead connector into the MB compartment. The black connector housing I got from A.C. Ryan is already sitting on the MB.
Lots of pretty colors, but the loom is way too long. So I think it's times to get out the dykes for a little snip snip action.
First thing to do is to slip on a piece of heatshrink so I can gauge where everything needs to be.
About 25% of the way through and I highly suggest you get some cheap molex pins to practice crimping before you start using the gold plated ones. There is a definite knack to crimping molex pins.
About half way though. Now where did that green wire get off to? Did I mention I am color blind? :
Last wire to do! Hmm....wasn't it supposed to be a red wire?
Gold on black certainly looks nice, huh?
All wires crimped and in the connector housing.
So now what to do, huh? Time to take it all apart again so I can sleeve each of the wires. Some people use heatshrink, but I am somewhat leery of that because I want to be able to see what color is going where and I can see through the sleeving if I need to. Once I get it sleeved I can use that hunk of heastshrink to finish it off all uber sweet.
Okay how about a teaser on what I am doing with those wires on the other side of the MB? Here is the wires that will go to the SLI connector and the 4 pin ATX MB connector. You can see the black connector housing sitting in the MB which I also got from A.C. Ryan.
I think this suspiciously looks like a drilled and tapped hole.
More drilled and tapped holes! :
i hate to say this given you've already started wiring, but i don't much like those cable clamps you're using, something like this would be more appropriate, more 'stealth' IMHO:

course it's just my opinion, plus it could be the photo's throwing me off (like the silicon fan mounts).
hope you don't mind constructive criticism. :
course it's just my opinion, plus it could be the photo's throwing me off (like the silicon fan mounts).
hope you don't mind constructive criticism. :
i hate to say this given you've already started wiring, but i don't much like those cable clamps you're using, something like this would be more appropriate, more 'stealth' IMHO:
course it's just my opinion, plus it could be the photo's throwing me off (like the silicon fan mounts).
hope you don't mind constructive criticism. :
Don't mind it at all.
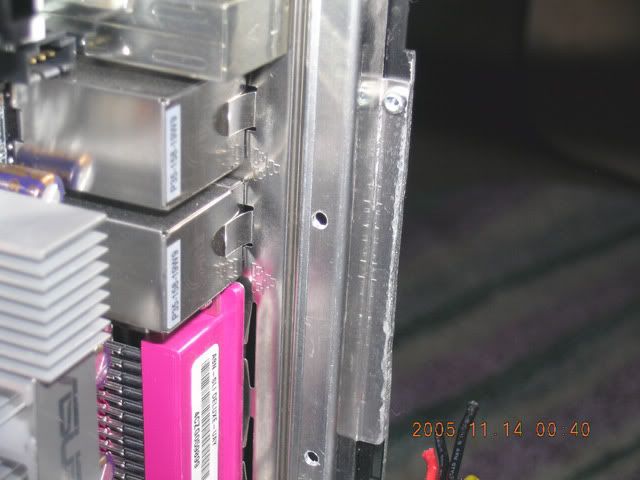
Actually I had some of those that came with my Lian-Li case, but they are not "stealth" as they take up a lot of room in the case. However they are certainly easier to locate and use than the ones I am using. Mine are standard electronic cable clamps and held down with buttonhead screws.On a side note I forgot to mention that my dyed silicon gaskets faded to a reddish color.
So I just got in some real black fan gaskets. ;D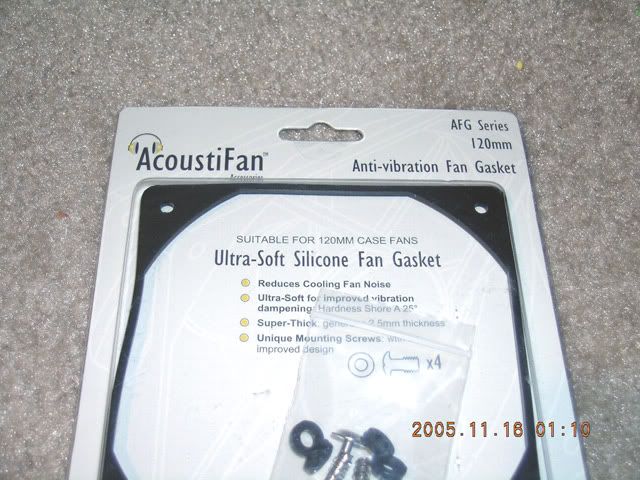
i guess with those tabs sticking out they aren't stealth, but the ones you are using have a tab sticking out one side also, that's what is putting me off.
hmmm.......
maybe something along the lines of these:

now i know you said you didn't want to use cable ties, but you can get these with 8mm slots i believe in which you could put 8mm wide cable ties, so they wouldn't really look like cable ties, they'd look more like your cable clamps.
the only problem with cable ties is that they are not reusable and - oh. :-[ i see why you don't want to use them.
someone really should invent a pc that you can mod in one go!
ps, i'm joking about that, of course! i do take things apart and put them back together again 50 times before i'm satisfied. i am a real modder, really i am.
i'm not joking. ;D
hmmm.......
maybe something along the lines of these:
now i know you said you didn't want to use cable ties, but you can get these with 8mm slots i believe in which you could put 8mm wide cable ties, so they wouldn't really look like cable ties, they'd look more like your cable clamps.
the only problem with cable ties is that they are not reusable and - oh. :-[ i see why you don't want to use them.
someone really should invent a pc that you can mod in one go!
ps, i'm joking about that, of course! i do take things apart and put them back together again 50 times before i'm satisfied. i am a real modder, really i am.
i'm not joking. ;D
-