 28.04.2024, 16:48
 Sprache ändern
 Registrieren
 Anmelden
Sie sind nicht angemeldet.
Lieber Besucher, herzlich willkommen bei: Aqua Computer Forum. Falls dies Ihr erster Besuch auf dieser Seite ist, lesen Sie sich bitte die Hilfe durch. Dort wird Ihnen die Bedienung dieser Seite näher erläutert. Darüber hinaus sollten Sie sich registrieren, um alle Funktionen dieser Seite nutzen zu können. Benutzen Sie das Registrierungsformular, um sich zu registrieren oder informieren Sie sich ausführlich über den Registrierungsvorgang. Falls Sie sich bereits zu einem früheren Zeitpunkt registriert haben, können Sie sich hier anmelden.


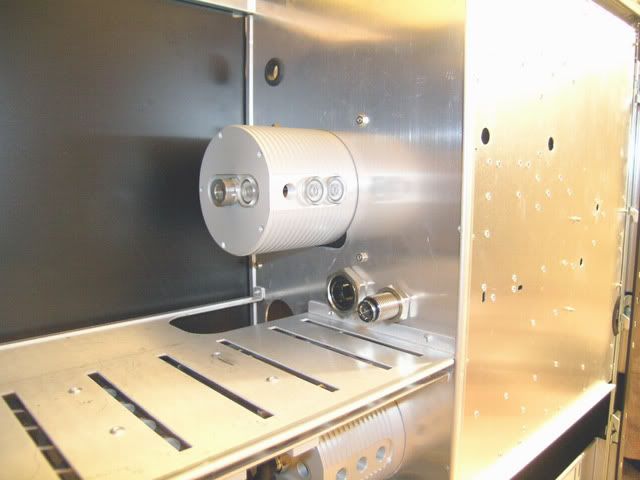
It is hard to quit modding for a few days when you are laid up from an auto wreck. So I was feeling better (probably from the pain pills) and decided I could do a little modding. Seeing how as I had to turn the case on it's front to perform some surgery I decided to snap a few pics of the top of the PSU compartment for your modding pleasure. ;D
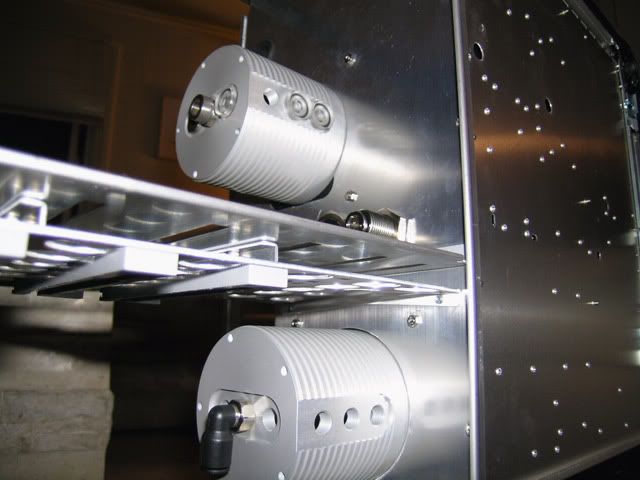
Those 3mm screws and nuts I used sure look a lot nicer on the Aquatube mounting plate on the bottom as well. Much more cleaner look then the one from the beginning of this log. The one thing I haven't been happy with is the Dykem Mark & Code paint pens as they look nice but the paint comes off easily.
Anyway as you recall I was having some difficulty with trying to figure out how I was going to be able to adjust my PSU voltage rails. So while I was hanging around the ER getting sewed up I decided that the best way to do this was to open up the area under the PSU. This is the plate that the PSU rests on as then I would be able to either buy a right angle screwdriver or make one. I thought about trying a Dremel cutoff saw, but considering I am a bit looped from the pain pills I decided to just drill out the rivets and remove it from the case. So here is the case minus the plate.
Here is the plate removed. The pencil marks are where the material has to be removed. By the way in case you wish to do something similar with your V-2xxx case, a 1/8" drill is just about perfect to drill out the rivet. You do not want to drill all the way through, but just enough that the top of the rivet breaks loose. Then you can easily pop out the remaining part without any difficulty.
Here is a close-up of the plate.
This is the preferred tool for crazy modders looped on pain pills. No way I am going to do any side milling with a 30,000 RPM Dremel. :
Well I got a good deal of the material removed with the nibbler, but the finish work will have to wait till I am off the pills as I need power tools to do some more metal removal and finish work.
Well time to go lay down for a while, but more fun stuff awaits you. In a project like this, one operation quite often leads to another unforseen one. Guess what I am going to do next?
Zitat von »Ze@lot«
unlucky top nurse :-/ hope ya better soon. ya pc is looking sweet tho so keep up the good work ;D
:o hope you get well soon!
Thanks for all the well wishes.
If I have a chance over the weekend I will see if I can get a pic up of my car that really needs a modding job. :'(I just noticed that all the new stuff is up on the new webshop. A pair of TwinPlex Pro's and a Multiswitch look to be part of Feeding Frenzy real soon. However, I am considering waiting till I can get a pair of the Silver TwinPlex Pro's instead. ;D

Just curious if anyone knows why there haven't been more project worklog entries from the AC case modding forum. There is just me and someone else. We need more Aqua Computer representation in this world wide modding event.
hey TN would you happen to have an aquastream that you could sell me? im short one on my project and the rest of my stuff comes in monday. and if you have time stop in and check out the progress.
Sorry but I only have the three Aquastreams I need for this project. Can't you get anymore from either Leftclicks or Sharka? Sorry, but I can't remember the name of your project so could you leave a link? BTW, did you enter the worklog contest?
Well as I pointed out a while back one operation often leads to another unforseen one.
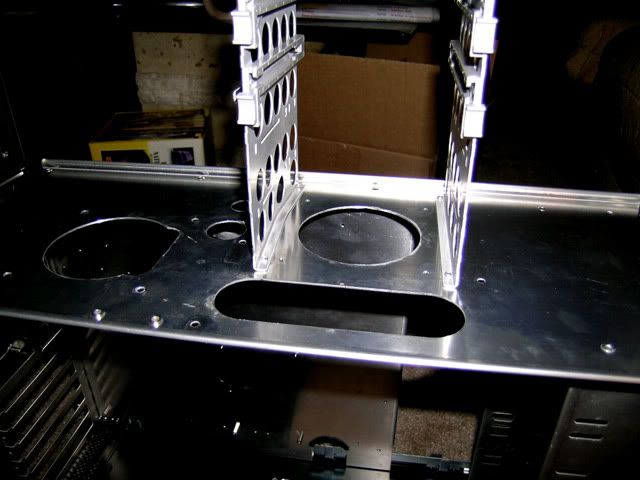
After removing the PSU resting plate I realized I would have to order some metric taps from McMaster-Carr, some new sizes of buttonhead screws, and some metric nuts. Since I was going to this amount of trouble (got to buy 100 screws/nuts of each size) to replace the four (4) rivets I drilled out I decided to go ahead and remove the wall between the PSU and HD compartments. This was not done purely on asthetic grounds, but also had to do with some mechanical issues as well. From the pic you can see that I was able to remove the top two HD rails as I could get a screwdriver in from the side plate. However, the bottom one needed to come out as well because the combined Raptor and Koolance HD cooler was to thick to fit in the bottom rail unless I cut the bottom of the case where the side panel locks on.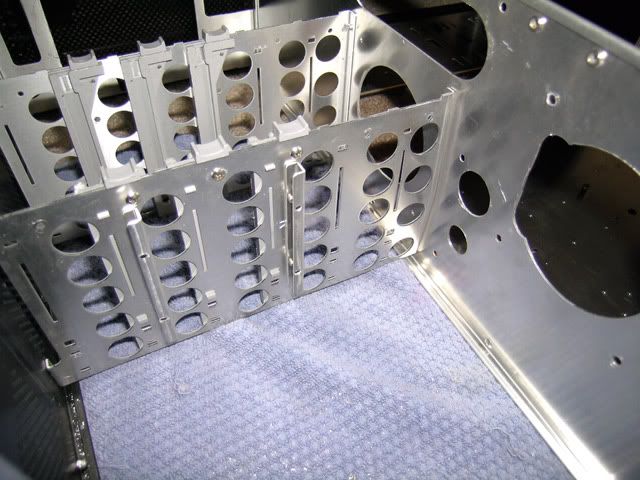
I removed the bottom HD rail a while back and the only way to get to the the screw was by figuring out where it was and drill a hole through the plate so I could insert a screwdriver through it. That is the reason for the pencil lines and the little hole at the bottom.

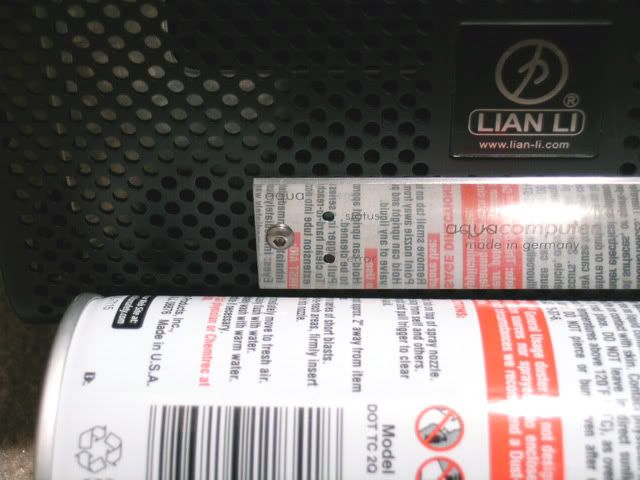
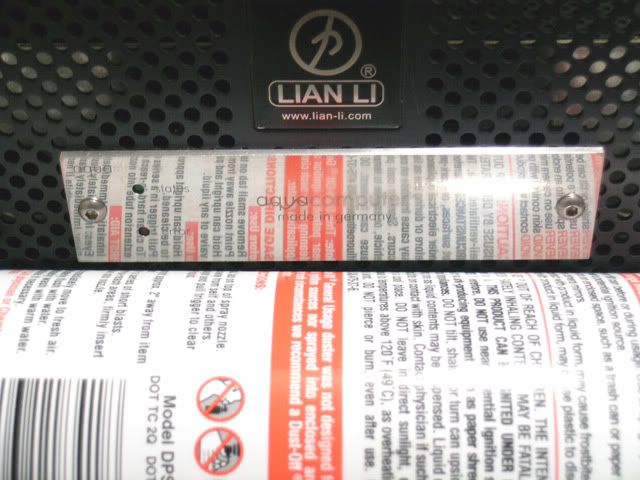
So the main reason I took out the plate was because I decided that the grey HD rails would look a lot nicer if they were all black. The remaining three sets of HD rails would have required another three sets of holes like the one on the bottom. Even if that had worked I would have had to drill much bigger holes to fit get the rail screws in through the plate during the reassembly phase. Seems to me that this was a major design flaw by Lian-Li in that the compartment plate has to be taken off to get to the HD rail screws. ::0
I also wanted to be able to put back in the lowest HD rail set in case I ever decide to cut the case for a fourth HD/Cooler set. These four sets of rails will be vinyl dyed this week and later re-assembled.
Seems like I got too long a post :o : so here is the balance.
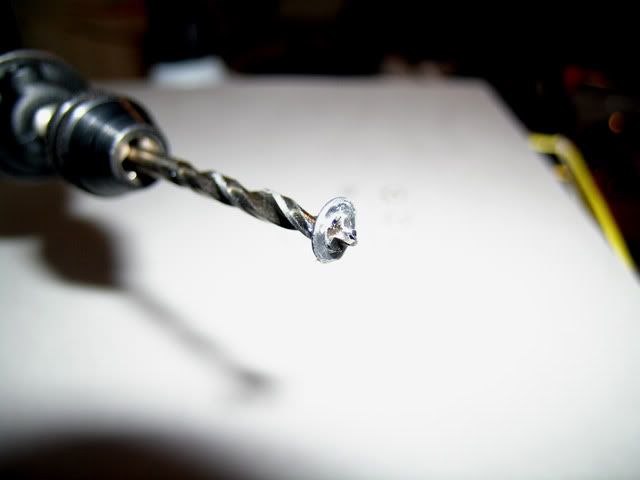
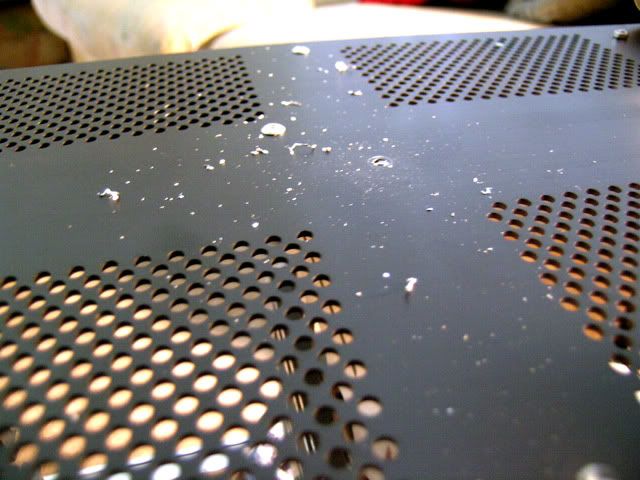
Drilling rivets out seems like a traumatic experience if you have never done this before, at least it was for me. The first drilled rivet is to many a total unknown. So I have decided to give a short tutorial on doing this. If you don't know what a rivet looks like before being used you should know that most companies use what is called a pop rivet. If you ever have installed one you probably know they often make a poping noise when installed. Have no clue as to if that is the real reason, but it "sounds" good to me. You can read a short tutorial on this web page as to how they work. Anyway there are two different sides to a rivet. The one we are interested in is the one which has a slight indentation in it. This indentation serves as a convenient center for a drill bit. Drill size selection for the ones used in Lian-Li V-2000 cases is either a 7/64" or a 1/8" bit. Essentially what you want is to be able to drill the head off and the other part will either fall off or be easily taken out with a pair of needle nose pliers. Here you can see what comes loose when drilling a rivet head.
Here is a bunch of the rivet heads after you drill them.
Here is a close-up of a drilled rivet. What you see is what is left after the head comes off. Then you can either push the remaining part out from this side or use a pair of pliers to pull it out from the other side.
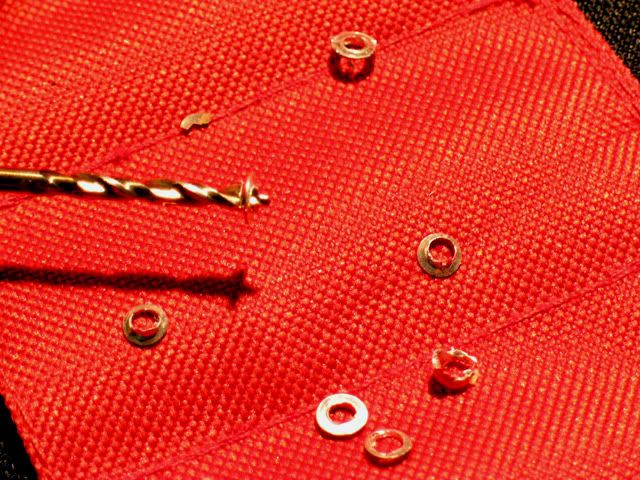
If you are living right and do a good job the mating part hole will look as good as the hole the manufacturer started with before assembly.

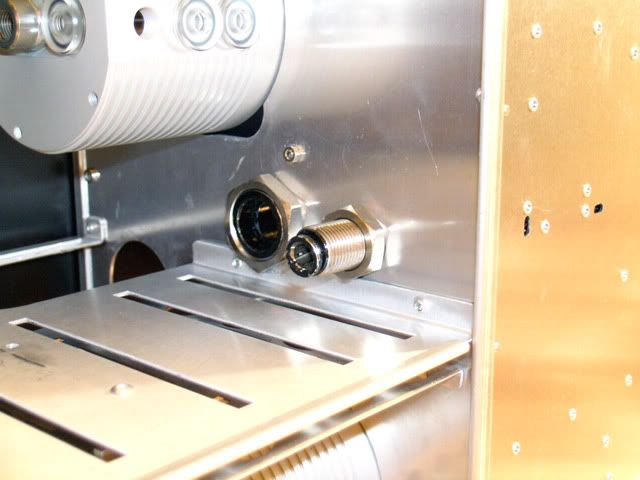
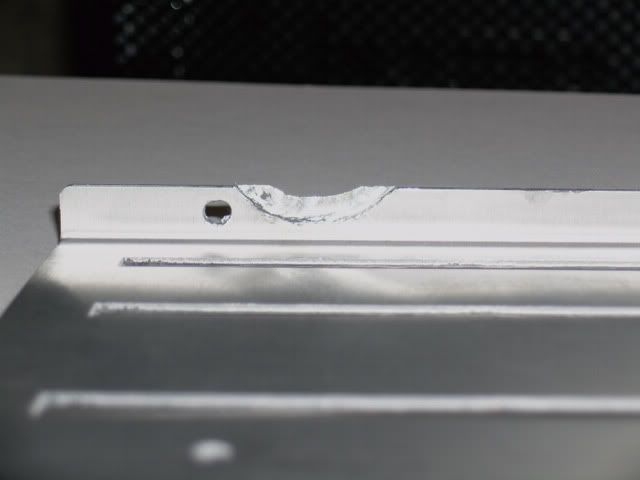
If your not living right you might get a slightly out of round hole like this. Please keep in mind that this is close-up photography and is difficult to tell with the naked eye. The milled area to the right of the hole is where I had previously removed metal to allow the ATX power loom bulkhead fitting nut to seat properly. Now I get a chance to fix this right.
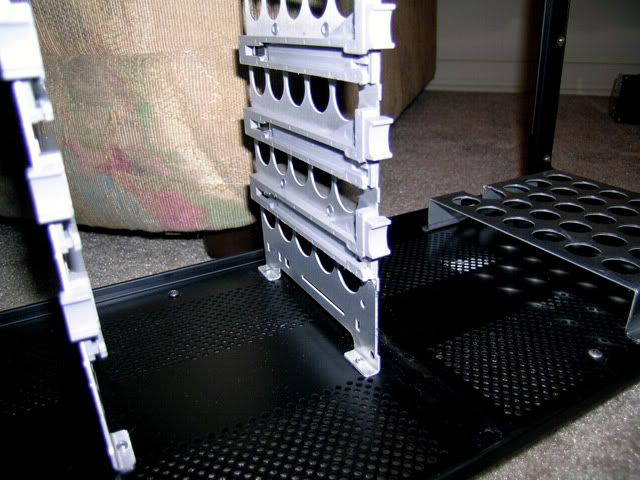
After getting the plate out I noticed that the HD rack side sitting next to the plate was bowed a bit. I think this happened during assembly at the factory. In any case I have the other set of HD racks that I will replace this one with after the vinyl dyeing is complete.
So now it is back to the waiting game as I am waiting for more 3mm screws, nuts, and some metric taps to get here from McMaster-Carr. When they get here all this will be reassembled and bolted back together with more buttonhead socket cap screws.
so here is the balance.Drilling rivets out seems like a traumatic experience if you have never done this before, at least it was for me. The first drilled rivet is to many a total unknown. So I have decided to give a short tutorial on doing this. If you don't know what a rivet looks like before being used you should know that most companies use what is called a pop rivet. If you ever have installed one you probably know they often make a poping noise when installed. Have no clue as to if that is the real reason, but it "sounds" good to me. You can read a short tutorial on this web page as to how they work. Anyway there are two different sides to a rivet. The one we are interested in is the one which has a slight indentation in it. This indentation serves as a convenient center for a drill bit. Drill size selection for the ones used in Lian-Li V-2000 cases is either a 7/64" or a 1/8" bit. Essentially what you want is to be able to drill the head off and the other part will either fall off or be easily taken out with a pair of needle nose pliers. Here you can see what comes loose when drilling a rivet head.
Here is a bunch of the rivet heads after you drill them.
Here is a close-up of a drilled rivet. What you see is what is left after the head comes off. Then you can either push the remaining part out from this side or use a pair of pliers to pull it out from the other side.
If you are living right and do a good job the mating part hole will look as good as the hole the manufacturer started with before assembly.
If your not living right you might get a slightly out of round hole like this. Please keep in mind that this is close-up photography and is difficult to tell with the naked eye. The milled area to the right of the hole is where I had previously removed metal to allow the ATX power loom bulkhead fitting nut to seat properly. Now I get a chance to fix this right.
After getting the plate out I noticed that the HD rack side sitting next to the plate was bowed a bit. I think this happened during assembly at the factory. In any case I have the other set of HD racks that I will replace this one with after the vinyl dyeing is complete.
So now it is back to the waiting game as I am waiting for more 3mm screws, nuts, and some metric taps to get here from McMaster-Carr. When they get here all this will be reassembled and bolted back together with more buttonhead socket cap screws.
Hi, top nurse!
just a quick question, did you notice whether there is a great deal of strength lost in the dividing partition that you have the Aquatubes attached to when you took out the hd drive cages?
Not really as my Aquatubes are on opposite sides of the PSU/HD compartment dividing plate which gives the middle floor some rigidity. I don't think there would be a problem even if you took out all the HD cages so long as the PSU/HD compartment dividing plate was left in. However, I would recommend that you drill the Aquatube holes while there is still some support there from either the plate or hard drive cages if possible.
Not really as my Aquatubes are on opposite sides of the PSU/HD compartment dividing plate which gives the middle floor some rigidity. I don't think there would be a problem even if you took out all the HD cages so long as the PSU/HD compartment dividing plate was left in. However, I would recommend that you drill the Aquatube holes while there is still some support there from either the plate or hard drive cages if possible.
wow i feal luck TN my hd cages where held in by screws.
wow i feal luck TN my hd cages where held in by screws.
No luck involved as you have a later version of the case. Lian-Li is constantly evolving their case design so there are lots of changes they have instituted since they began production. I think Lian-Li keeps an eye on what the modding crowd does with their cases and responds by changing things around. Just my .02 ;D
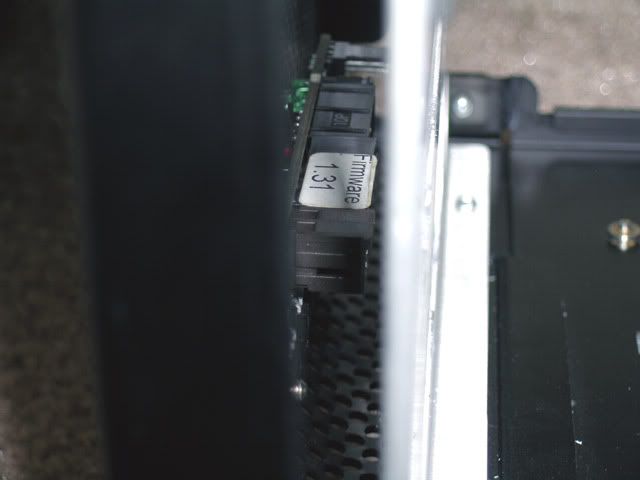
Well I have been muddling about where to locate the Aquastream controller for the HD circuit. Thought about mounting it in the middle compartment floor, but thought wiring might be a little tricky from a visual point of view. Decided to kill two birds with one stone as I really have no use for USB and Firewire ports on the front of the case. Why they put them on the bottom of a server case is beyond me. In fact why they even put them anywhere on a server case is a mysterious question. The stock cable barely even reaches most MB headers and if you go for a circumspect cable routing it is about 6-8" too short. Wasn't looking forward to adding length to a ton of small wires....so get rid of the dang thing. ;D
Decided that a perfect place for my Aquastream controller would be where the USB/Firewire ports were.
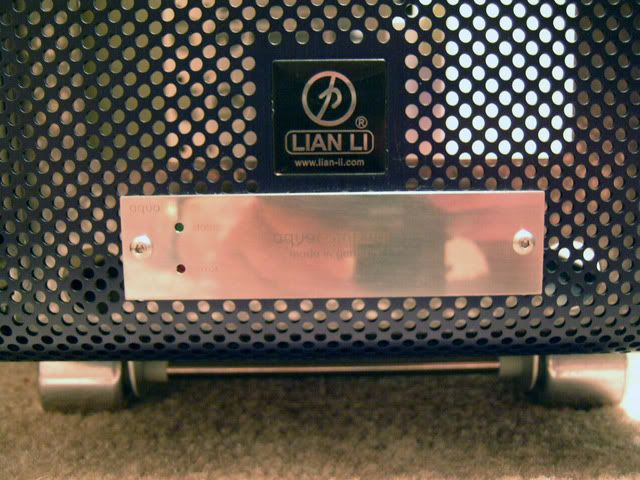
Also decided that since the stainless polishes up nicely a little lapping at 1200 grit would even add a little bling to the party to give some contrast to the black case. Those pesky buttonhead screws just can't stay away from my case.
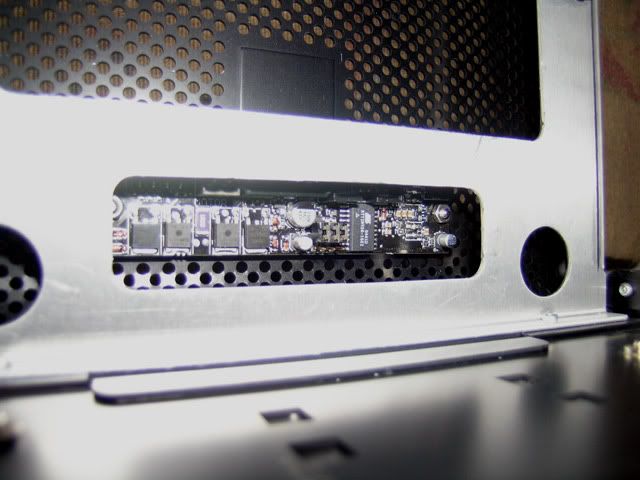
Here's a side shot that shows the controller between the front radiator mount and the front case wall.
Some more shots showing the controller mounted.
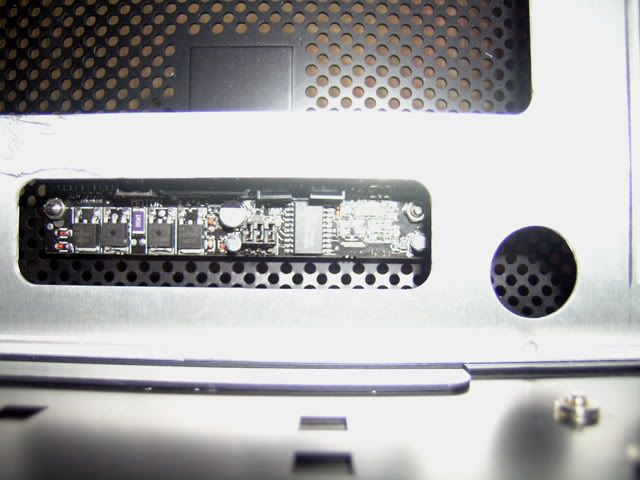
If you think you might want to do this mod I have a few quick suggestions. Put your faceplate on the front of the case and locate it accurately. I used a dial caliper and mine is centered within .001". Then tape it down securely with some 3M blue masking tape. Select a drill bit that fits in the faceplate holes and simply drill away. You might want to open up the area where the LEDS stick through the case so you have a little manuvering room unless you are really good with a drill.
Tomorrow I will be using my Dremel Tool to mill out the area above the oblong hole so that the power wires and Aquastream pump can be hooked up to the controller.
Decided that a perfect place for my Aquastream controller would be where the USB/Firewire ports were.
Also decided that since the stainless polishes up nicely a little lapping at 1200 grit would even add a little bling to the party to give some contrast to the black case. Those pesky buttonhead screws just can't stay away from my case.
Here's a side shot that shows the controller between the front radiator mount and the front case wall.
Some more shots showing the controller mounted.
If you think you might want to do this mod I have a few quick suggestions. Put your faceplate on the front of the case and locate it accurately. I used a dial caliper and mine is centered within .001". Then tape it down securely with some 3M blue masking tape. Select a drill bit that fits in the faceplate holes and simply drill away. You might want to open up the area where the LEDS stick through the case so you have a little manuvering room unless you are really good with a drill.
Tomorrow I will be using my Dremel Tool to mill out the area above the oblong hole so that the power wires and Aquastream pump can be hooked up to the controller.
As always: Nice work.
I don't really like the silver/chromatic Aquastream-Panel on a black Case, but the position is really a nice idea. I think they put front-connectors on a server-case because it's also a workstation-case, whatever, I am thinking too about a nice idea for the front-connectos of my V1200 - the aquastream-panel is no oppotunity for me - other ideas? :
Keep on modding, I am really keen on new pics of your Mod .
.
I don't really like the silver/chromatic Aquastream-Panel on a black Case, but the position is really a nice idea. I think they put front-connectors on a server-case because it's also a workstation-case, whatever, I am thinking too about a nice idea for the front-connectos of my V1200 - the aquastream-panel is no oppotunity for me - other ideas? :
Keep on modding, I am really keen on new pics of your Mod
.
"Live free or die: Death is not the worst of evils."
As always: Nice work.
I don't really like the silver/chromatic Aquastream-Panel on a black Case, but the position is really a nice idea. I think they put front-connectors on a server-case because it's also a workstation-case, whatever, I am thinking too about a nice idea for the front-connectos of my V1200 - the aquastream-panel is no oppotunity for me - other ideas? :
Keep on modding, I am really keen on new pics of your Mod
Glad you like it. More coming later today. ;D
I like had doubts about the high polish look too initially, but it compliments the Lian-Li case badge and the screws used on the Aquastream and Aquaero when you get the big picture with everything assembled on the front.
One of the nice things about using the stock Aquastream controller plate is that it opens up a lot of possibilities since I have all the black and silver aluminum faceplates along with the stock one. Have been considering sanding down the silver aluminum one till I can get under the anodizing. Then I can polish the plate nicely. The only problem I seem to be having is figuring out a way to get the high polish look without eliminating the lettering. Some one recommended to me something made in Germany for a two step polish and protection of stainless steel so I just got to find the stuff.
Hmm I don't like the Aquastream unit down there, and that polished constrast to the black aluminium is also not my thing. Did you know that you can mount the AS Controller behind the Aquaero ?
"It goes somethin' like dat" ;D
edit: okay im so sorry didn't know that  And didn't know that you are a woman, makes it even more interesting ;D Very Good work
"It goes somethin' like dat" ;D
edit: okay im so sorry
didn't know that And didn't know that you are a woman, makes it even more interesting ;D Very Good work
Hmm I don't like the Aquastream unit down there, and that polished constrast to the black aluminium is also not my thing. Did you know that you can mount the AS Controller behind the Aquaero ?
"It goes somethin' like dat" ;D
edit: okay im so sorry
ROFL
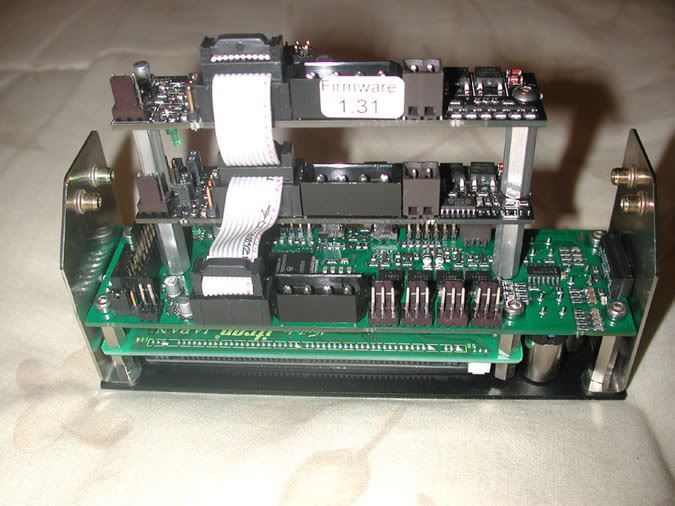
You even used my photobucket account pic that I posted a while back. Glad to see that someone got some mileage out of those pics. Actually I was giving some thought to putting three Aquastream controllers on the back of the Aquaero, but it seemed pointless as the HD circuit isn't connected to the Aquaero. With the lower controller location I get a very short run from the Aquastream to the controller so I get to do a little snip snip action. ;DDoes anyone know how to add a third pump to the Aquaero in case I am missing something?
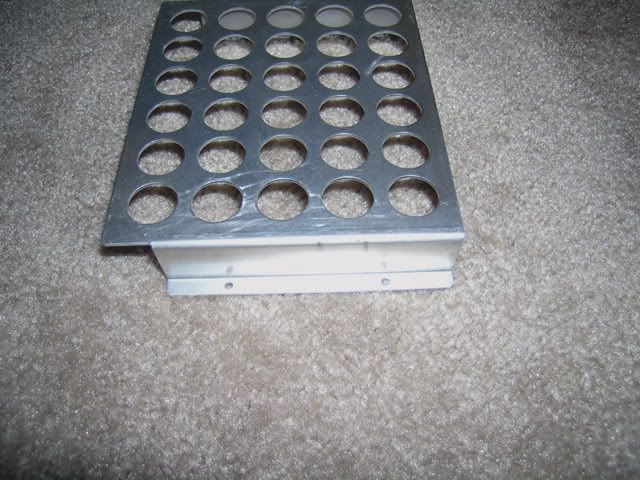
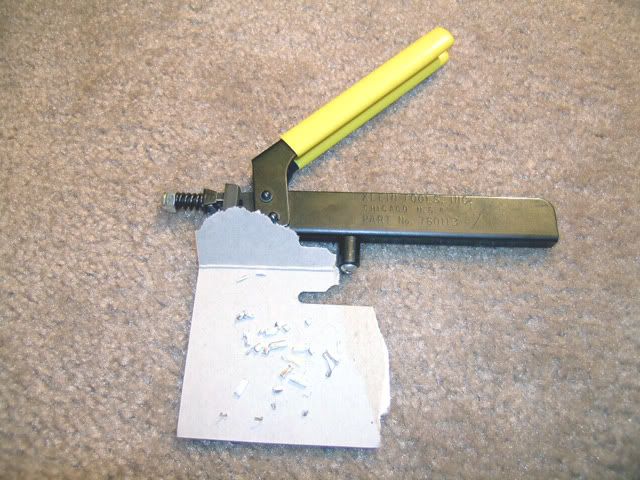
Small update for now. Had time to work on my PSU resting plate again. I have found that the right tool can make life a lot easier (if you can figure out what it is). So today we start out with a new tool. I already have a Klein Tools metal nibbler which is one of the best, but it has limitations in getting up close to a shoulder. So I got the cheapie tool and it goes really close, but it is a PITA to use. You pays your money and you takes your chances.
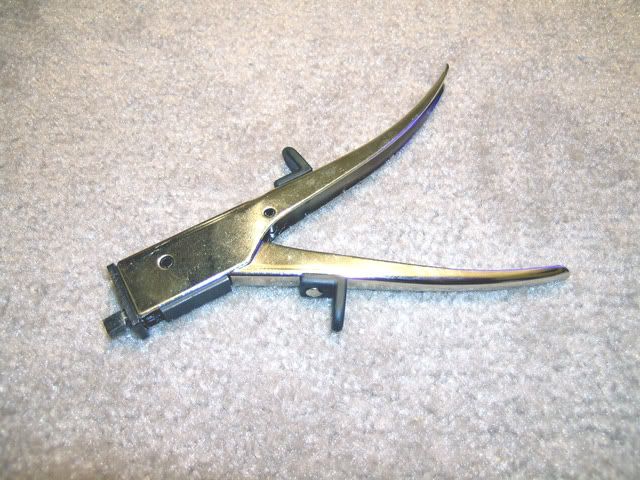
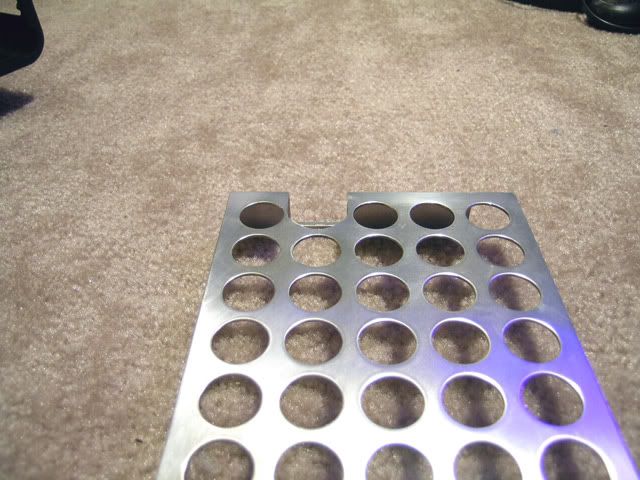
As you recall a ways back I nibbled the plate and left it in a rather sorry state of affairs due to being concerned about taking pain pills and operating power tools. Was going to do the Dremel routine but as it turns out the above tool and a set of Swiss needle files saved the day.
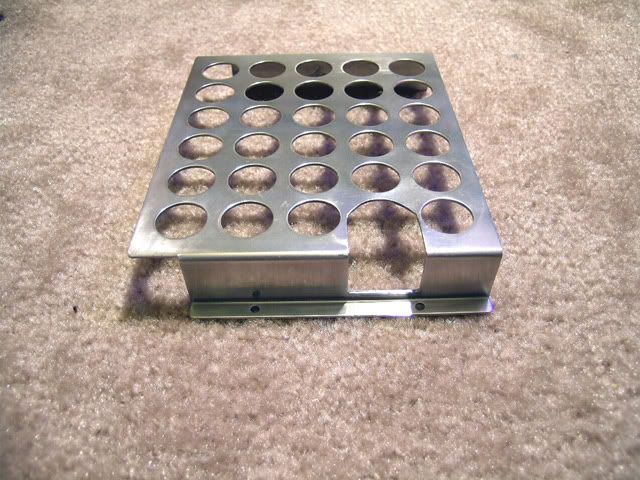
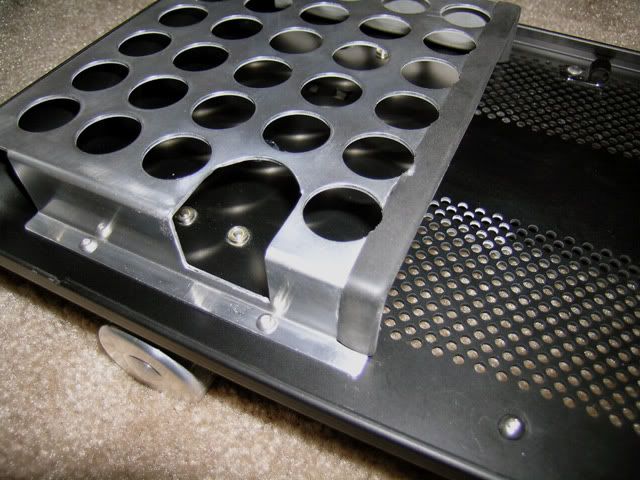
So here we have the basic nibbling done and ready for a little sanding.
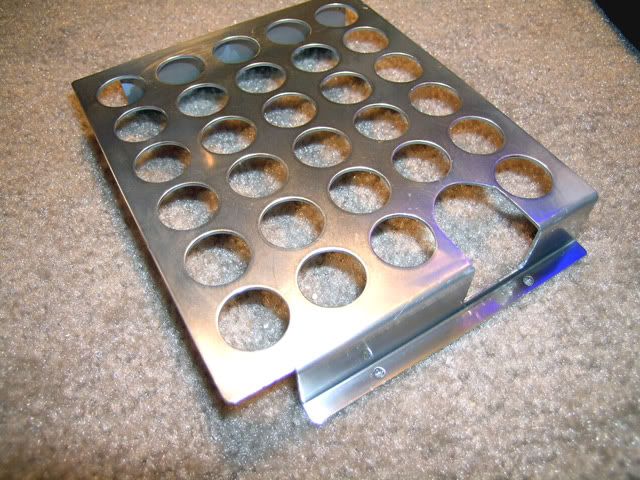
Sanded top and sides with 1200 grit wet and dry sandpaper (wet) to give it a slightly polished satin finish. Finished detail work on the slot with Swiss needle files.
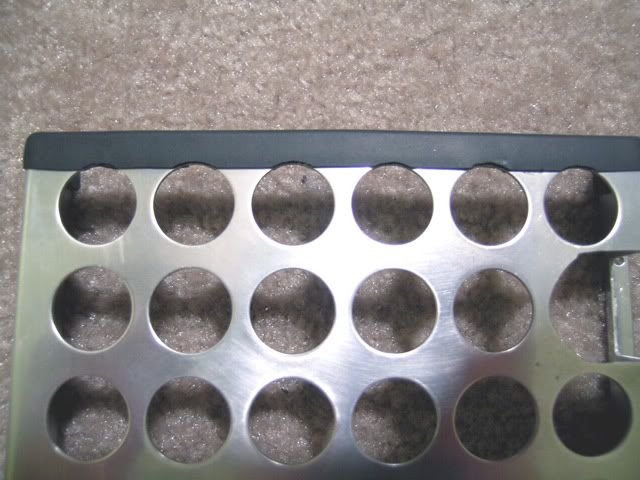
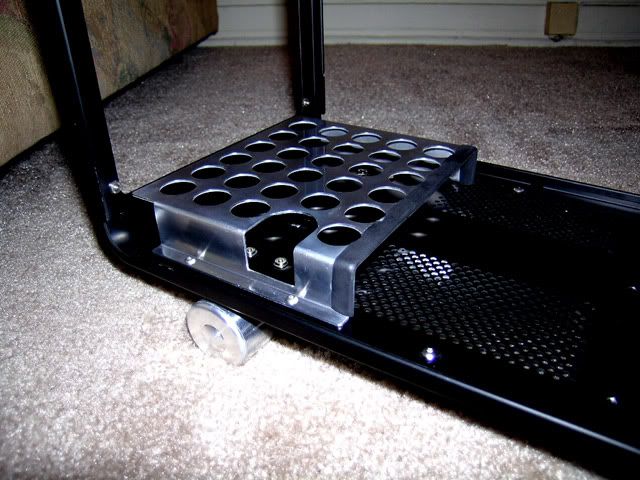
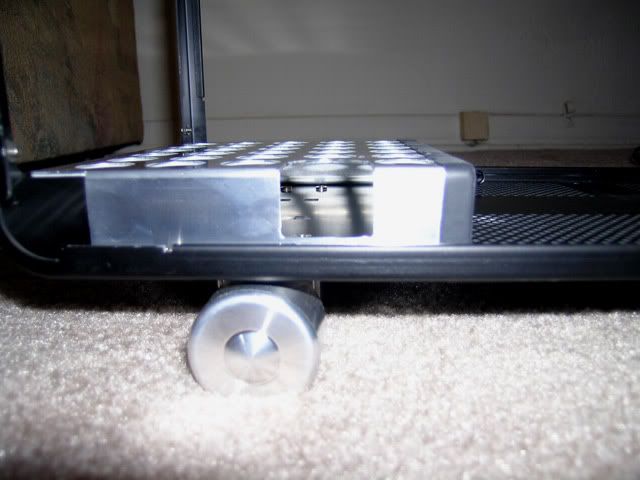
Since I probably sanded through the anodizing I thought it might be a good idea to do some polishing and protecting with a metal cleaner and protector.
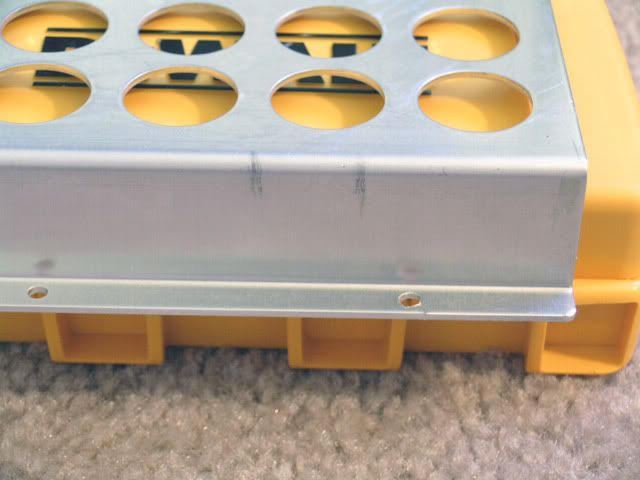
And after everything was polished and protected I added on the rubber molding to the front of the plate. As I mentioned a while back it is part bling and part functional as it isolates the PSU from actually touching the PSU plate. Hopefully it will cut out any vibration or fan acoustics from resonating through the case. And of course a little X-Acto knife action to restore my circles where the molding crossed the plate circles.
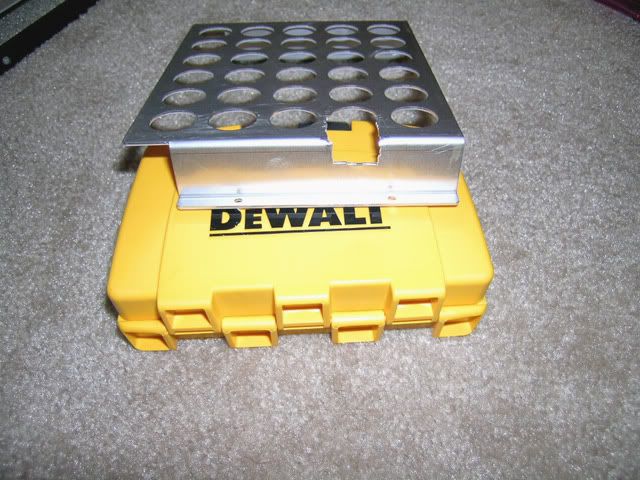
And here we go back into the case.
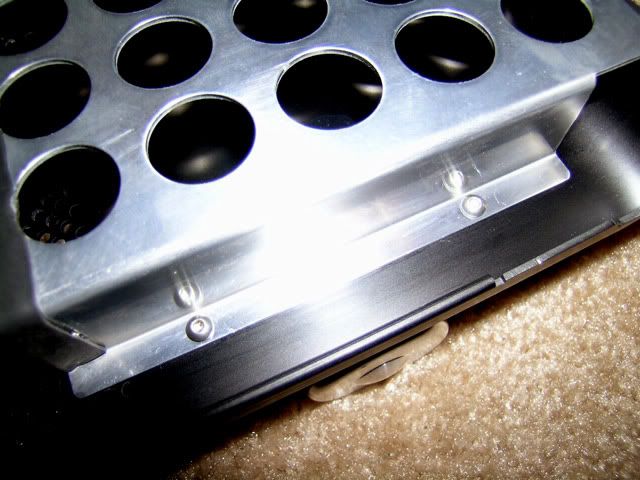
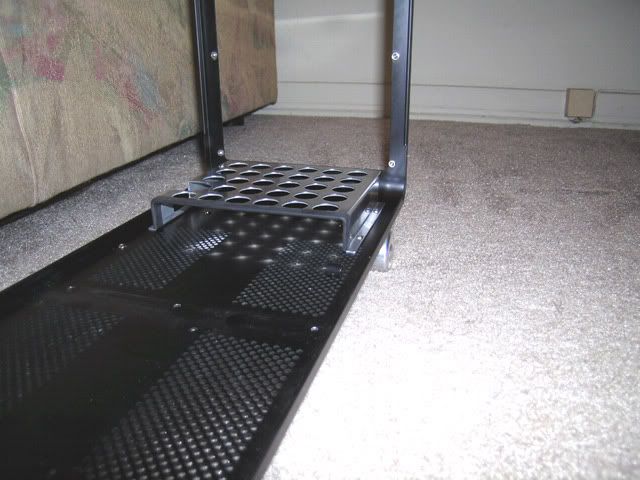
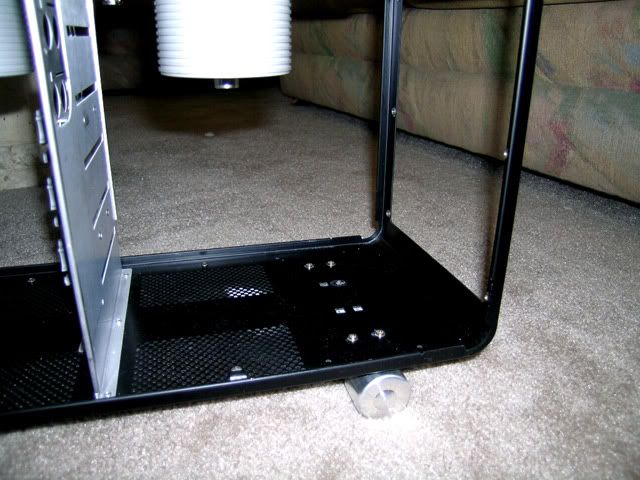
By the way notice the screws that are holding the wheels on? The stock screws stuck out enough that they were catching the sleeving on some of my PSU cables. I replaced them with some buttonhead 3mm x 5mm screws and now they fit pretty much flush. See that off white spot on the right side of the pic two holes up from the bottom? I put the molding on with super glue and was fortunate enough to decided to wear gloves. That spot is where the glove stuck to the rubber. :
As you recall a ways back I nibbled the plate and left it in a rather sorry state of affairs due to being concerned about taking pain pills and operating power tools. Was going to do the Dremel routine but as it turns out the above tool and a set of Swiss needle files saved the day.
So here we have the basic nibbling done and ready for a little sanding.
Sanded top and sides with 1200 grit wet and dry sandpaper (wet) to give it a slightly polished satin finish. Finished detail work on the slot with Swiss needle files.
Since I probably sanded through the anodizing I thought it might be a good idea to do some polishing and protecting with a metal cleaner and protector.
And after everything was polished and protected I added on the rubber molding to the front of the plate. As I mentioned a while back it is part bling and part functional as it isolates the PSU from actually touching the PSU plate. Hopefully it will cut out any vibration or fan acoustics from resonating through the case. And of course a little X-Acto knife action to restore my circles where the molding crossed the plate circles.
And here we go back into the case.
By the way notice the screws that are holding the wheels on? The stock screws stuck out enough that they were catching the sleeving on some of my PSU cables. I replaced them with some buttonhead 3mm x 5mm screws and now they fit pretty much flush. See that off white spot on the right side of the pic two holes up from the bottom? I put the molding on with super glue and was fortunate enough to decided to wear gloves. That spot is where the glove stuck to the rubber. :
-