 11.05.2024, 13:11
 Sprache ändern
 Registrieren
 Anmelden
Sie sind nicht angemeldet.
Lieber Besucher, herzlich willkommen bei: Aqua Computer Forum. Falls dies Ihr erster Besuch auf dieser Seite ist, lesen Sie sich bitte die Hilfe durch. Dort wird Ihnen die Bedienung dieser Seite näher erläutert. Darüber hinaus sollten Sie sich registrieren, um alle Funktionen dieser Seite nutzen zu können. Benutzen Sie das Registrierungsformular, um sich zu registrieren oder informieren Sie sich ausführlich über den Registrierungsvorgang. Falls Sie sich bereits zu einem früheren Zeitpunkt registriert haben, können Sie sich hier anmelden.

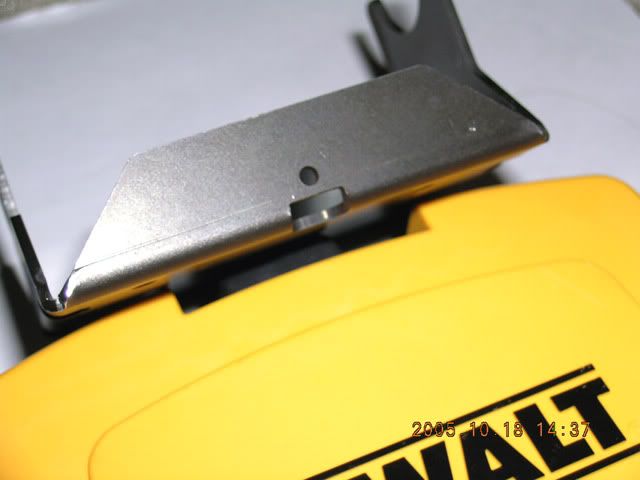
The Aquastream controller mounted to the front of the case had some minor issues after I had installed it a few days ago. So it was off to the hardware store to get some new tools. Found a nice little carbide cutting tool for my 35,000 RPM Dremel that looked like it might work out well as the new nibbler was a PITA to use. Basically I needed to open up the case a bit so that I could get the Aquastream pump connector and a molex power connector on.
So here is after a little Dremel tool action.
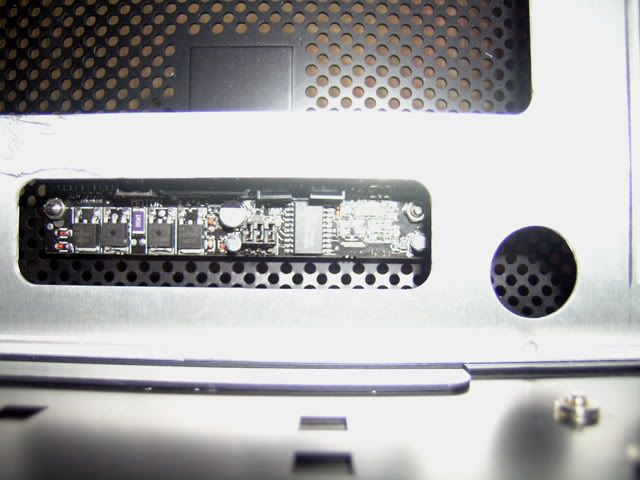
And here is the controller board back in the case.
Here is a top down look on the installed controller.
Unfortunately I failed to take into account the little raised surface on the Molex female connector housing. So out came the controller and time for a quick little buzz job.
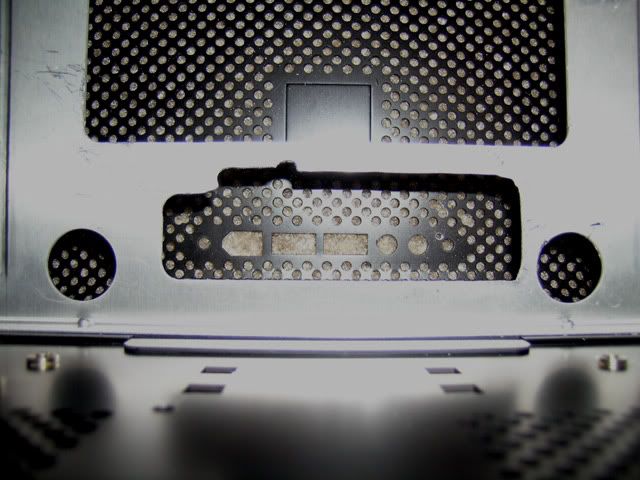
In this pic you can see the molex connector and the raised surface I was talking about while it is being used for a trial fit. Decided to buzz out a little room for the pump connector as well.

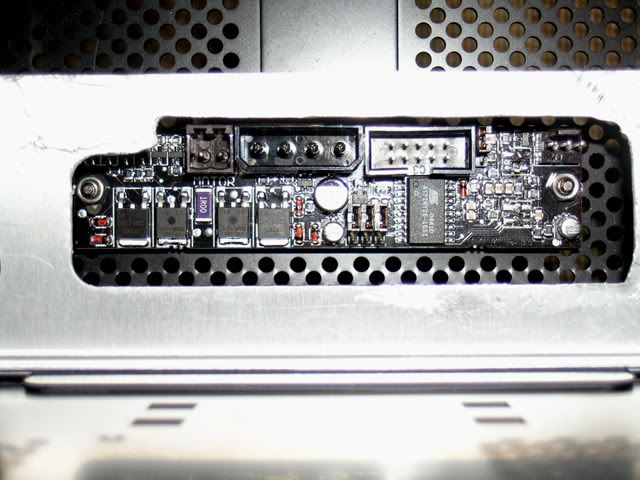
While I was doing all this work I decided to see how the black Aquastream faceplate would look. I think I like it better than the polished stainless look so for now it stays on.
Well with everything out of the case I decided that a little vinyl dyeing was in order for those grey HD rails. Grey just seems out of place on FF so I went to Pep Boys and got some Dupli-Color flat black (part number HVP106 in case you are interested) vinyl spray paint. Picked flat black as the grey rails were a little shiny already and wanted something that would compliment the black case anodizing and black HD's. Here is the removed HD rail assemblies with one painted and the other showing the stock condition.
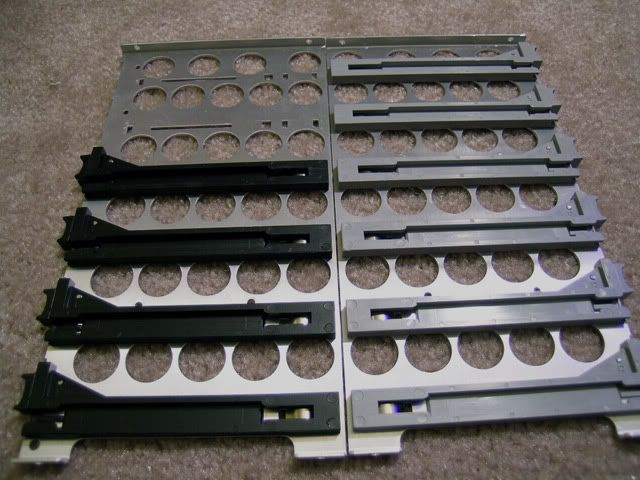
Here is the rail assemblies re-installed in the case with some more buttonhead screws.
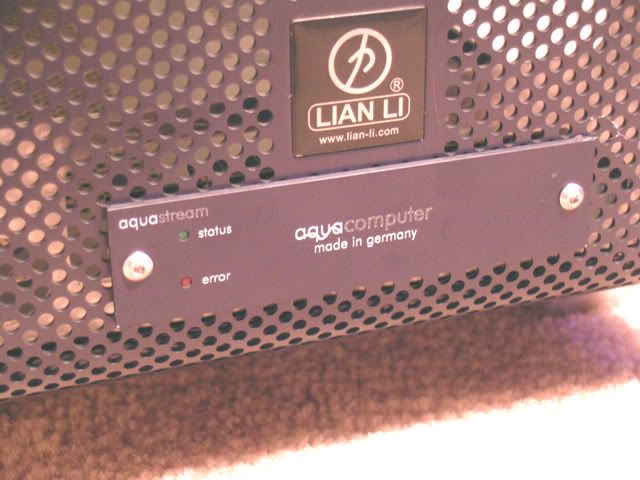
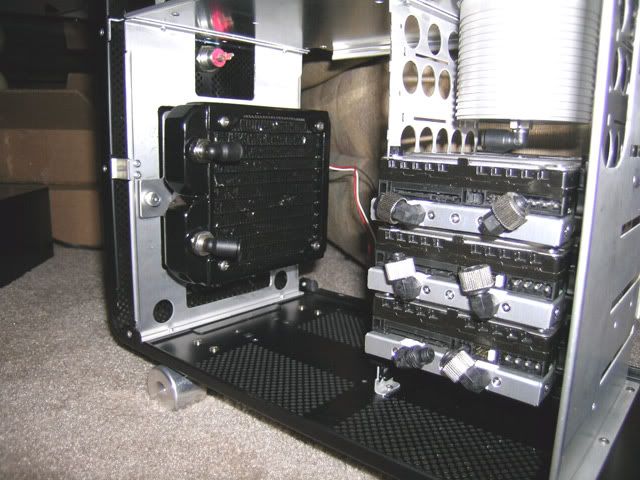
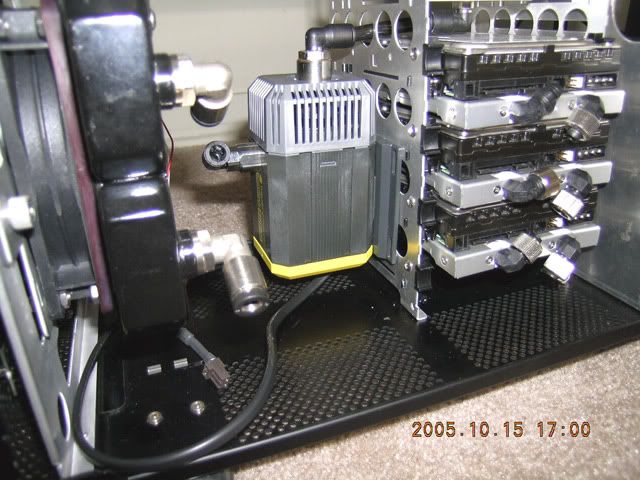
Here is the look forward with the Aquastream controller visible. The switch up in the middle of the case is being replaced with a Bulgin Anti-Vandal with a LED ring and you can see the rear of it. Hmmm....I think that shocking pink has to go. :
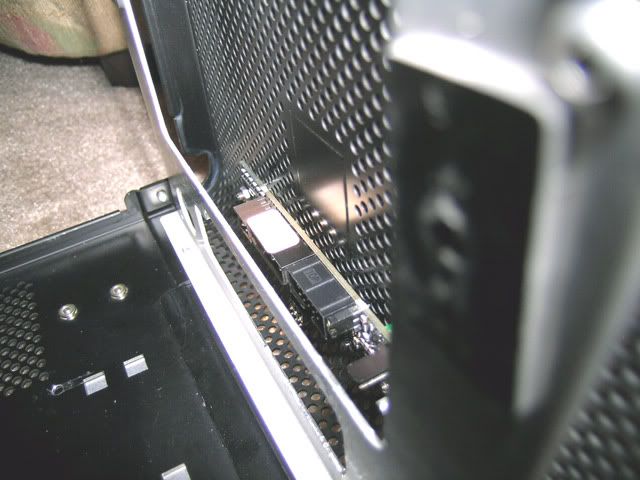
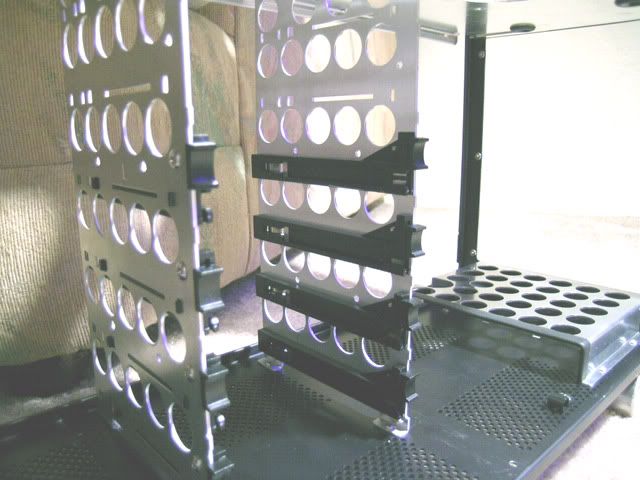
Here is a view of the forward Aquatube (HD circuit), three watercooled Raptor's, and the BI 120mm Pro rad in. The Aquastream pump for the HD circuit will sit inbetween the rad and the HD rack. Waiting for some more goodies from McMaster-Carr so I can mount the pump. Also having some special compression nuts made so that I can use 6mm x 8mm tubing with the Koolance HD coolers that were designed for the 6mm x 9mm Koolance tubing. Should have the nuts done in a few weeks
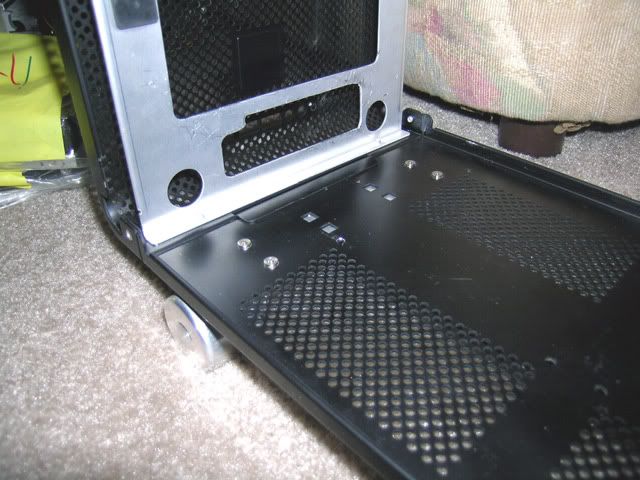
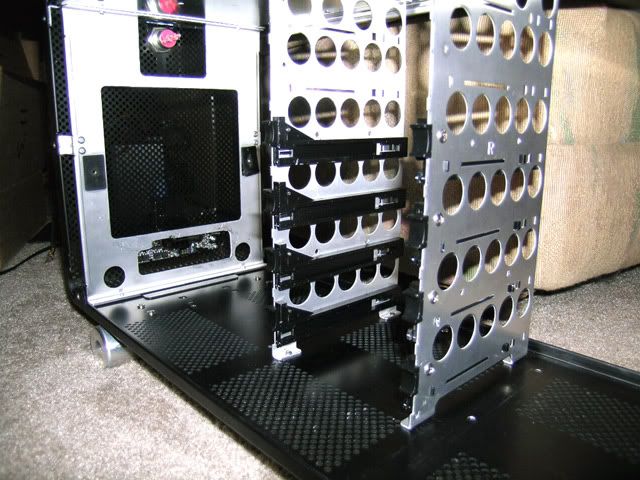
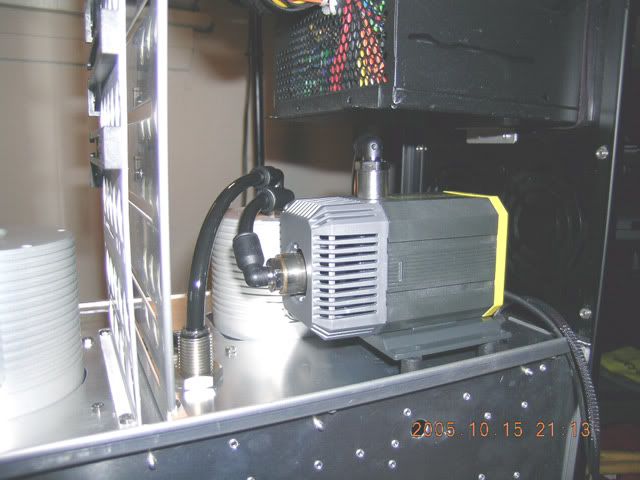
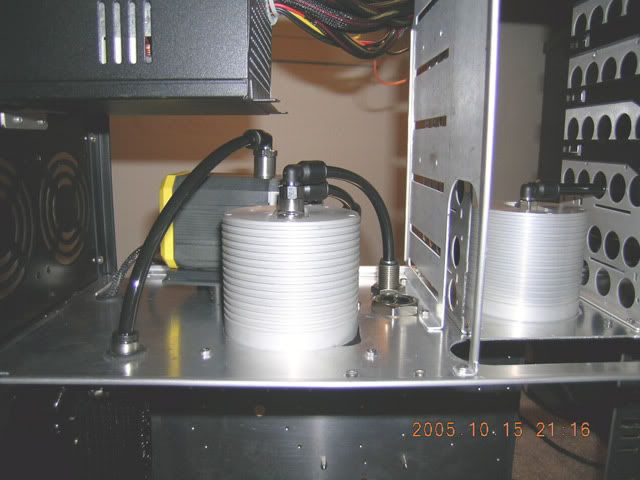
Here is a wide angle view of the bottom compartments.
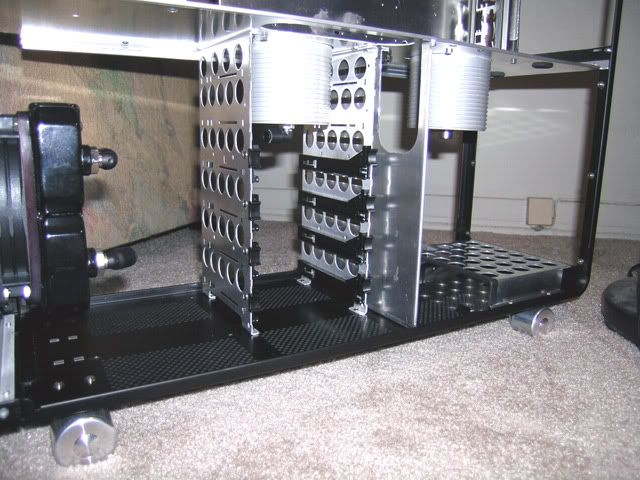
Another view of the installed HD racks and the Aquatubes back in the case.
Well that is it for now. Now that the major case work is done (I hope) I can get back to installing the PSU and running the wiring looms.
So here is after a little Dremel tool action.
And here is the controller board back in the case.
Here is a top down look on the installed controller.
Unfortunately I failed to take into account the little raised surface on the Molex female connector housing. So out came the controller and time for a quick little buzz job.
In this pic you can see the molex connector and the raised surface I was talking about while it is being used for a trial fit. Decided to buzz out a little room for the pump connector as well.
While I was doing all this work I decided to see how the black Aquastream faceplate would look. I think I like it better than the polished stainless look so for now it stays on.
Well with everything out of the case I decided that a little vinyl dyeing was in order for those grey HD rails. Grey just seems out of place on FF so I went to Pep Boys and got some Dupli-Color flat black (part number HVP106 in case you are interested) vinyl spray paint. Picked flat black as the grey rails were a little shiny already and wanted something that would compliment the black case anodizing and black HD's. Here is the removed HD rail assemblies with one painted and the other showing the stock condition.
Here is the rail assemblies re-installed in the case with some more buttonhead screws.
Here is the look forward with the Aquastream controller visible. The switch up in the middle of the case is being replaced with a Bulgin Anti-Vandal with a LED ring and you can see the rear of it. Hmmm....I think that shocking pink has to go. :
Here is a view of the forward Aquatube (HD circuit), three watercooled Raptor's, and the BI 120mm Pro rad in. The Aquastream pump for the HD circuit will sit inbetween the rad and the HD rack. Waiting for some more goodies from McMaster-Carr so I can mount the pump. Also having some special compression nuts made so that I can use 6mm x 8mm tubing with the Koolance HD coolers that were designed for the 6mm x 9mm Koolance tubing. Should have the nuts done in a few weeks
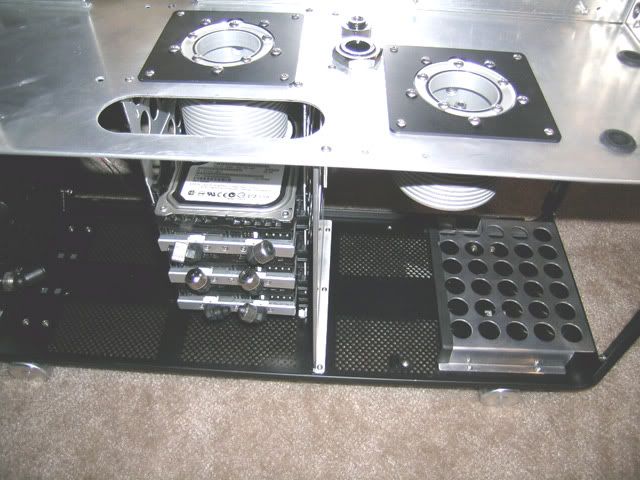
Here is a wide angle view of the bottom compartments.
Another view of the installed HD racks and the Aquatubes back in the case.
Well that is it for now. Now that the major case work is done (I hope) I can get back to installing the PSU and running the wiring looms.
Tried to add this post onto the previous one, but it keeps giving me an error message. I wonder if there is some specific length parameters that I am exceeding? Anyway here is my little update. ;D
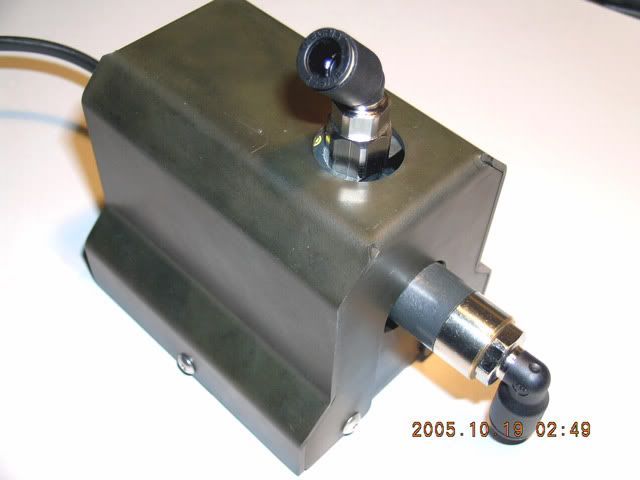
I have been fooling around with the Mazzer 8mm x 6mm tubing I got from Sharka and found a good use for it. Normally the Aquastream is mated to the Aquatube (in an Aquabay) by use of a 90 degree elbow. The Mazzer tubing is so flexible I was able to eliminate the 90 degree elbow on the GPU circuit.

The 90 degree elbow at the back of the Aquatube goes to my DD Fillport via a G 1/8 valve I got from AC.
I wanted to replace the metal 90 degree elbow at the top of the Aquatube, but the matching Legris fitting wouldn't have allowed me to get the LED's in.
I'm working on getting the pumps are going into the box now. The HD circuit pump is being mounted to the side of the HD rack on a specially built mount that I'm making from some scrap pieces of my V-2000. The CPU/NB circuit pump looks like it is going to get mounted to the bottom of the middle floor right next to the Aquatube and above the PSU. More on this later in the week.
Added:
If you would like to see just the pics without having to wade through all the commentary then you can go here to my Photobucket folder. There are some pics that never made it into the worklog for one reason or another do enjoy.
I have been fooling around with the Mazzer 8mm x 6mm tubing I got from Sharka and found a good use for it. Normally the Aquastream is mated to the Aquatube (in an Aquabay) by use of a 90 degree elbow. The Mazzer tubing is so flexible I was able to eliminate the 90 degree elbow on the GPU circuit.
The 90 degree elbow at the back of the Aquatube goes to my DD Fillport via a G 1/8 valve I got from AC.
I wanted to replace the metal 90 degree elbow at the top of the Aquatube, but the matching Legris fitting wouldn't have allowed me to get the LED's in.
I'm working on getting the pumps are going into the box now. The HD circuit pump is being mounted to the side of the HD rack on a specially built mount that I'm making from some scrap pieces of my V-2000. The CPU/NB circuit pump looks like it is going to get mounted to the bottom of the middle floor right next to the Aquatube and above the PSU. More on this later in the week.
Added:
If you would like to see just the pics without having to wade through all the commentary then you can go here to my Photobucket folder. There are some pics that never made it into the worklog for one reason or another do enjoy.
Zitat von »r00t69«
Like where you put the Aquastream panel. Nice idea.
Thanks for the nice comment
The standard Lian-Li cable barely made it by routing it straight across the case. When routing it cleanly it missed by about 6 inches. :'( So it was either ditch the cable or splice the wiring loom. Once I decided to ditch the cable then it became apparent that something had to go into the empty space. The Aquastream sits within 5 inches of the controller so it seemed a no-brainer to me. Necessity is the mother of invention ;D
Looks much better with the black instead of the silver panel :-*.
"Live free or die: Death is not the worst of evils."
Well I am a little shy of posting some more FF pics today so I thought I would share some of my other modding activities. WTF has this to do with computers? I use a lot of computers in my amateur astronomy as well.
Before I started watercooling my computer I was watercooling my telescope camera. And you thought watercooling your computer was hightech, huh? : The cooler you can keep a CCD chip the more "performance" you can get out of it. What a concept, huh? I will have to look around for some pics of my old SBIG CCD camera. In the meantime I am working on modifying my Celestron C-11. The C-11 is a Schmidt-Cassegrain design telescope and as the name implies it is 11" in diameter so it can image galaxies a long time ago in a far away place. I am installing some fans and associated electrical stuff to keep my mirror cooled down.
In case you are wondering the fan holes weren't there when it left the factory and you void the warranty as soon as you pop the telsescope open.
Well enough fun as I have to get to bed so I can get my stuff at McMaster-Carr in the morning so I can keep on modding Feeding Frenzy. Hmmm....how about an Aqua Computer cooled telescope.
Before I started watercooling my computer I was watercooling my telescope camera. And you thought watercooling your computer was hightech, huh? :
The cooler you can keep a CCD chip the more "performance" you can get out of it. What a concept, huh? I will have to look around for some pics of my old SBIG CCD camera. In the meantime I am working on modifying my Celestron C-11. The C-11 is a Schmidt-Cassegrain design telescope and as the name implies it is 11" in diameter so it can image galaxies a long time ago in a far away place. I am installing some fans and associated electrical stuff to keep my mirror cooled down.In case you are wondering the fan holes weren't there when it left the factory and you void the warranty as soon as you pop the telsescope open.
Well enough fun as I have to get to bed so I can get my stuff at McMaster-Carr in the morning so I can keep on modding Feeding Frenzy. Hmmm....how about an Aqua Computer cooled telescope.
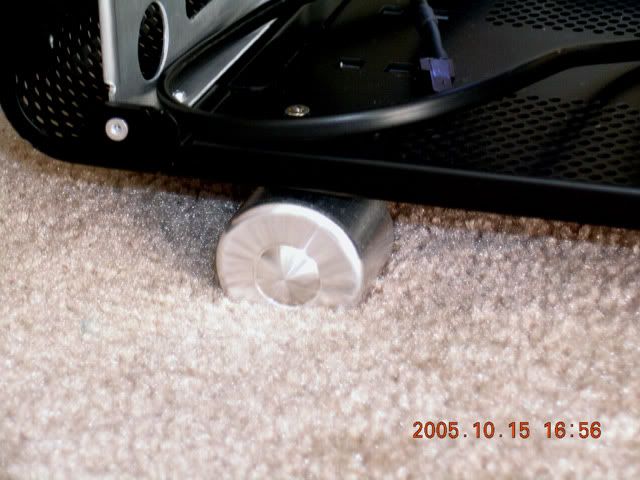
Just noticed that my case is starting to sink into the carpet from the weight. :o
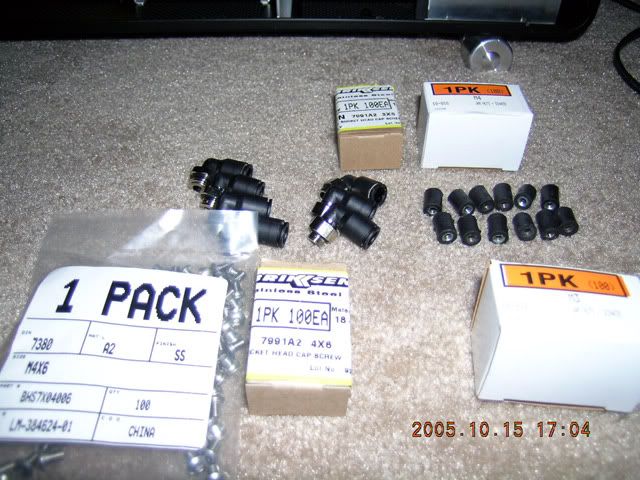
Also was up at McMaster-Carr this afternoon picking up some more computer toyz.
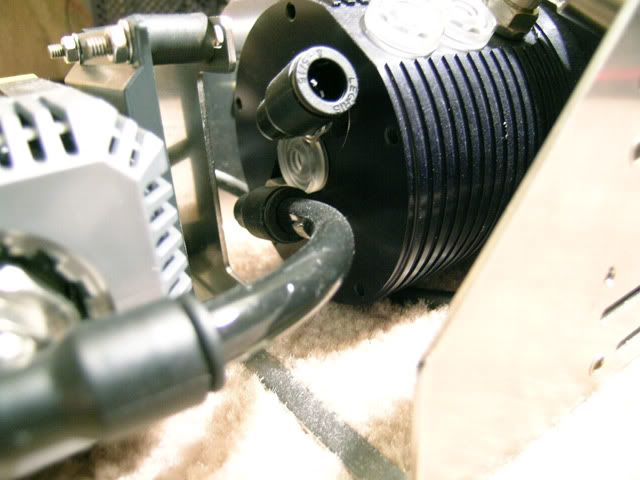
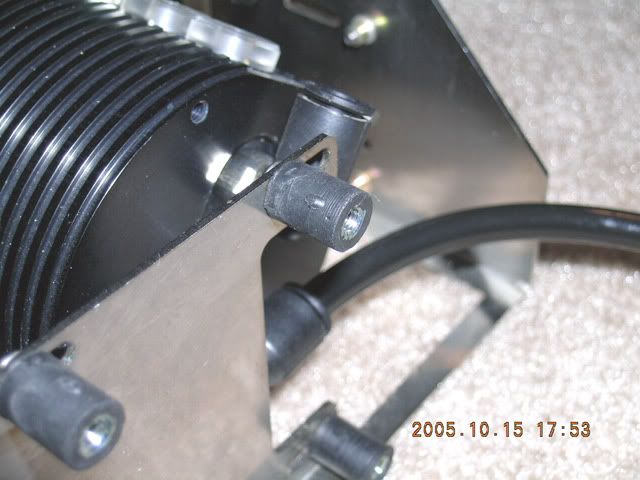
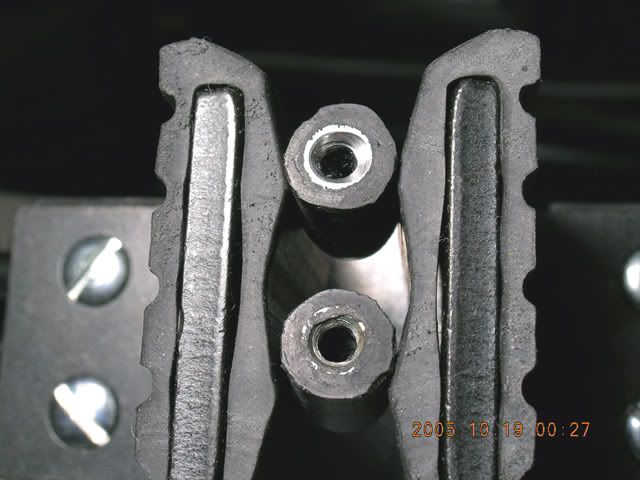
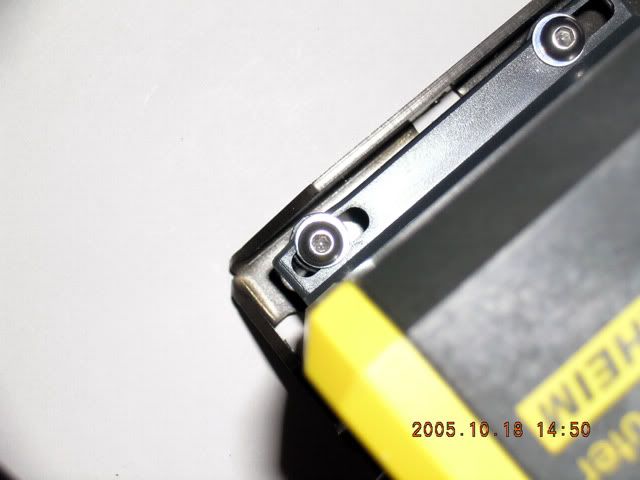
As you probably recall a ways back I have been somewhat unhappy with the way the Aquastream pump mounts onto various parts of FF. The stock pump mounts have those way too long studs coming out of it like seen here.

That always just bugged me so I went to the trouble of cutting off the extra material on the Aquabay side of the mount with a Dremel cut-off saw.
While all this looked better it still kind of left me with a sour taste in my mouth and I felt I was going to have to do some serious grinding and polishing to make it look half way decent. But after getting what I needed from McMaster-Carr today I took off those stock isolation mounts and replaced them with the "right stuff." These rubber isolation mounts are threaded for 4mm x 0.7mm screws on both sides. This opens up some new possibilities.
Now I have some nice looking mounts and they are attached with more buttonheads. We won't talk about the lousy material Eheim uses for their pump mounts. Got to go looking for some of those parts now. :
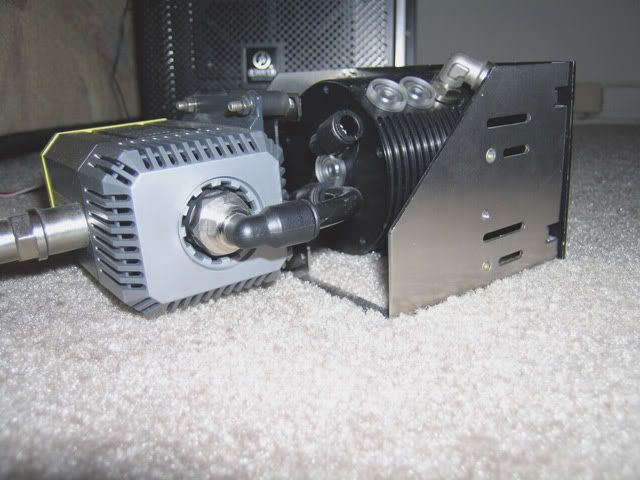
I know a lot of you have been wondering how the heck I was going to put three Aquastream pumps into a case where most people have difficulty trying to figure out where just one will go. The GPU circuit obviously mounts to the Aquabay as seen above. The HD and CPU/Chipset circuit has had a few people scratching their heads. I kind of new where I was going to put them, but after doing some mockup's I decided to make a few changes. I want it all to look very clean and give me room to manuver my wirilg looms in an equally clean manner. So I have decided to let you in on the plans.
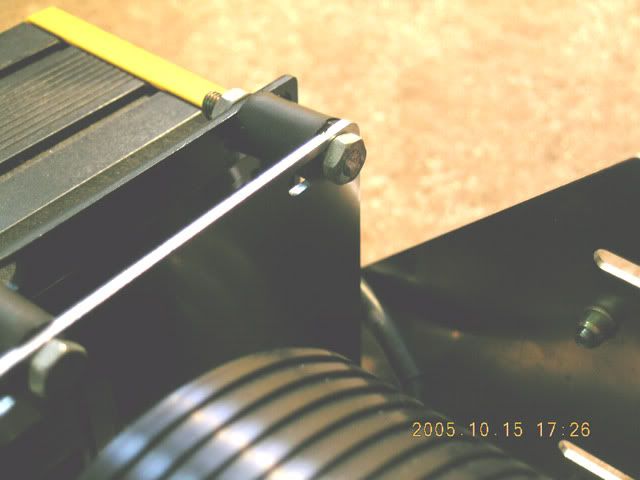
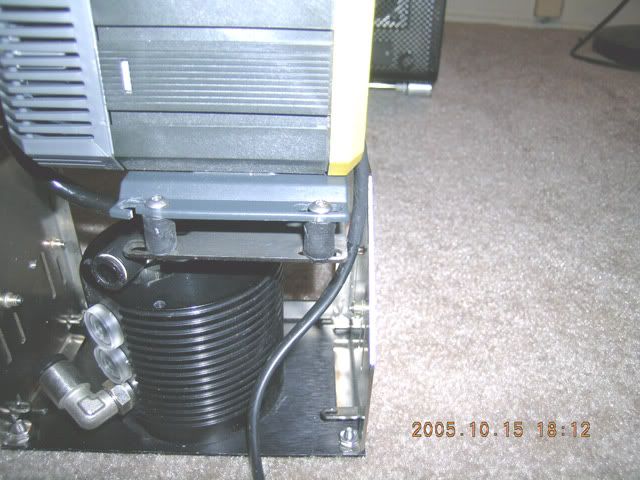
This pic is a mockup of the HD circuit pump. The holes and isolation mounts will be put in tomorrow, but it basically will look like this.
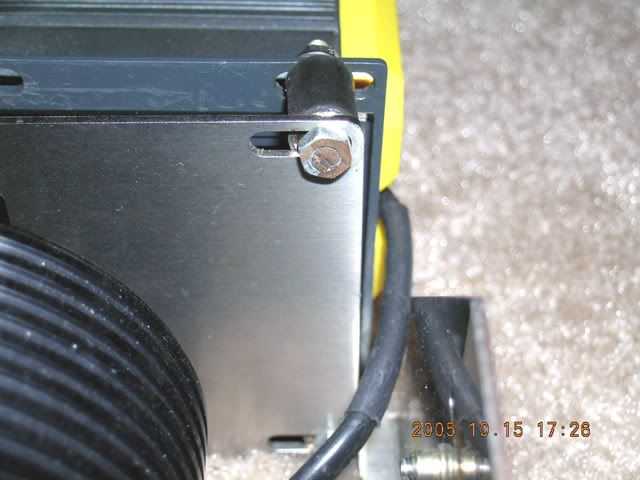
Here a few pics of my CPU/Chipset circuit that I mocked up today and will drill the holes over the next few days. This one shows what you normally will not see as it is on the side opposite from the window panel (more on that down the line).
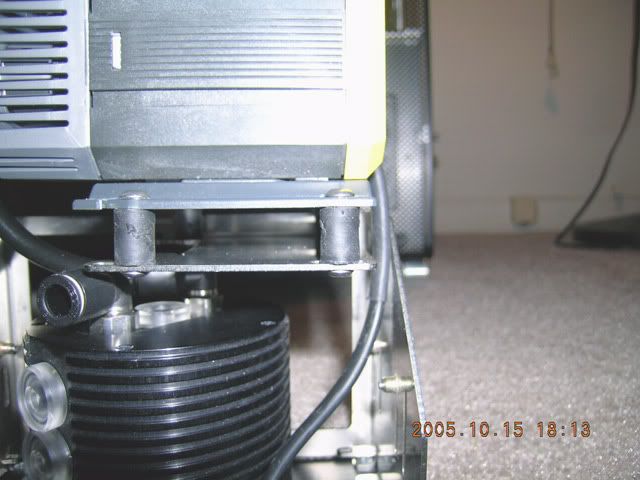
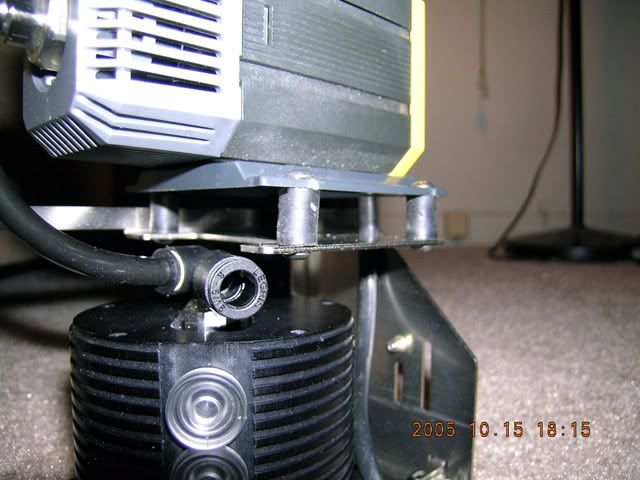
And here is the side that you would normally see from the window side of the case.
After I get the holes drilled and countersunk I will shoot the real pictures of it all installed as they are some neat stuff being done to make it all work correctly.
Also was up at McMaster-Carr this afternoon picking up some more computer toyz.
As you probably recall a ways back I have been somewhat unhappy with the way the Aquastream pump mounts onto various parts of FF. The stock pump mounts have those way too long studs coming out of it like seen here.
That always just bugged me so I went to the trouble of cutting off the extra material on the Aquabay side of the mount with a Dremel cut-off saw.
While all this looked better it still kind of left me with a sour taste in my mouth and I felt I was going to have to do some serious grinding and polishing to make it look half way decent. But after getting what I needed from McMaster-Carr today I took off those stock isolation mounts and replaced them with the "right stuff." These rubber isolation mounts are threaded for 4mm x 0.7mm screws on both sides. This opens up some new possibilities.
Now I have some nice looking mounts and they are attached with more buttonheads. We won't talk about the lousy material Eheim uses for their pump mounts. Got to go looking for some of those parts now. :
I know a lot of you have been wondering how the heck I was going to put three Aquastream pumps into a case where most people have difficulty trying to figure out where just one will go. The GPU circuit obviously mounts to the Aquabay as seen above. The HD and CPU/Chipset circuit has had a few people scratching their heads. I kind of new where I was going to put them, but after doing some mockup's I decided to make a few changes. I want it all to look very clean and give me room to manuver my wirilg looms in an equally clean manner. So I have decided to let you in on the plans.
This pic is a mockup of the HD circuit pump. The holes and isolation mounts will be put in tomorrow, but it basically will look like this.
Here a few pics of my CPU/Chipset circuit that I mocked up today and will drill the holes over the next few days. This one shows what you normally will not see as it is on the side opposite from the window panel (more on that down the line).
And here is the side that you would normally see from the window side of the case.
After I get the holes drilled and countersunk I will shoot the real pictures of it all installed as they are some neat stuff being done to make it all work correctly.
Very nice again
If you leave the pump there, you have to cover it with a FMJ because the magnetism of the pump can damage the HDDs, an it will if the pump is mounted so close to the drives. Better cover it with a FMJ, but I'm not sure if a FMJ also covers from underneath ?
*DiTTo*
plus the aquastream is not a nice looking pump & you really do need one for that hard drive section. they are also shielded at the bottom. 6 self tapping screws secure the metal top cover to the base plate.
no prizes for guessing what they'll be replaced with, though!
;D
(hint: begins with 'b' and ends in 'uttonhead screws')
How did you guess? ;D Those sheet metal screws are fugly. Just so happens I have two of those FMJ's so I think that at least one will make an appearance in FF. Needs a paint job though and the weather is not cooperating here in California ATM.
I don't think I will mount it to the side of the HD rack though as I think it would be too heavy with the FMJ.Added 10-18-05:
Well even I am amazed about how popular Feeding Frenzy seems to be. I just looked at my Photobucket stats for the last 30 days and I have definitely been getting my money's worth on having a paid account. ;D
Monthly bandwidth used: 33.485 Gb
Monthly hits: 360,975
Wow...just wow! :o
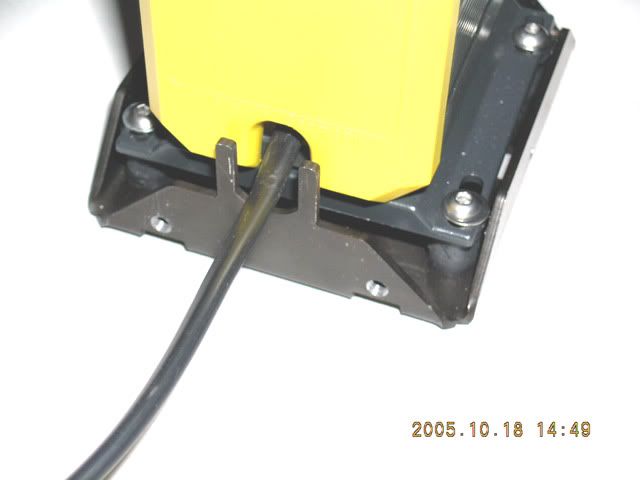
Okay for today I am trying to get the HD pump circuit pump going in the right direction. After giving it considerable thought I have decided to use the Aqua Computer FMJ pump cover. Just don't entirely feel comfortable about putting a big magnet right next to my HD's no matter what anyone says. Call it just erring on the side of caution.
So the problem in mounting the pump to the HD rack is two fold. First is the necessity to mount the pump to the FMJ and secondly to mount the FMJ to the HD rack. I think I have come up with a novel solution.
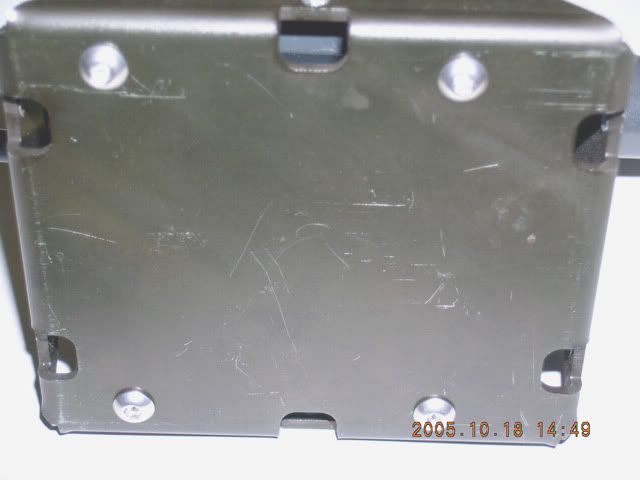
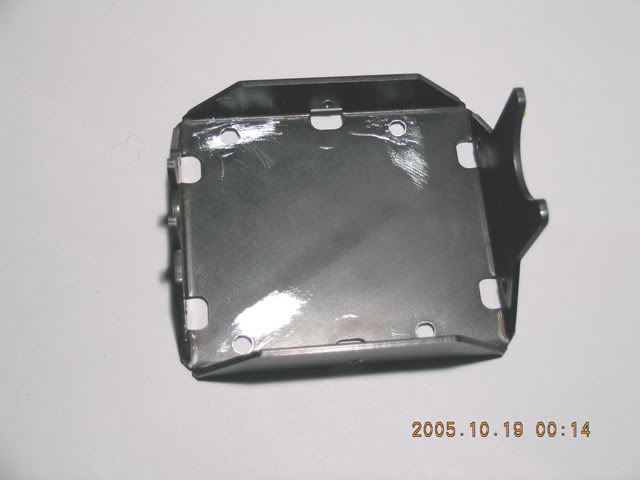
Here are the basic parts to start with. There are four holes in the bottom plate for mounting the pump and there are 6 holes that are used to mount the pump cover to the base.
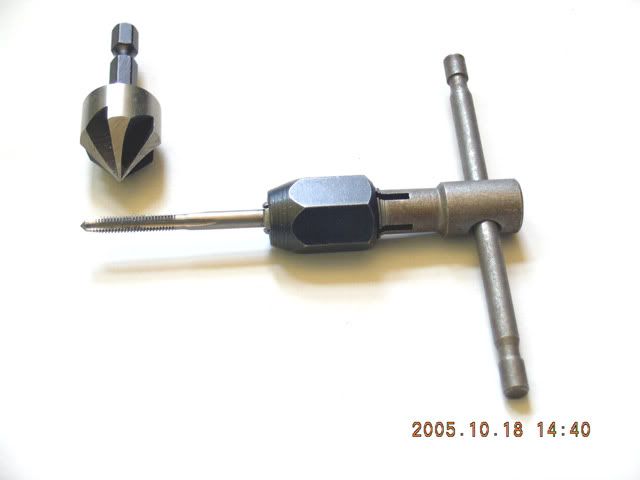
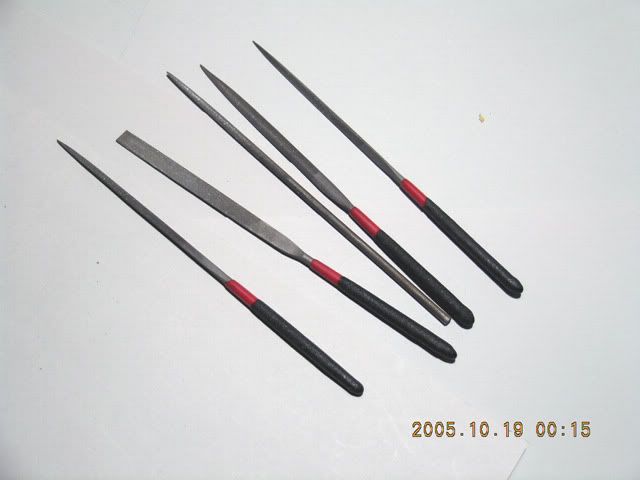
The first think is to make sure you have the proper tools handy. Here is my 4mm x 0.7mm hand tap, a multi-flute countersinking tool, and a set of swiss needle files.
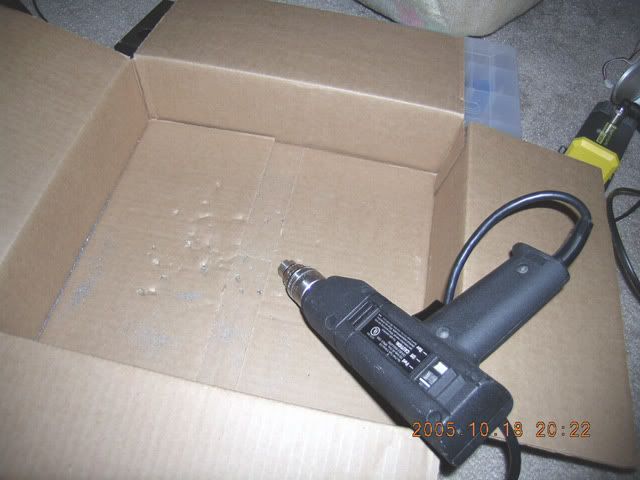
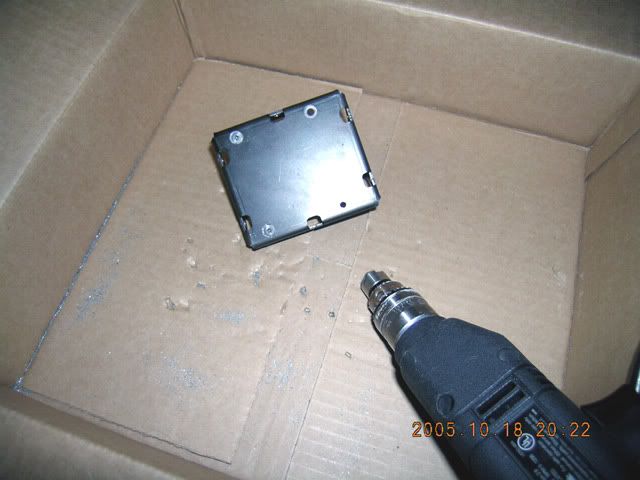
Since I live in an apartment I don't have a place to do machining of stuff as I don't want to be trying to vaccum up small metal particles all week. So this is my portable machining containment system. When you get done machining you just throw away the box.
Here is the first go around on getting the pump mounted using my mounts I got from McMaster-Carr. Looks nice with the buttonheads, but it's a problem because now it won't lay flat against the HD rack.
So the solution appears to be that I need to use flathead screws so the pump screws mount flush. Fortunately I anticipated needing this for the CPU/NB pump mount and picked up a box of 4mm x 6mm stainless flathead socket cap screws. This is where the countersinking tool comes into play. Since this is all hand done with a drill you have to do frequent checks to make sure you don't go to far. Here you can see three holes done and one still needing to be countersunk for comparison purposes.
Here is them all countersunk ready for the flathead screws.
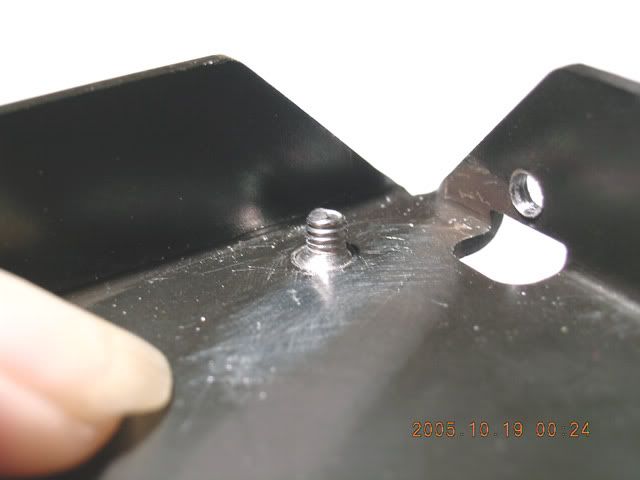
However, one fix often introduces another problem. To get the flathead flush with the bottom of the FMJ causes the tapered part of the screw to stick out the other side. This is a problem because now the mount doesn't screw all the way into the mount. :'( As you can see I have already tapped the cover plate mounting holes. The stock hole is slightly oversize, but the 4mm x 0.7mm tap leaves enough thread for what is needed.
One slight problem with the tapping is that the cover plate is a little undersize for a 4mm screw. So I found it easier to tap the holes with the cover plate on.

So the fix is to countersink the mount with the same tool so that it will slip past the part sticking out. Here is the stock and modified mounts for comparison. This is also hand done so it is best to do a little at a time and check for fit.
The countersinking tool kicked up a burr so the swiss needle files made short work of this problem.
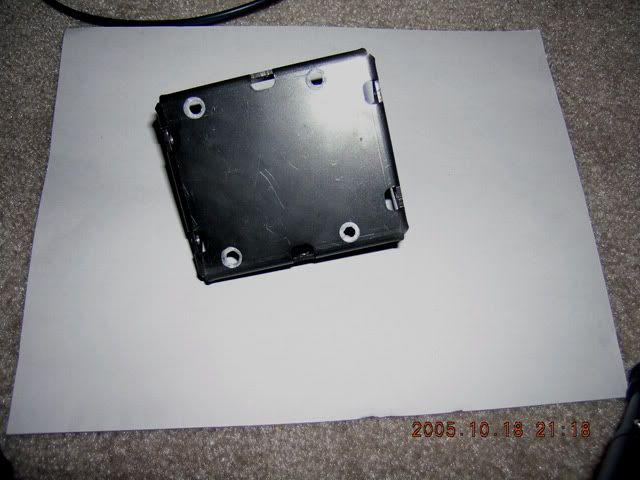
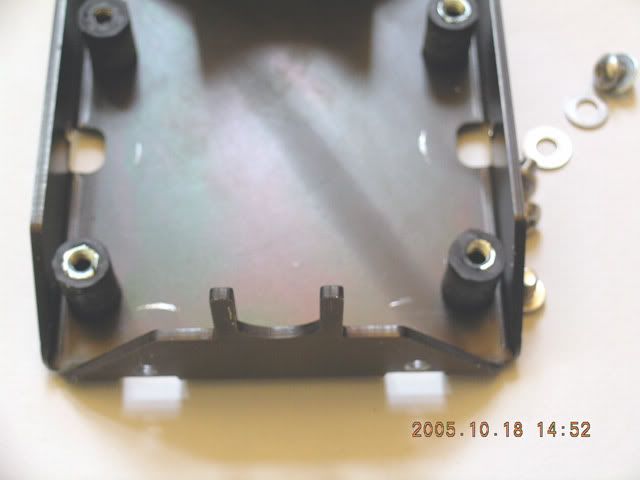
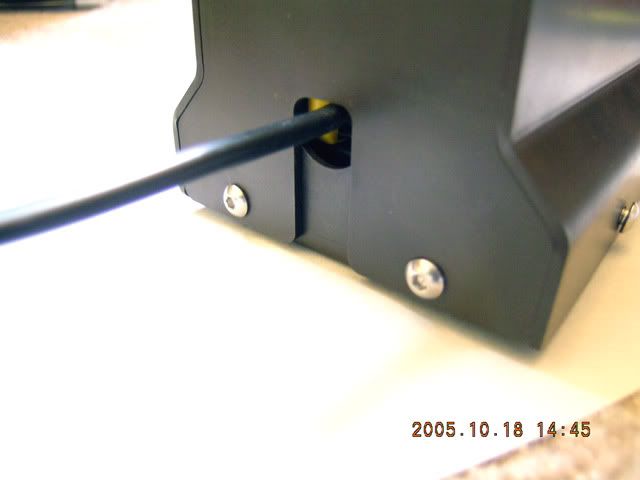
Here we are with all four mounts countersunk and installed in the base plate.
Here is a view of the screws in from the other side.
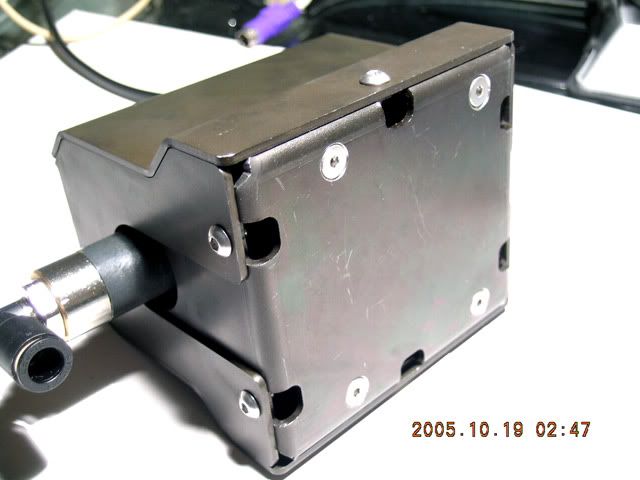
Here are some pics showing the Aquastream pump mounted with buttonheads.
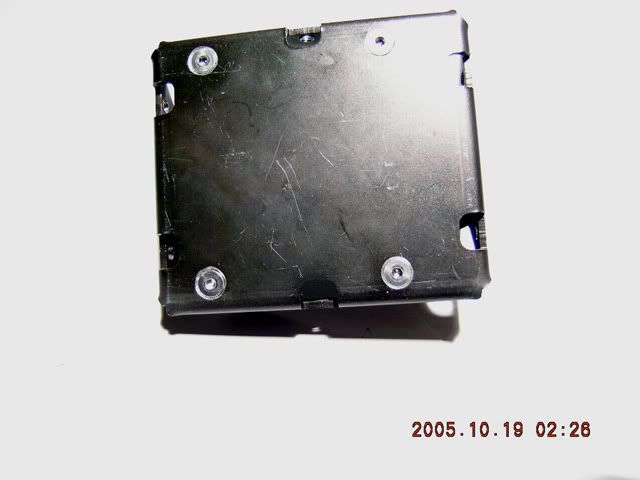
Here is the cover on and secured with more buttonheads.
And last but not least the completed mod in the following pics.
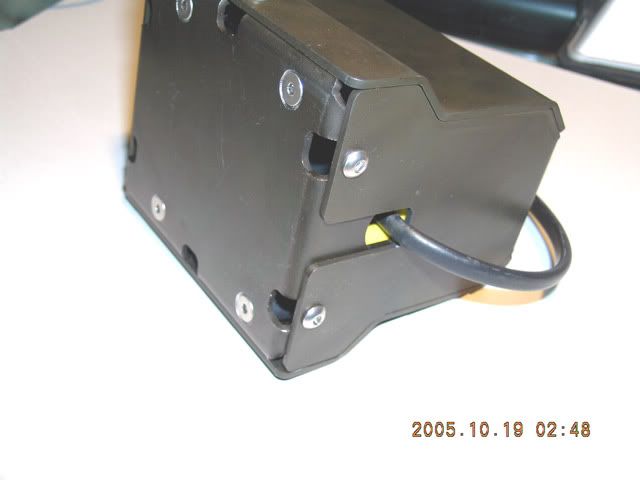
Next up is mounting to the HD rack. Luckily I have an extra HD rack (from the one I removed) to experiment on. ;D
So the problem in mounting the pump to the HD rack is two fold. First is the necessity to mount the pump to the FMJ and secondly to mount the FMJ to the HD rack. I think I have come up with a novel solution.
Here are the basic parts to start with. There are four holes in the bottom plate for mounting the pump and there are 6 holes that are used to mount the pump cover to the base.
The first think is to make sure you have the proper tools handy. Here is my 4mm x 0.7mm hand tap, a multi-flute countersinking tool, and a set of swiss needle files.
Since I live in an apartment I don't have a place to do machining of stuff as I don't want to be trying to vaccum up small metal particles all week. So this is my portable machining containment system. When you get done machining you just throw away the box.
Here is the first go around on getting the pump mounted using my mounts I got from McMaster-Carr. Looks nice with the buttonheads, but it's a problem because now it won't lay flat against the HD rack.
So the solution appears to be that I need to use flathead screws so the pump screws mount flush. Fortunately I anticipated needing this for the CPU/NB pump mount and picked up a box of 4mm x 6mm stainless flathead socket cap screws. This is where the countersinking tool comes into play. Since this is all hand done with a drill you have to do frequent checks to make sure you don't go to far. Here you can see three holes done and one still needing to be countersunk for comparison purposes.
Here is them all countersunk ready for the flathead screws.
However, one fix often introduces another problem. To get the flathead flush with the bottom of the FMJ causes the tapered part of the screw to stick out the other side. This is a problem because now the mount doesn't screw all the way into the mount. :'( As you can see I have already tapped the cover plate mounting holes. The stock hole is slightly oversize, but the 4mm x 0.7mm tap leaves enough thread for what is needed.
One slight problem with the tapping is that the cover plate is a little undersize for a 4mm screw. So I found it easier to tap the holes with the cover plate on.
So the fix is to countersink the mount with the same tool so that it will slip past the part sticking out. Here is the stock and modified mounts for comparison. This is also hand done so it is best to do a little at a time and check for fit.
The countersinking tool kicked up a burr so the swiss needle files made short work of this problem.
Here we are with all four mounts countersunk and installed in the base plate.
Here is a view of the screws in from the other side.
Here are some pics showing the Aquastream pump mounted with buttonheads.
Here is the cover on and secured with more buttonheads.
And last but not least the completed mod in the following pics.
Next up is mounting to the HD rack. Luckily I have an extra HD rack (from the one I removed) to experiment on. ;D
looks good TN, but how are you mounting the fmj to the hard drive rack ? its that im puzzled y you really needed to countersink the fmj ??? lol i see you did fitted the buttonhead bolts ;D
I had to countersink the holes so that the FMJ would lay flat up against the HD rack. Normally the AC mounts have studs protruding from each side and mine do not. Also I want to use the existing holes on the HD rack and thus I need to drill some more holes that will fit this pattern. See the next pic for a better explanation.

So what do you guys think about using these FMJ's on all the Aquastream pumps I have in FF? I actually have two of these FMJ's and am placing a new order so I could get another one soon. Erasmus354 suggested covering them in the flat black aluminum foil I used on my optical drives. Been mulling it over as it would definitely look hot, but also thinking about all the extra weight as they weigh about 1.5 lbs a piece. :o
lol i still cant figure it out, but im sure you got a plan
the aquabay is not designed to have a fmj :'( well in stock form anyways. you might beable to modify it to fit. unless you can do this i would have thought 2 would be enough.
Plan? There ain't no plan. ;D This project just goes from one problem to another problem.
I noticed it would take some heavy Dremel time to fit the FMJ to the Aquabay. :
not sure i like the way the washers are on the aquastream base. surely given that you've gone to so much trouble replacing the rubber anti vibration mounts, you'd have put the correct size on, so that they don't sit off-centre?
ps. just being picky i know, so please don't send me to theatre with "amputate both hands" on my card! ;D
ROFL
Thanks for noticing that! Figured no one would notice. :
I will go back and see if I can get something better, but IIRC those washers are the ones that came from AC. I think the Eheim base isn't wide enough to properly accomodate a standard flat washer.The real solution will be to make up some Aquastream bases made up out of metal. Something to do for a rainy day or when I can find someone who has a mill who owes me a favor.
-