 20.05.2026, 05:05
 Sprache ändern
 Registrieren
 Anmelden
Sie sind nicht angemeldet.
Lieber Besucher, herzlich willkommen bei: Aqua Computer Forum. Falls dies Ihr erster Besuch auf dieser Seite ist, lesen Sie sich bitte die Hilfe durch. Dort wird Ihnen die Bedienung dieser Seite näher erläutert. Darüber hinaus sollten Sie sich registrieren, um alle Funktionen dieser Seite nutzen zu können. Benutzen Sie das Registrierungsformular, um sich zu registrieren oder informieren Sie sich ausführlich über den Registrierungsvorgang. Falls Sie sich bereits zu einem früheren Zeitpunkt registriert haben, können Sie sich hier anmelden.
![]() Top_Nurse
Top_Nurse
Senior Member

Zitat von »Mr_modnaR«
Quality job! well impressed!
Quick question: will those three sets of wires be wired to one molex connector, or will they each have their own?
cheers
They will all be soldered into one standard four wire PSU loop. Thanks for the nice comments. ;D
Very cool, very clean, thats the way I like itYou would have earned more replies if you had posted this in "Selbstgebautes", because not everybody has a look in the English Forum. Just that you don't think that's not much going on here
Thanks for the nice words.
 Must be my German ancestry coming out, but I like clean installs as well. I didn't realize that you could post English projects into the German forums as I thought they all got moved here.
![]() Top_Nurse
Top_Nurse
Senior Member
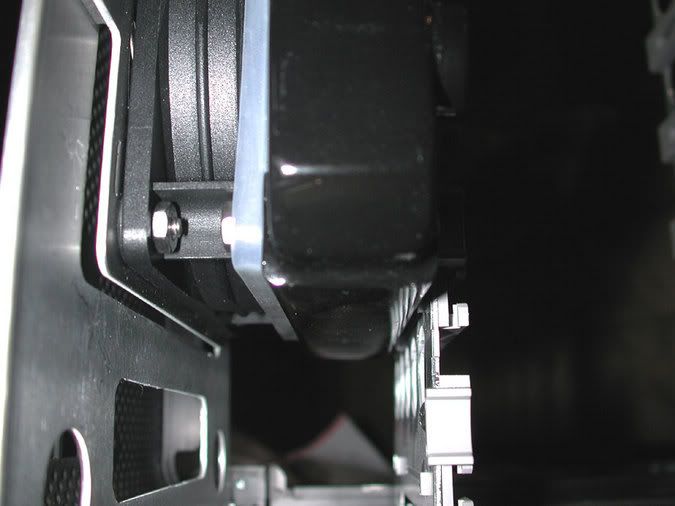
Just a little update today as I picked up a bunch of stainless buttonhead socket cap screws Friday from McMaster Carr. Never did like those low profile screws they use as they seem to blocky to me. 
Here is what I used to have to look at before. I had used some inch standard buttonheads when I originally bolted the Aquabay together, which you see in the 4 corners.
Here is what I get to see now.
And I also decided to change a lot of the other screws to buttonheads as well.
Here is what I used to have to look at before. I had used some inch standard buttonheads when I originally bolted the Aquabay together, which you see in the 4 corners.
Here is what I get to see now.
And I also decided to change a lot of the other screws to buttonheads as well.
![]() Top_Nurse
Top_Nurse
Senior Member
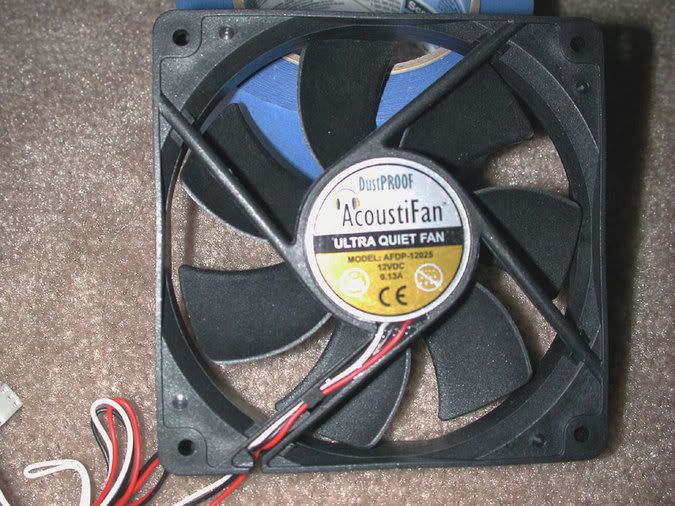
As you recall from earlier on in this project I used some silicon fan gaskets that really work well, but the they were fugly white. That has just irked the heck out of me everytime I looked at my case. So I tried vinyl dye...nada. Then I tried a Dykem color pen...nada. Then I tried acrylic enamel...nada. Then I went to the store and got some RIT dye...YES! So for today I have been patiently awaiting for the RIT dye to do it's thing for the last 12 hours. It takes a while to dye silicon.
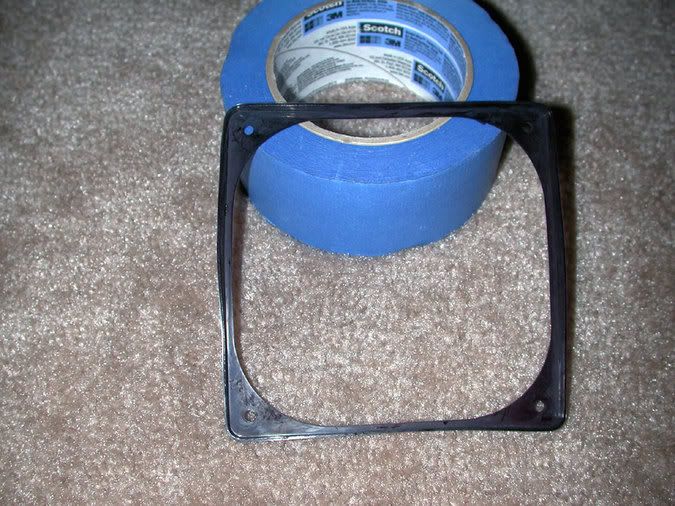
Here are a few pics of what it was like before.
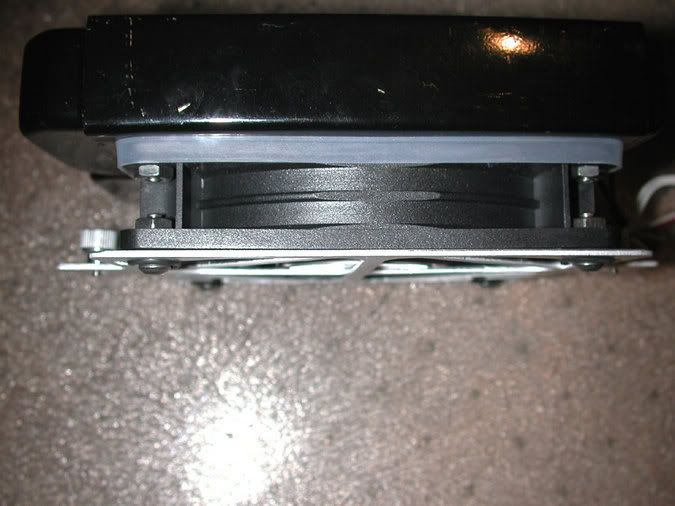
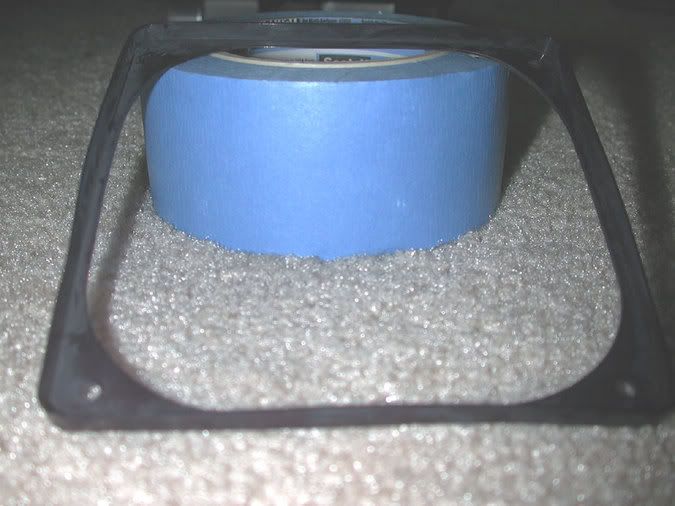
So here it is after being in the dye for about 12 hours.
As you recall I said I was going to take care of the fugly red/white/black wires at a later date. With the Acoustifan it is not really feasible to sleeve all the way to the motor as the glued in the wires to the wire channel. So the fix was a black Dykem pen.
Before:
After:
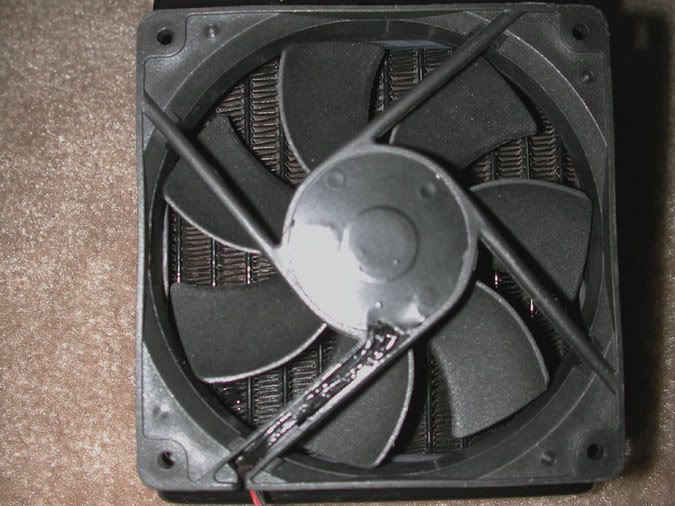
And here is what you get.
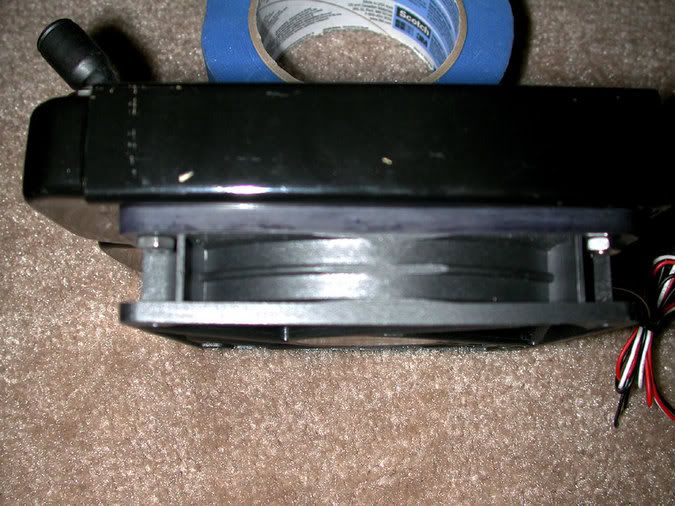
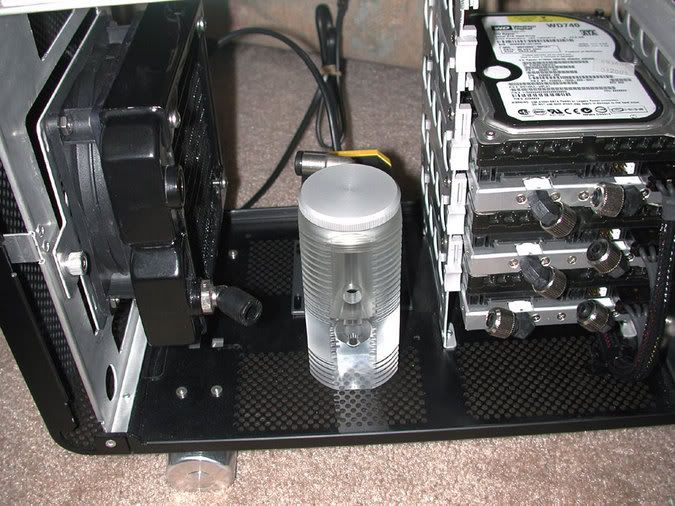
So now here is the rad/fan sub-assembly mounted back in to the case. Hey! What's that round looking thingy in the back of the case? See if you can guess what that is.
Here I turned up the brightness so you can see the gasket in a little better detail. Notice the white looking exudate? That is the salt coming back out of the silicon. After a few days I will wipe it off and rub some silicon oil back into the gasket.

And of course a little preview of what is coming down the line a bit.
Here are a few pics of what it was like before.
So here it is after being in the dye for about 12 hours.
As you recall I said I was going to take care of the fugly red/white/black wires at a later date. With the Acoustifan it is not really feasible to sleeve all the way to the motor as the glued in the wires to the wire channel. So the fix was a black Dykem pen.
Before:
After:
And here is what you get.
So now here is the rad/fan sub-assembly mounted back in to the case. Hey! What's that round looking thingy in the back of the case? See if you can guess what that is.
Here I turned up the brightness so you can see the gasket in a little better detail. Notice the white looking exudate? That is the salt coming back out of the silicon. After a few days I will wipe it off and rub some silicon oil back into the gasket.
And of course a little preview of what is coming down the line a bit.
![]() Top_Nurse
Top_Nurse
Senior Member
If you go back a while into this project you will see that my Aquatube is mounted into the Aquabay in a pretty much normal manner as seen below.
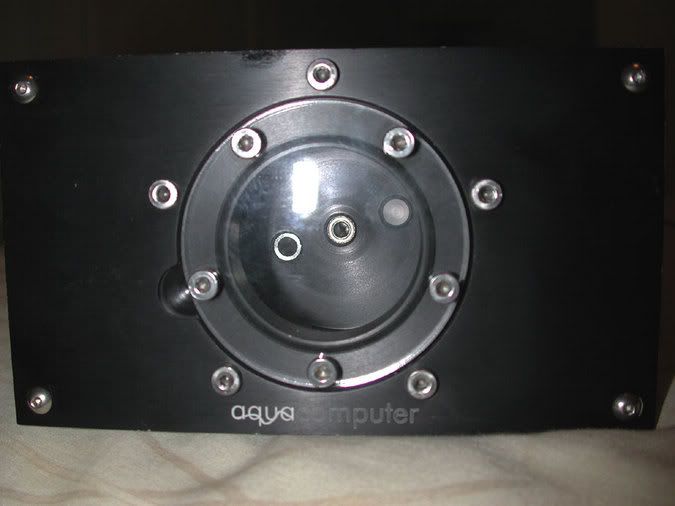
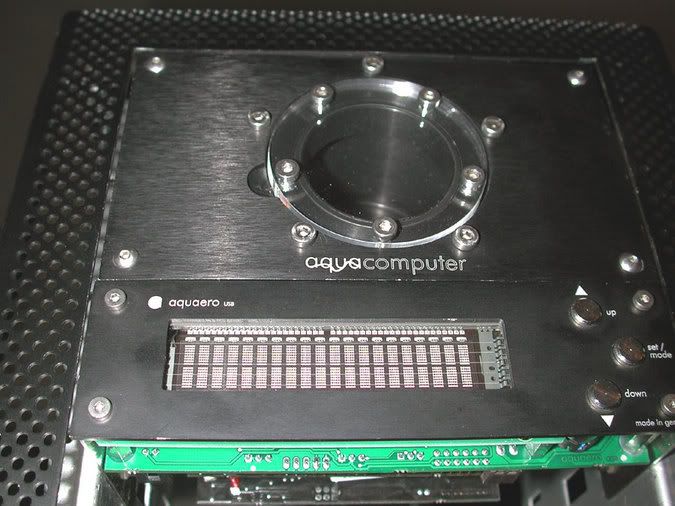
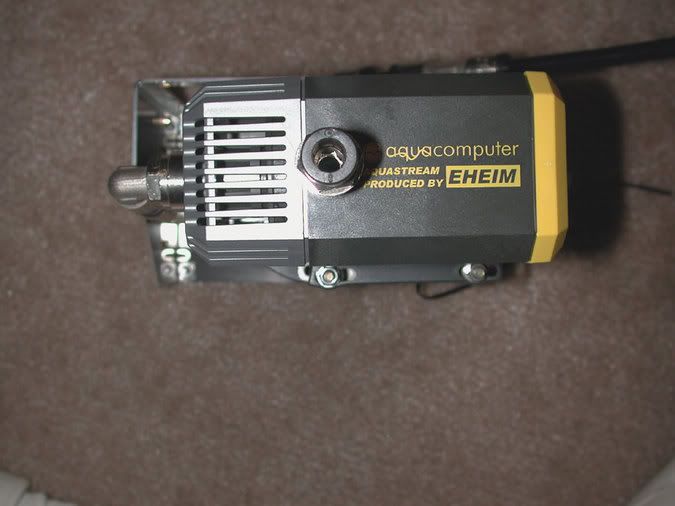
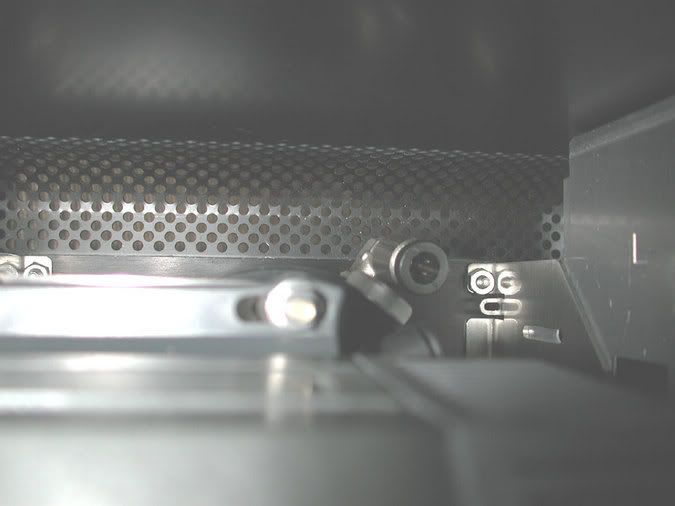
Well now that is all going to change. J-Pepper sugegsted that I flip the Aquabay upside down, but at first look I didn't think it was going to work well due to some asthetic and mechanical issues. However, after giving it a lot of thought I decided there was a way to make this all happen and get some advantages out of the deal. So here is what the front of my Aquabay/Aquatube looks like now. As you can see the ports are now all vertical instead of sitting at a lopside angle. This does two things. The first is that now it is possible to have the intake of the pump at a much lower part of the Aquatube. Second of all the return line gets to go in a different spot. Guess where it will be?
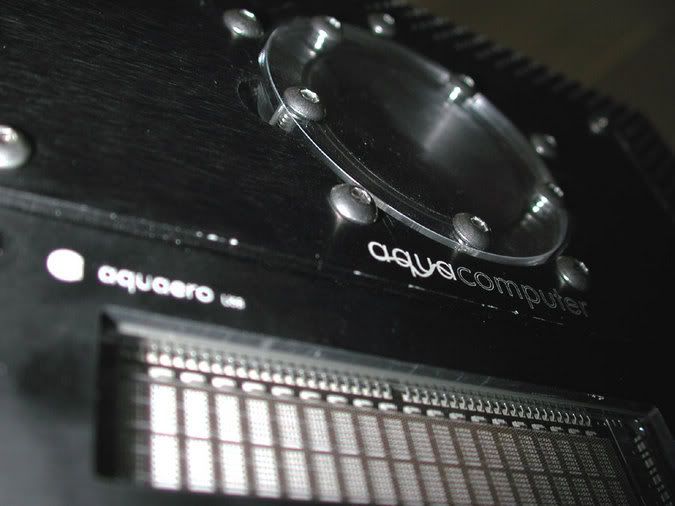
This pic shows a little more detail of the front. No more Aqua Computer name and everything is nice and black. The only downside here is that the notch on the Aquatube no longer matches up with the notch in the Aquabay front plate. Normally this might prove to be a problem if you need to get into the plexi plate cover a lot. Fortunately in my case I am using a DD Fillport to fill and bleed the Aquatube. The plexi will probably never be taken off.
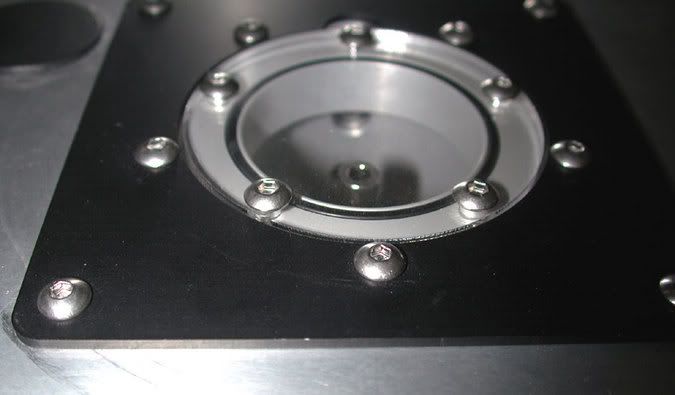
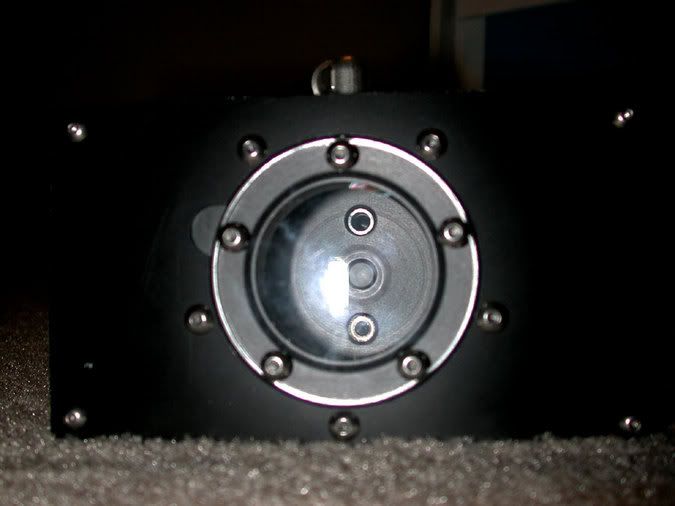
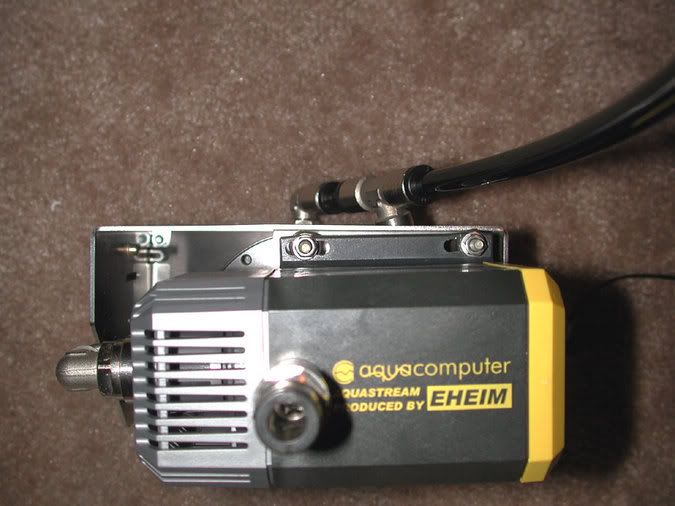
This is looking at the completed assembly from the bottom up (or the top if it were assembled in a conventional manner). You can just see the in-line temp probe coming down through the Aquabay right near the bottom of the Aquatube. One of the other asthetics was that I got to be able to put the silver/grey pump cover back on.
And of course the reason for doing this in the first place is that now the AquaStream pump has the name right side up. ;D
As I said before my return line is in a different place now. In this configuration the water will be coming in from the top of the Aquatube. I expect to get some decent action from having the water streaming in vertically right in front of the plexi. Here you can see what this will look like. Now in many cases this would not be possible to do, but the V2000 case has about 1.5 inches from the top of the top 5 1/4" bay to the top of the case. So in this instance everything is copasetic. The T fitting holds the Aquaero temp sensor and the two top LED mounts will be for the Aquaero dual LED setup.
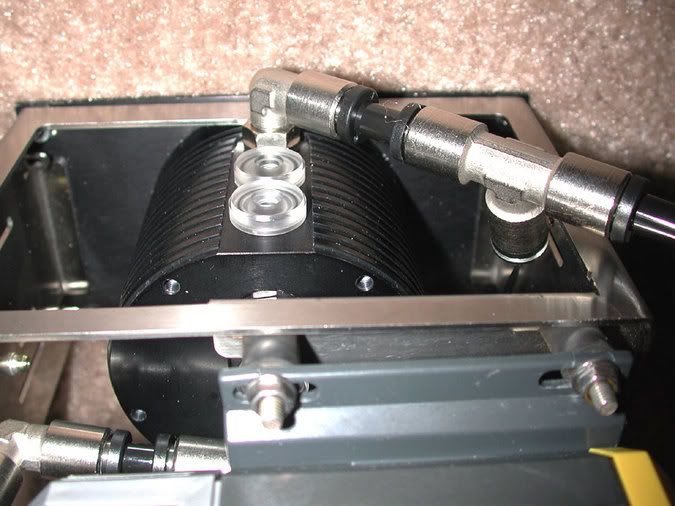
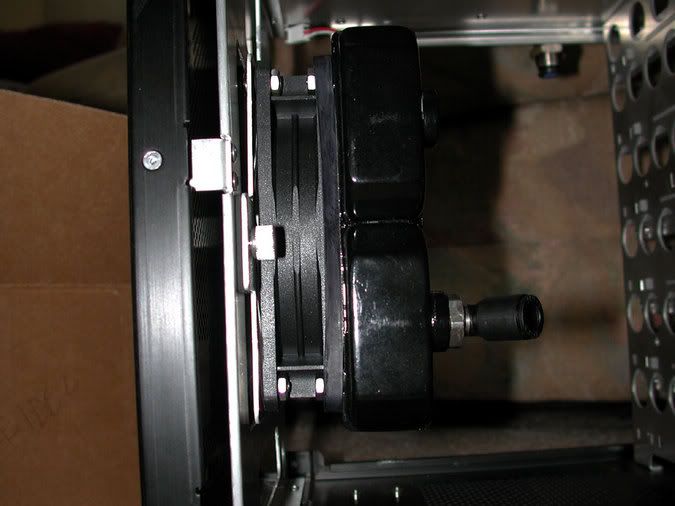
Here is another pic of what you would see if you were looking in from the middle of the case. Once I get it mounted in the case I will shoot some more pics so you can see some of the other advantaghes of doing it this way.
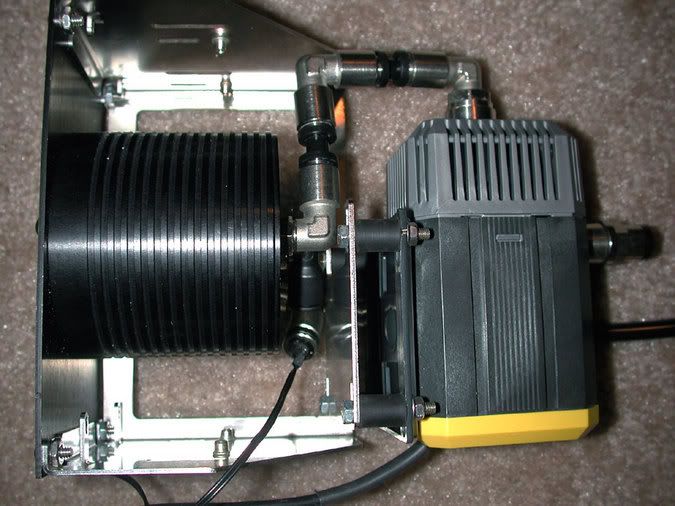
And finally here is a pic of the way it will sit in the case from the top view.
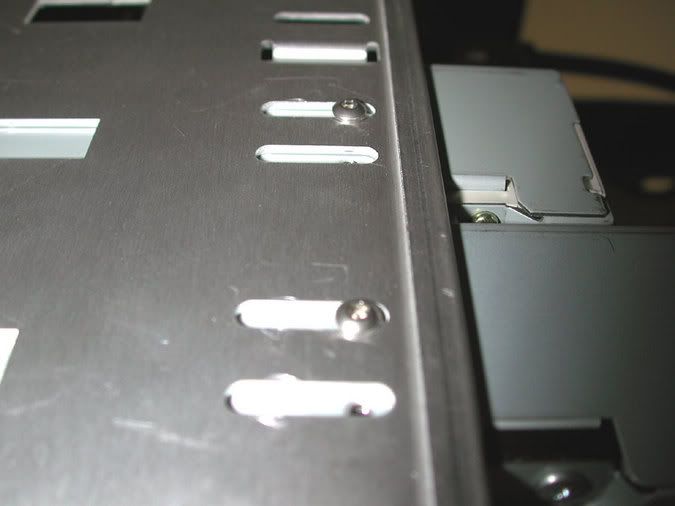
There is one slight problem with this setup. When you flip the Aquabay the nuts pressed in the Aquabay don't line up anymore with the case slots. So tomorrow I will be drilling some holes and tapping them.
Well now that is all going to change. J-Pepper sugegsted that I flip the Aquabay upside down, but at first look I didn't think it was going to work well due to some asthetic and mechanical issues. However, after giving it a lot of thought I decided there was a way to make this all happen and get some advantages out of the deal. So here is what the front of my Aquabay/Aquatube looks like now. As you can see the ports are now all vertical instead of sitting at a lopside angle. This does two things. The first is that now it is possible to have the intake of the pump at a much lower part of the Aquatube. Second of all the return line gets to go in a different spot. Guess where it will be?
This pic shows a little more detail of the front. No more Aqua Computer name and everything is nice and black. The only downside here is that the notch on the Aquatube no longer matches up with the notch in the Aquabay front plate. Normally this might prove to be a problem if you need to get into the plexi plate cover a lot. Fortunately in my case I am using a DD Fillport to fill and bleed the Aquatube. The plexi will probably never be taken off.
This is looking at the completed assembly from the bottom up (or the top if it were assembled in a conventional manner). You can just see the in-line temp probe coming down through the Aquabay right near the bottom of the Aquatube. One of the other asthetics was that I got to be able to put the silver/grey pump cover back on.
And of course the reason for doing this in the first place is that now the AquaStream pump has the name right side up. ;D
As I said before my return line is in a different place now. In this configuration the water will be coming in from the top of the Aquatube. I expect to get some decent action from having the water streaming in vertically right in front of the plexi. Here you can see what this will look like. Now in many cases this would not be possible to do, but the V2000 case has about 1.5 inches from the top of the top 5 1/4" bay to the top of the case. So in this instance everything is copasetic. The T fitting holds the Aquaero temp sensor and the two top LED mounts will be for the Aquaero dual LED setup.
Here is another pic of what you would see if you were looking in from the middle of the case. Once I get it mounted in the case I will shoot some more pics so you can see some of the other advantaghes of doing it this way.
And finally here is a pic of the way it will sit in the case from the top view.
There is one slight problem with this setup. When you flip the Aquabay the nuts pressed in the Aquabay don't line up anymore with the case slots. So tomorrow I will be drilling some holes and tapping them.
![]() Ze@lot
Ze@lot
Full Member
cool idea, but id have a test fit in the pc b4 id start drilling stuff. as having the setup like this limits you being only able to remove it by taking it into the main body of the pc. i like the idea of just slipping it out the front. id be worried id catch a wire or hose and then bork sumit up. im just not sure its gonna work with the pump on the back.
hope it works tho
i really like the button head screws though, i found a local supplier to me today that do them in stainless steel. much better than the pick'n mix selection AC seem to do.
hope it works tho
i really like the button head screws though, i found a local supplier to me today that do them in stainless steel. much better than the pick'n mix selection AC seem to do.
![]() CygnusX1
CygnusX1
God
Well you are one of the first ones who complain about the stock AC screws. The most users here really like them.
Nice Job Nurse I want to buy the v2000b too and want to use a Aquabay AT too, but now that I see the first time that the backholes of the mounted AT aren't in a vertical line, i'm not sure anymore about the Aquabay, because that sux :x But your method is nothing for me, I want to see the AC logo and it looks strange when you can't see that "thumbhole" of the AT at the outcut.
Nice Job Nurse
I want to buy the v2000b too and want to use a Aquabay AT too, but now that I see the first time that the backholes of the mounted AT aren't in a vertical line, i'm not sure anymore about the Aquabay, because that sux :x But your method is nothing for me, I want to see the AC logo and it looks strange when you can't see that "thumbhole" of the AT at the outcut.
![]() Ze@lot
Ze@lot
Full Member
Well you are one of the first ones who complain about the stock AC screws. The most users here really like them.
lol, i wasn't really complaining i was more like stating my personal taste. i like the look of the button shaped bolt over the AC bolts. i'm sure that most people like them, tbh i did before i seen TN's comp.
![]() x-stars
x-stars
God
CygnusX1 the aqua bay fits fine in that v2000b no drilling or modding needed.
Not at all, there are little pieces every 2nd bay which bewares the devices from "falling down" when they are not installed. But they can be easily removed by using a "Feile" *hu, difficult to explain* :
.
"Live free or die: Death is not the worst of evils."
![]() Top_Nurse
Top_Nurse
Senior Member
Not at all, there are little pieces every 2nd bay which bewares the devices from "falling down" when they are not installed. But they can be easily removed by using a "Feile" *hu, difficult to explain* :
How about a file? Works okay, but a Dremel tool is a lot faster with a burr or grinding stone. ;D
Nice Job Nurse
Well the Aquabay AT fits just fine in the V2000 case if you put it in the normal way. If you put it in upside down then you will probably have to drill and tap new screw holes in the Aquabay AT to fit the existing slots in the V2000 case. As pointed out above they did put in those horizontal lips that make putting the Aquabay AT difficult, but as already mentioned it is nothing a Dremel tool won't fix in a jiffy.

I agree with you about the thumbhole so I suppose somewhere down the line I will have a new plate made and then it will be made the proper width.
![]() Mr_modnaR
Mr_modnaR
Full Member
If you put it in upside down then you will probably have to drill and tap new screw holes in the Aquabay AT to fit the existing slots in the V2000 case.
i meant to say: RS do crimp nuts like the ones in the new aquaeros. they're basically rivets with a bolt thread on the inside. you do need a special tool to fix them into a hole, but it's definitely worth it!
![]() Top_Nurse
Top_Nurse
Senior Member
i meant to say: RS do crimp nuts like the ones in the new aquaeros. they're basically rivets with a bolt thread on the inside. you do need a special tool to fix them into a hole, but it's definitely worth it!
Thanks for the tip, but a drill and a tap is a pretty simple fix.
However, I like tools so I will look into what you say today at RS. Well the upside down Aquabay didn't work out well. The first problem is that the stainless they use to manufacture the Aquabay is really nasty on drill bits.
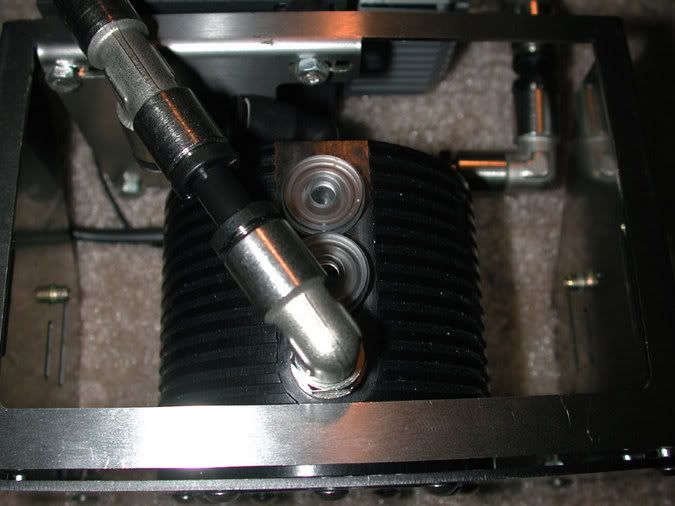
It took 3 drills to punch one hole and I thought for sure I was going to bust the tap. So after getting one hole drilled and tapped I realized that the Fillport was going to be a problem as it just barely cleared the Aquastream housing. There just wasn't enough room to get a 3/8" ID tube on it and the only way I could move the Fillport was by scraping the case. So I guess the Eheim name will have to remain upside down.However, I was able to keep the return line in pretty much the same place although canted off at about 15 degrees from the top of the Aquatube. I suppose I will now have to consider making a new Aquabay plate that would allow me to bolt up the Aquatube so the back holes are totally vertical. Not a total loss of time as I am still waiting on some AC parts that I need before I can continue on with running the tubing. Pic's to follow tomorrow.
The back 120mm AC grill is now at the machine shop and should be back in a few days. I am taking off .150 inch of the left and right sides and .100 inch off the top side. This will then allow me a really nice fit on the back of the case.
Here is a pic of what I described last night with the Aquatube side fittings sitting about 15 degrees off vertical. Nice place to have the return line from the GPU circuit as it allows for really good water action and that line stays relatively hidden from view.
![]() Top_Nurse
Top_Nurse
Senior Member
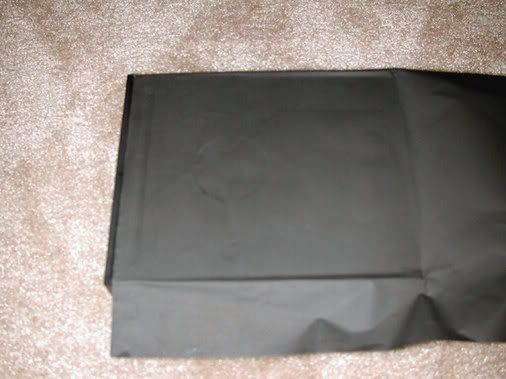
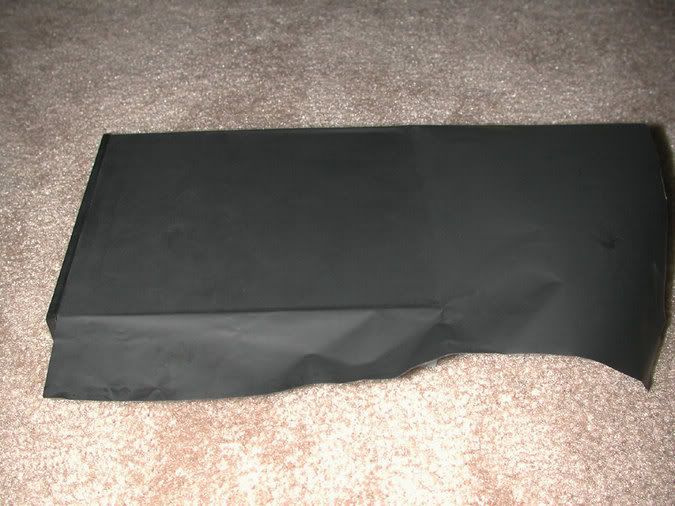
Well I have been thinking about how I might go about changing the color of the optical drives. That basic grey just didn't make it for me and the carbon fibre look seemed pretty much the same blase to me. So I decided to do something different and covered my optical drives with very thin balck aluminum sheeting. I got the stuff at an art supply house and you can see the packaging below,

Here's what I started out with. Your basic DVD.
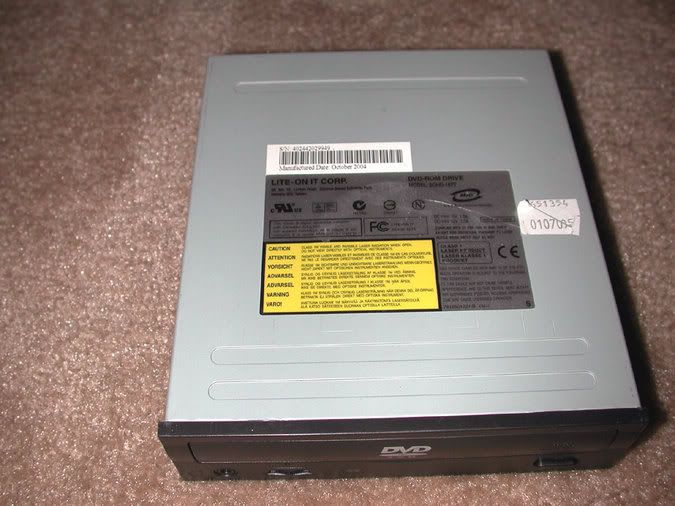
I used a tape dispenser that applies a thin film of dual sided sticky tape called a Mono Adhesive. The stuff I used was made by Tombow USA and the part number is A-45. IIRC the aluminum was about $7 for a 9" x 12" sheet and the stuff is difficult to work with so if you try this take it nice and easy. Mistakes are not easy to fix. Here you can see the first part of applying the aluminum to the DVD case.
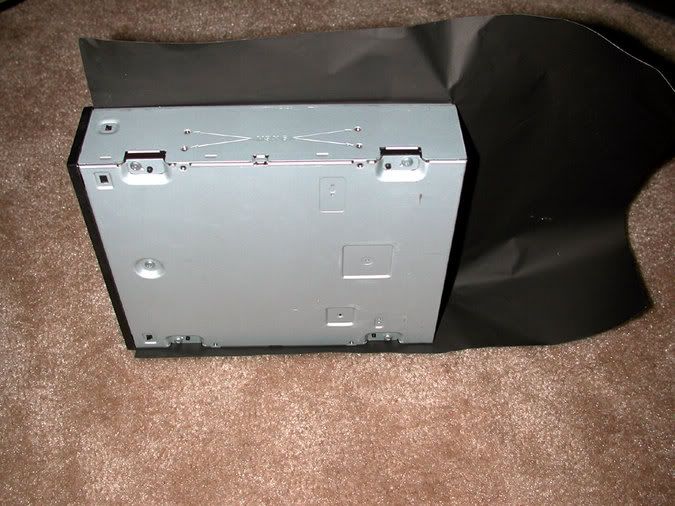
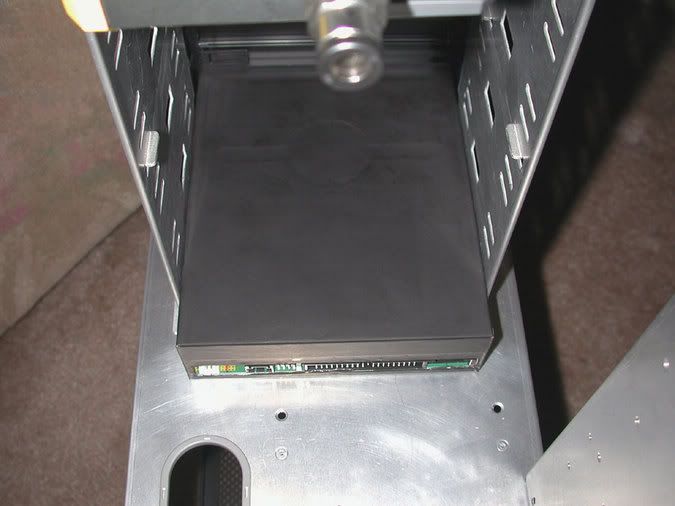
Here you can see the top of the case done.
Here we are applying down the second side.
Here it is finished and looking down from the top of the case.
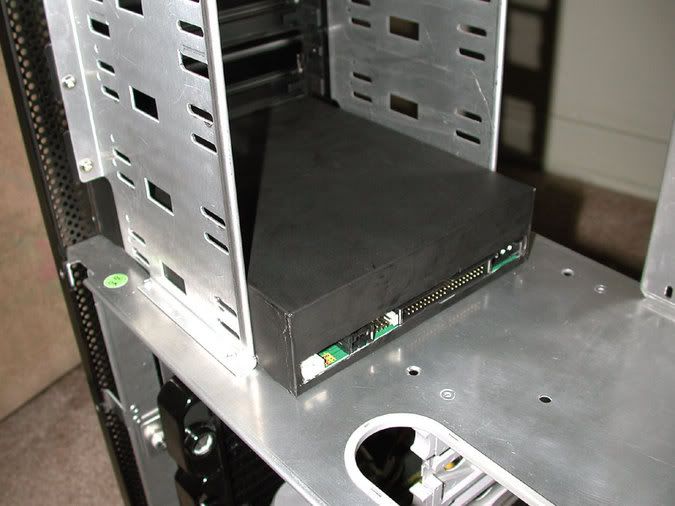
A view here from the window side of the case.
And the final pic shows what you see from the back window side of the case.
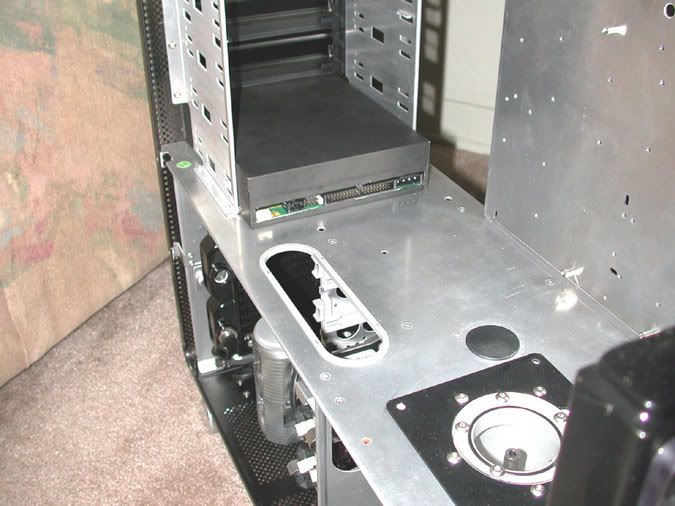
What you get in the end is a very nice look and a real sense of metal (because it is) and it actually blends in well with the rest of the case.
Here's what I started out with. Your basic DVD.
I used a tape dispenser that applies a thin film of dual sided sticky tape called a Mono Adhesive. The stuff I used was made by Tombow USA and the part number is A-45. IIRC the aluminum was about $7 for a 9" x 12" sheet and the stuff is difficult to work with so if you try this take it nice and easy. Mistakes are not easy to fix. Here you can see the first part of applying the aluminum to the DVD case.
Here you can see the top of the case done.
Here we are applying down the second side.
Here it is finished and looking down from the top of the case.
A view here from the window side of the case.
And the final pic shows what you see from the back window side of the case.
What you get in the end is a very nice look and a real sense of metal (because it is) and it actually blends in well with the rest of the case.
![]() Top_Nurse
Top_Nurse
Senior Member
n1 TN ;D
very neat idea if i can find some in the uk i might have to nick that idea
Thanks for nice words
I think that stuff should be available worldwide by one manufacturer or the other. I would try an art supply shop first. The website for American Art Clay might also help you.
![]() Top_Nurse
Top_Nurse
Senior Member
Hey you got that idea from the guy who used the fake carbon-fiber decal on his drives
I like that though.
Yes I saw that done on some friends boxes on bit-tech and decided that I wanted something not so audacious. So the black aluminum sheeting seemed like something right up my alley. ;D
![]() DerrickD
DerrickD
Junior Member
Yes I saw that done on some friends boxes on bit-tech and decided that I wanted something not so audacious. So the black aluminum sheeting seemed like something right up my alley. ;D
looks good nurse.... im working on a project my self based on the the same case.
-