 17.07.2026, 07:46
 Sprache ändern
 Registrieren
 Anmelden
Sie sind nicht angemeldet.
Lieber Besucher, herzlich willkommen bei: Aqua Computer Forum. Falls dies Ihr erster Besuch auf dieser Seite ist, lesen Sie sich bitte die Hilfe durch. Dort wird Ihnen die Bedienung dieser Seite näher erläutert. Darüber hinaus sollten Sie sich registrieren, um alle Funktionen dieser Seite nutzen zu können. Benutzen Sie das Registrierungsformular, um sich zu registrieren oder informieren Sie sich ausführlich über den Registrierungsvorgang. Falls Sie sich bereits zu einem früheren Zeitpunkt registriert haben, können Sie sich hier anmelden.
![]() D4F
D4F
Senior Member

Hehe ... no problem, good mods need some time. But i am looking forward to every Update 
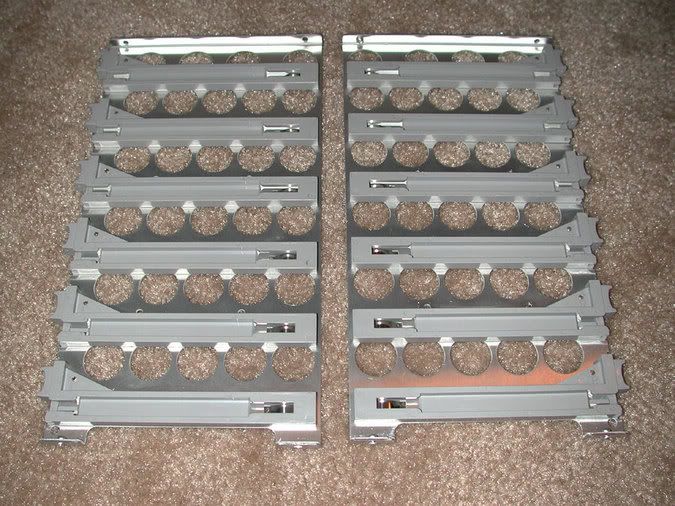
Nice work to the psu and the "Fan" grills are really sweet. I have some Ideas u could use them for, but u have ur own secrets 
Nice work to the psu and the "Fan" grills are really sweet. I have some Ideas u could use them for, but u have ur own secrets
-=[ !! LN2 / DICE Kühler !!]=-
(\_/)
(x.x)
(><)/)
This is totgeschossenes Drecksvieh. Copy totgeschossenes Drecksvieh into your signature to help him on his way to world domination.
![]() Top_Nurse
Top_Nurse
Senior Member
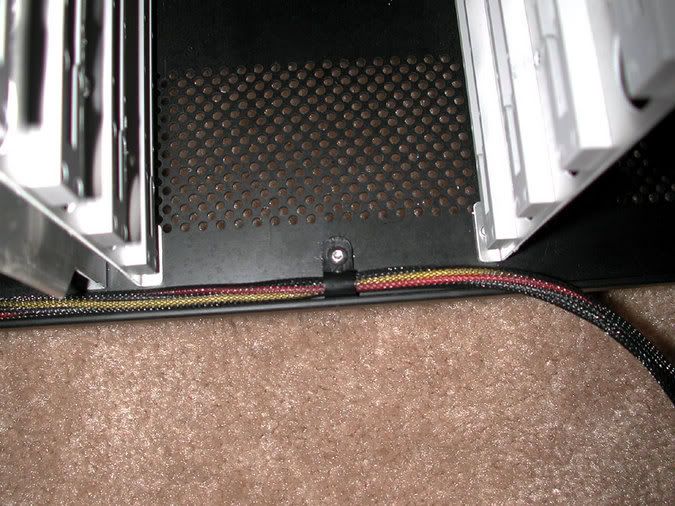
Well here is the SATA cable I made the other day trial fitted to my case.
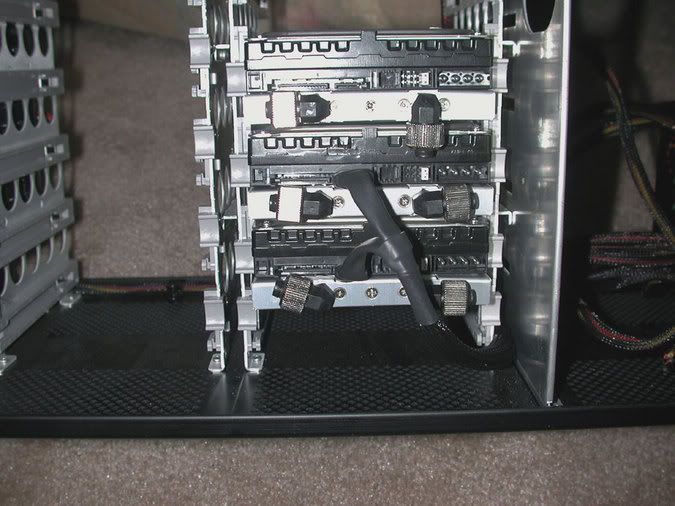
Bottoms Up

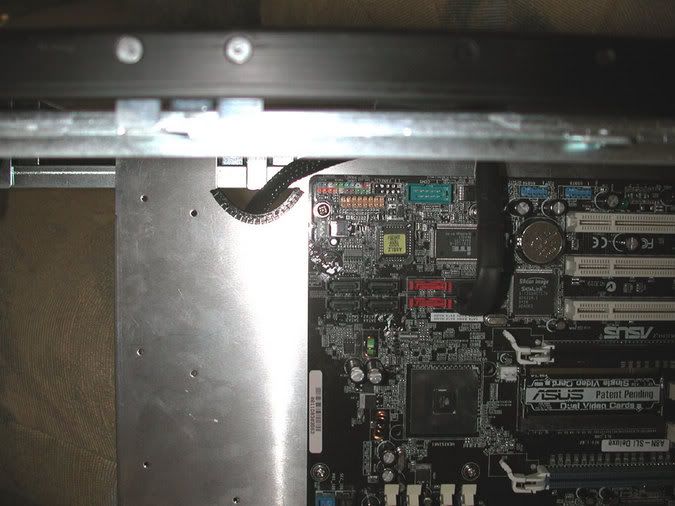
Here you see the cable coming into the top of the case.
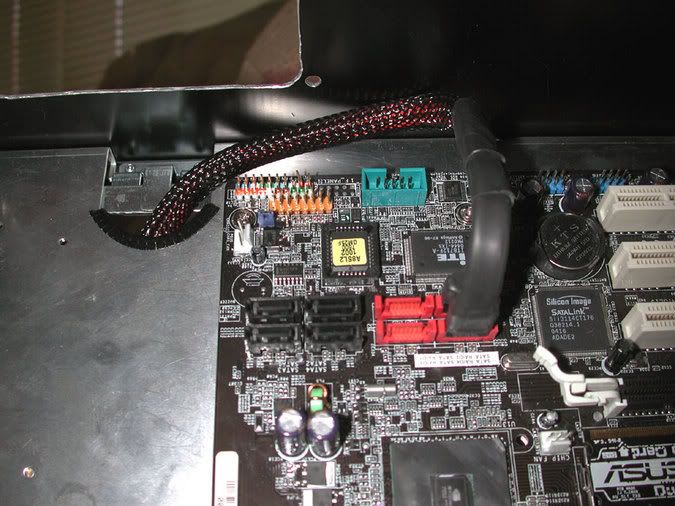
This is pretty much all you will see when the radiator is installed. However you won't see where the cable comes in as the radiator covers up that part of the cable. In fact the only thing you will see is that black cable coming down to the SATA connector. Nice and clean is the way I like it.
Bottoms Up
Here you see the cable coming into the top of the case.
This is pretty much all you will see when the radiator is installed. However you won't see where the cable comes in as the radiator covers up that part of the cable. In fact the only thing you will see is that black cable coming down to the SATA connector. Nice and clean is the way I like it.


![]() IT-TRADE.NET
IT-TRADE.NET
Junior Member
Zitat
didnt happen to pick those grills up off franz did you
seems like someone disclosed a dark secret ;D
Aqua Computer Distribution worldwide
Talk about Aqua-Computer at TritschTratsch.com Forum Community
![]() x-stars
x-stars
God
I have been looking around for some long black SATA cables, but alas this was not to be.
Jap, I was also looking for some pure-black SATA-cables, but all I've found was "black-sleeved" ones (by Revoltec) and they don't look so nice :'(. Maybe there will be a chance in the future to get nice black ones
.So, about your project:
Guess who saved all your pics ;D. Nice work (maybe the wholes for the radiators xould be a little nicer (but I think nobody will care, they are hidden under the grills :
 )). All in all a nice PC, keep on modding .
"Live free or die: Death is not the worst of evils."
![]() Ze@lot
Ze@lot
Full Member
chillblast in the uk do black sata cables £1.00ea
http://www.chillblast.com/product.php?pr…t=33&bestseller
id have thought that they must be about in other countries to
http://www.chillblast.com/product.php?pr…t=33&bestseller
id have thought that they must be about in other countries to
![]() Top_Nurse
Top_Nurse
Senior Member
So, about your project:
Guess who saved all your pics? Nice work (maybe the wholes for the radiators xould be a little nicer (but I think nobody will care, they are hidden under the grills. All in all a nice PC, keep on modding.
Thanks for the nice words.
I cut the top radiator hole with a dremel and it is much straighter, but it was tedious so I decided to rough it in with the jig saw which was a heck of a lot faster. But as you can see it was more crooked.  As you say, no one will even see it and I'm a practical kind of gal so who cares? The back grill has to be sent over to a friends machine shop and get milled on three sides so it fits just like it should.
Did some more work today so I post some more pics tonight.
BTW, I think I found some black SATA cables that are 100cm long made by some company called AKASA. Now I just have to figure out how to get them here. Also at the same place they had clear ones as well so I think I will get some of those as well. ;D
![]() Top_Nurse
Top_Nurse
Senior Member
not in old europe
What is old Europe considered to be?
All right I got some of those PC's out the door so now I thought about doing some more modding.
Then I got a couple more boxes to fix, but there almost done so...Today we are drilling holes again. In the V series case it really pays to have the proper tools to work with as many times you are working inside the case. The Li-Ion cordless Dremel is my favorite and it is fantastic with the 90 degree attachment.
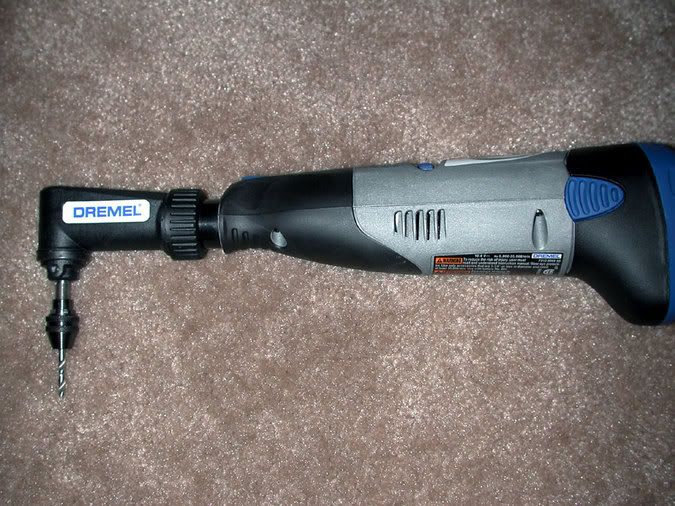
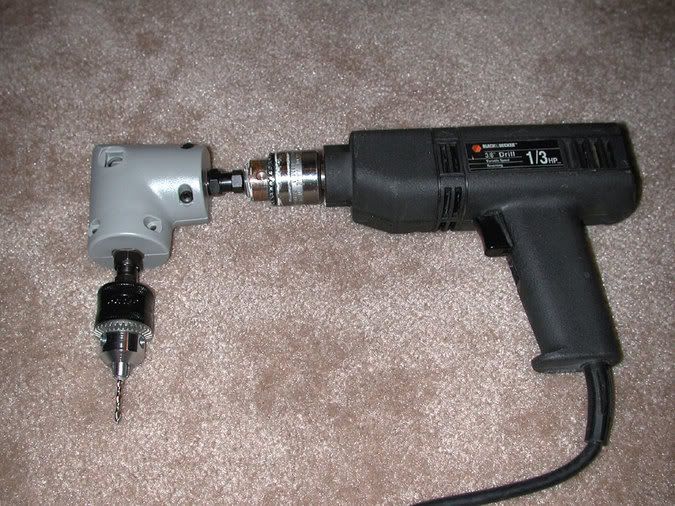
For the more heavy duty jobs I got a right angle attachment for my 3/8" drill.
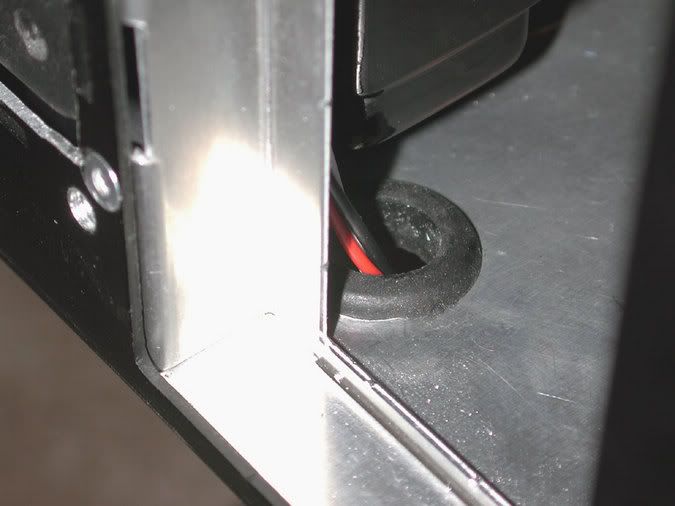
Well the first hole I drilled today was for the wires going through the case for the 4 pin power connector, SLI power connector, and for the back fan wires. Drilled a 5/8" hole so I could use a rubber grommet.
Here's another pic with the grommet installed.
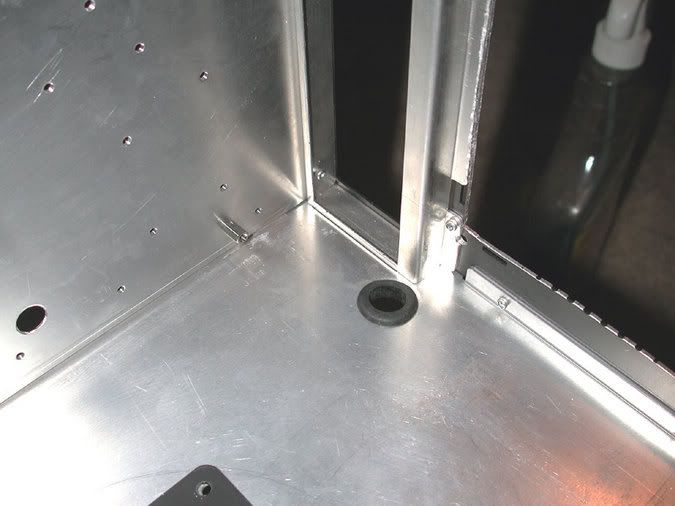
Here is looking from the front of the case. As you can see these wires are not going to be seen.
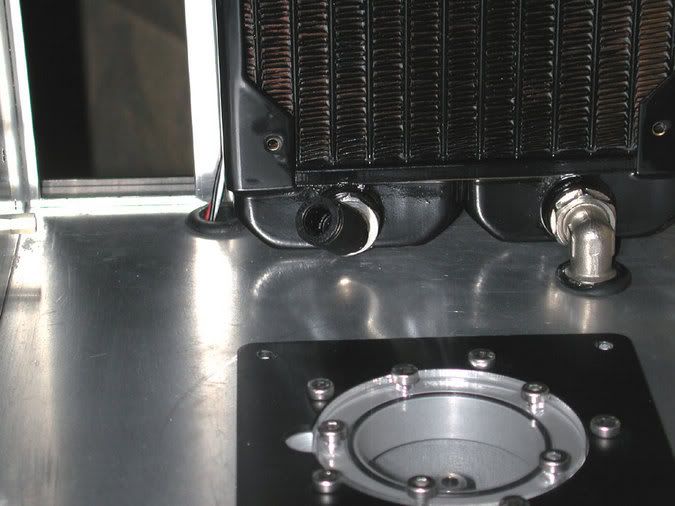
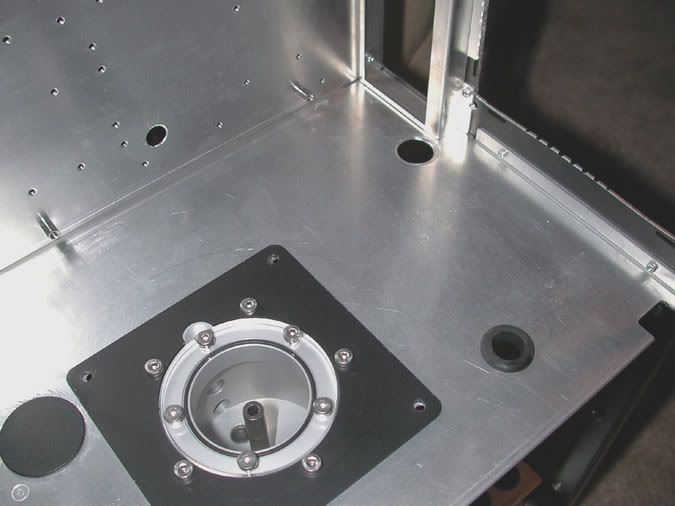
And here is lookin at it with the radiator installed and looking through the MB bezel.
Decided that the front HD rack was cramping my style and I don't think I will need more than 6 HD's anyway. So I got out my Dremel and started drilling. A 1/8" drill bit is just about perfect for getting these rivets out. The hole in the rivet acts as a guide hole so it's pretty much a snap. There is one rivet that you can't reach because it is under a metal plate. I lucked out and didn't have to mangle the case and with a little elbow grease it just popped off.
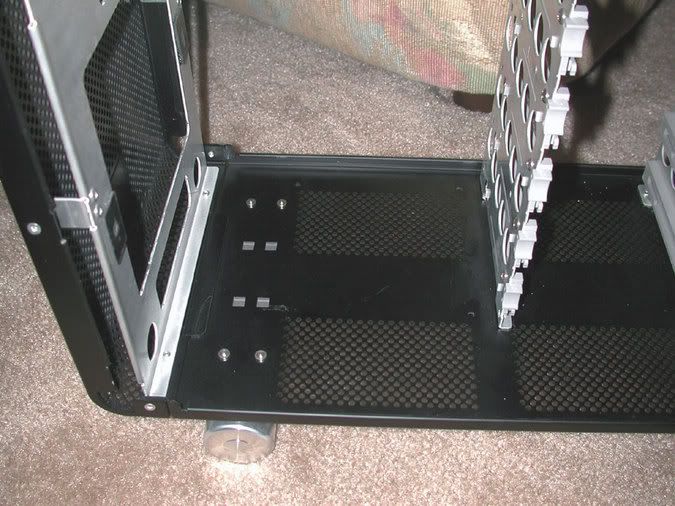
Here's what I took out of the case.
And here is the big picture. ;D
Looks like plenty of room for that Aquastream pump and an Aquainlet reservoir.
![]() D4F
D4F
Senior Member
Nice work again, but isnt that unstable without the HDD Bays ?
-=[ !! LN2 / DICE Kühler !!]=-
(\_/)
(x.x)
(><)/)
This is totgeschossenes Drecksvieh. Copy totgeschossenes Drecksvieh into your signature to help him on his way to world domination.
![]() Top_Nurse
Top_Nurse
Senior Member
Nice work again, but isnt that unstable without the HDD Bays ?
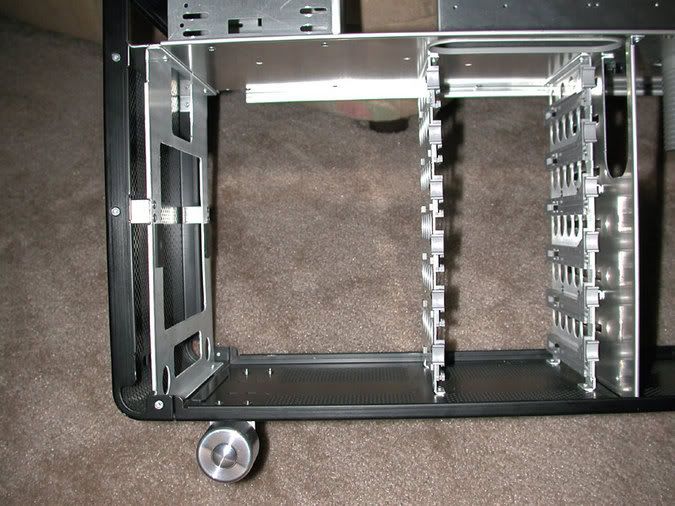
Not really as that middle plate is about 2mm thick. It also has the wall between the PSU and HD area intact along with the other hard drive rack which will have 3-5 Raptor's in it. I have been considering removing the other HD rack and sticking in three Dual Aquadrives (if they would make them in black/silver that is). Another thought was to remove the remaining one and reverse it so all the tubing and wires would be facing away from the side that will have the plexi in it.
Well since it is time to start doing the wiring I figured you might want to see what the front panel is looking like. The Aquabay is at the top and an Aquaero below it. Below that is a blank spot that is reserved for a Multi-Switch (come on AC hurry up and ship me one). Below that are the two DVD rewritables and beneath that is the Lian-Li memory card drives. The stock Lian-Li switch and system LED's is going bye-bye as well. Hmmm...need to call McMaster Carr and get some more metric buttonhead socket cap screws.

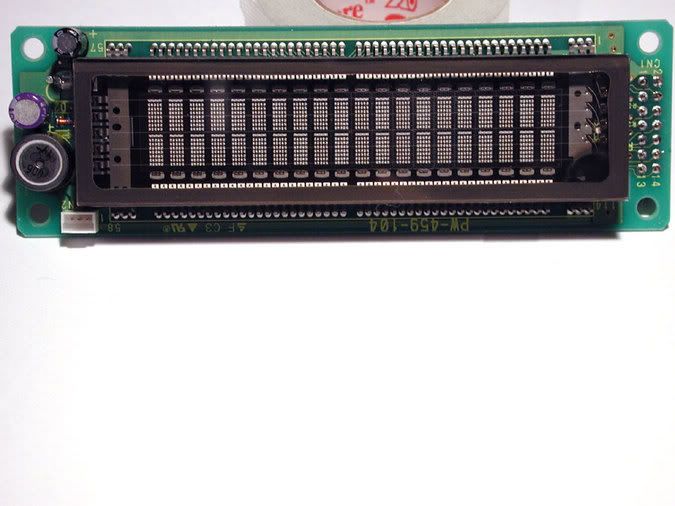
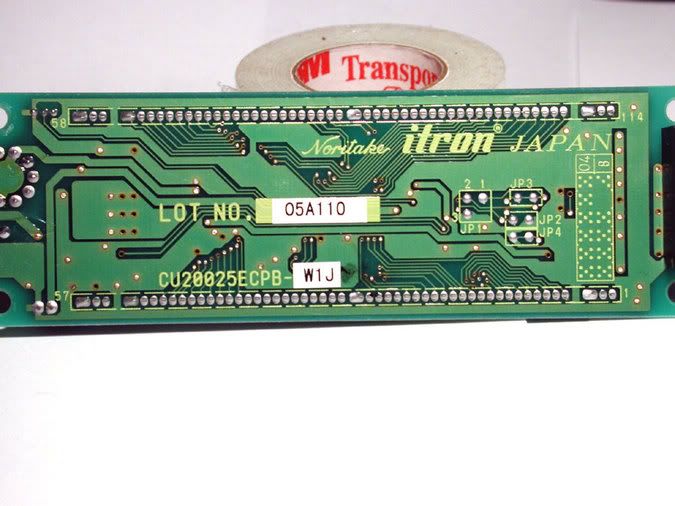
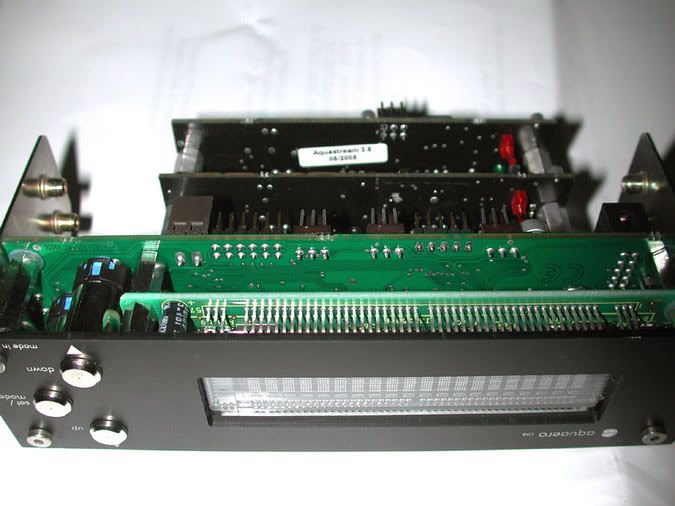
Since I figure people might be interested in the insides of the Aquaero here are some pic's of the Noritake VFD display they use.
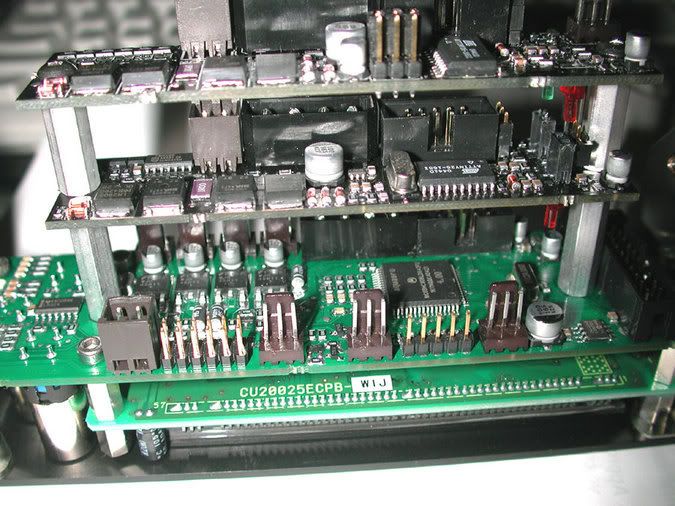
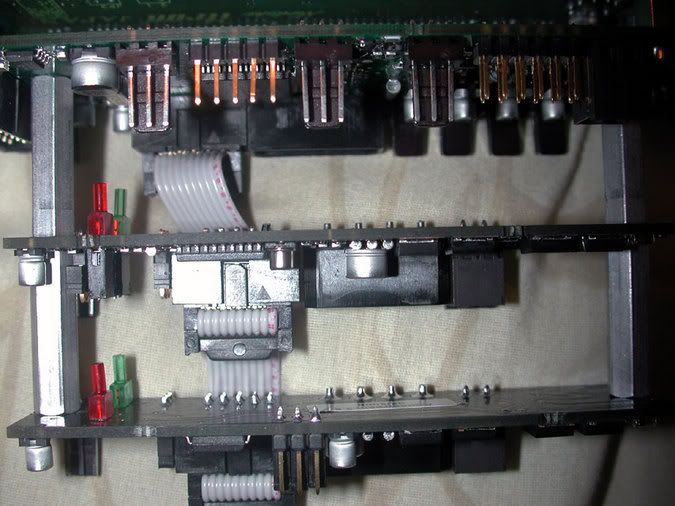
The stock Aquaero comes with the provision to mount an Aquastream pump controller to the back of it. This is quite handy as then you don't have to be running the ribbon cable all around and just looks neater. However, when you have two Aquastreams it is problematic as you then have to figure out where to put the other controller and run the ribbon cable to it as well.
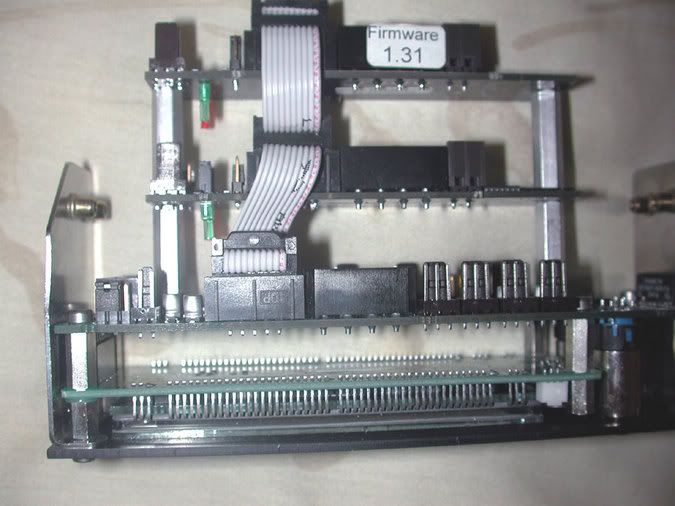
So I decided to mod the Aquaero so I could attach both Aquastream controllers to the back of the Aquaero. Please keep in mind that to do this mod you will have to completely dis-assemble the Aquaero so if you aren't handy with electronics it would be best if you found someone else to do this for you though it was pretty simple to do. This first pic shows the basic parts you need to do the mod.

This pic is the original mod with the parts shown above.
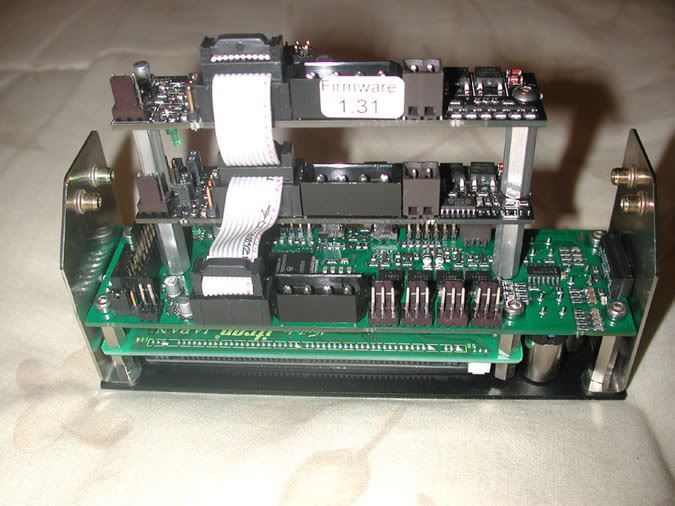
I have made some changes to my original idea to mount two Aquastream controllers onto one Aquaero. Essentially I added a 1" female stand-off between the 1st and second controllers instead of using the 3/4" length I previously used. This was done so I could easily get the 10 pin ribbon cable in and out without disassembling the assembly. I also added some # 6 nylon washers where I though there might be an electrical issue on the 3.5 controller. Another solution to fix this would be by using just a 6-32 binder head nylon screw. Here are the pics of the completed assembly:
So now it is time to put the PSU in and start wiring in the loom. See ya in a few days with some more pic's.
![]() Top_Nurse
Top_Nurse
Senior Member
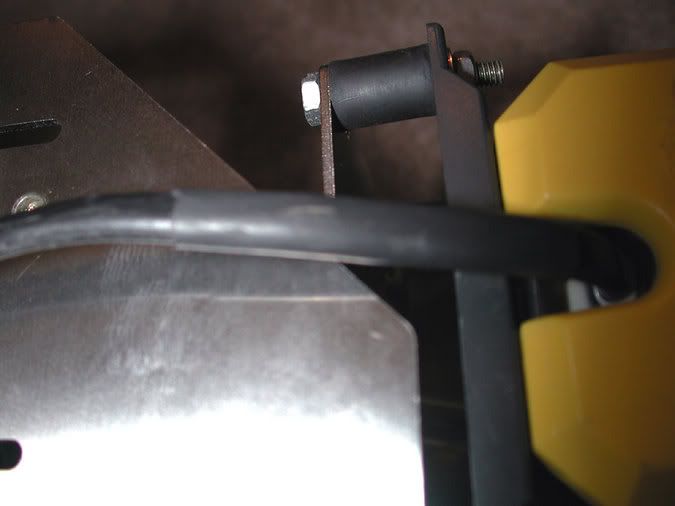
Okay did a little wiring work today. With the Aquastream using the G 1/4 fittings it sticks out a tad farther than when using the standard G 1/8 fittings. This turned out to cause a slight problem because I wanted to run the Aquastream power cable forward and down to the Aquaero below it. Essentially I had a fairly sharp surface on the Aquabat that the cable was rubbing on and I could see it eventually cutting though the insulation. So I thought about what I could do and while rounding that part would have worked or putting a plastic cover over that metal edge it seemed a little overkill and might look unslightly.
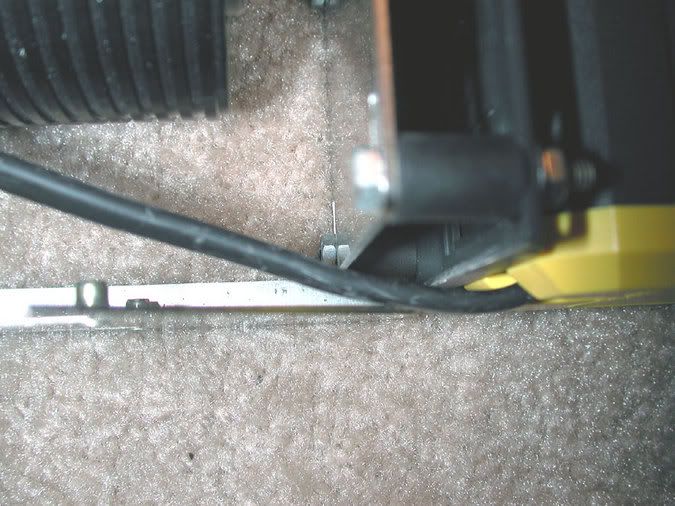
So what I decided to do is to add a piece of heatshrink over that area and eliminate the problem.
In the next pic you will see that my Aquastream cable is a little shorter than normal. Some people have been known to just use a cable tie and try and hide it somewhere. I decided that would look tacky so I cut it just long enough to drop down to the Aquaero below it.
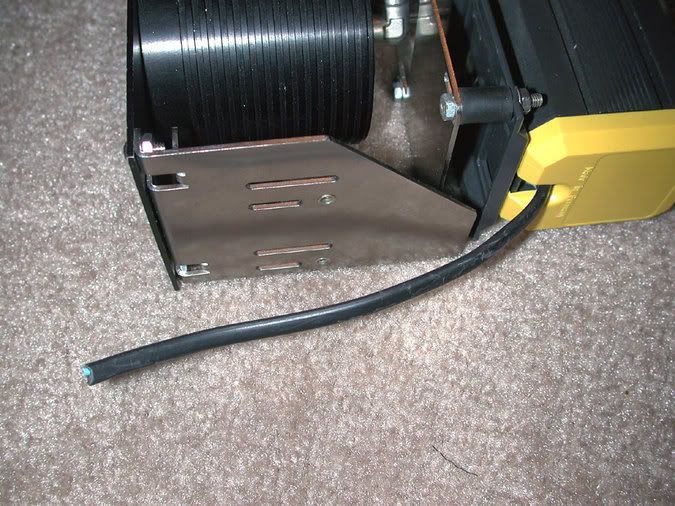
And here it is finished and ready to have the plug connector put on the wire.
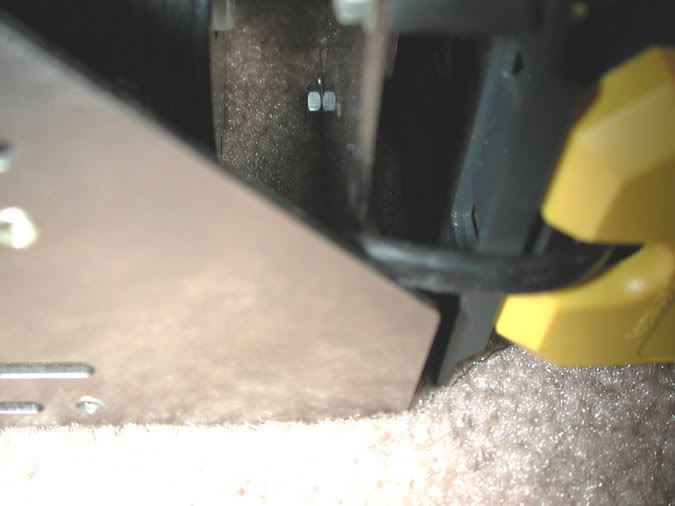
As I mentioned the other day I have started laying out the wiring and here are a couple of teaser pic's. What I did was to drill holes in the bottom of the case and thread them with a 6-32 hand tap. Now I have a nice way to hold down the power wires going to the front of the case for attachment to the Aquaero and the optical drives. I used the same looking stainless steel button head socket cap screws that I have been using elsewhere in this project.
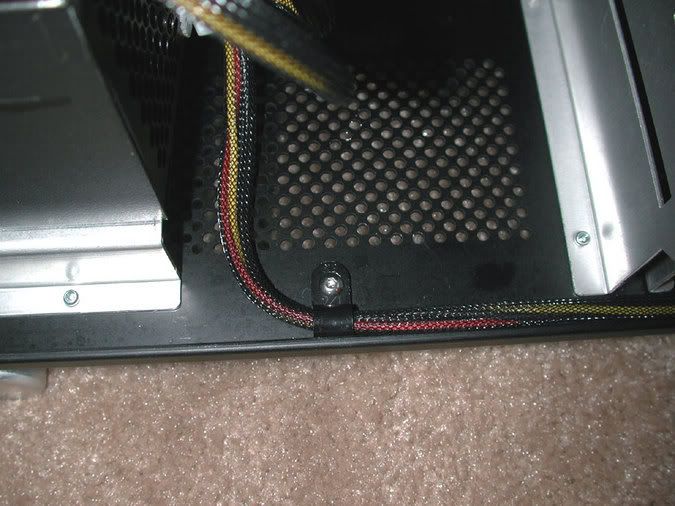
More to come tomorrow.
So what I decided to do is to add a piece of heatshrink over that area and eliminate the problem.
In the next pic you will see that my Aquastream cable is a little shorter than normal. Some people have been known to just use a cable tie and try and hide it somewhere. I decided that would look tacky so I cut it just long enough to drop down to the Aquaero below it.
And here it is finished and ready to have the plug connector put on the wire.
As I mentioned the other day I have started laying out the wiring and here are a couple of teaser pic's. What I did was to drill holes in the bottom of the case and thread them with a 6-32 hand tap. Now I have a nice way to hold down the power wires going to the front of the case for attachment to the Aquaero and the optical drives. I used the same looking stainless steel button head socket cap screws that I have been using elsewhere in this project.
More to come tomorrow.
![]() Top_Nurse
Top_Nurse
Senior Member
Well lets see what we have for today...more custom wiring solutions, what else?
So what bugs most people about a PSU? One size wiring loom does not fit all, right? The loom is either too long or too short and usually looks half-assed to boot IMHO. So today I have decided to fix my HD power wiring so I get a nice looking extremely clean install. After all I want it my way.
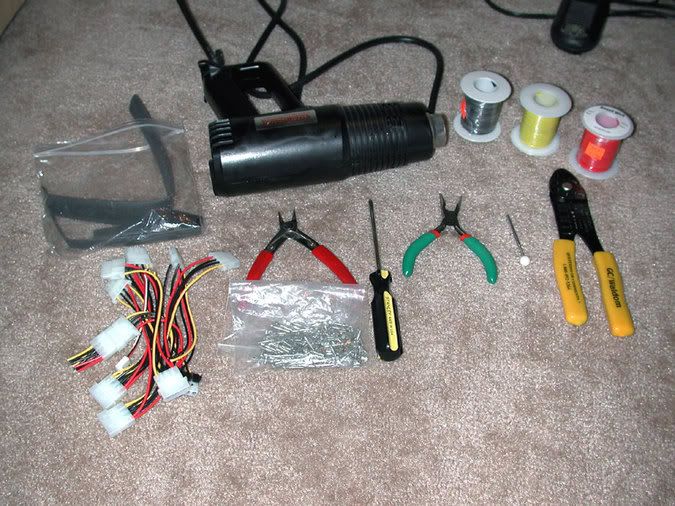
So the first thing to do is to gather up all the tools you will probably need. So what do we got here? heat shrink; heat shrink gun; red, yellow, and black wire; extra power assemblies, wire cutters; molex female pins; needle nose pliers; phillips screwdriver; molex pin remover tool; and a molex crimping tool.
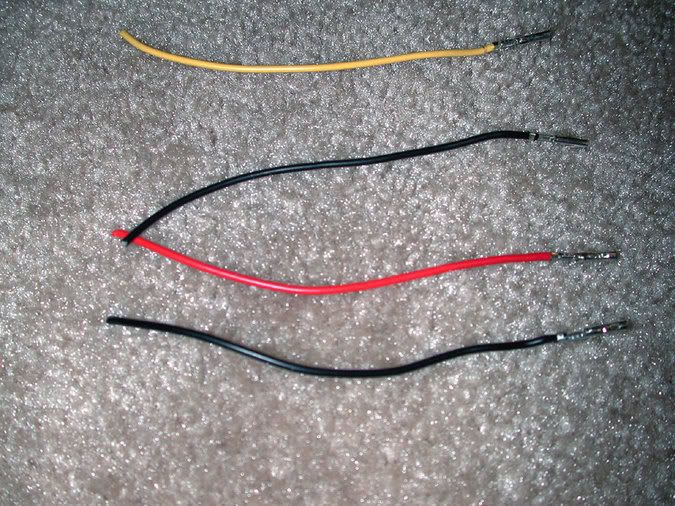
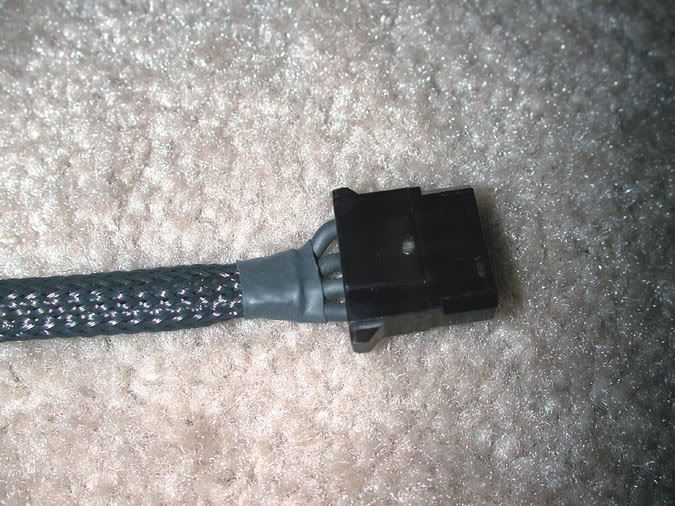
So the first thing you have to do is either decide if you want to make the wires up from scratch or use some of those old molex extensions you got hanging around. I did a combination of both if the wires I salvaged weren't up to my specs. It helps to look over the metal pins with a Optivisor to make sure they aren't damaged before you procede. Here are the ones I harvested and made up for one 4 pin molex.
The first thing you will want to do is to get out the heatshrink tubing and put about 2" on each wire and shrink it down.
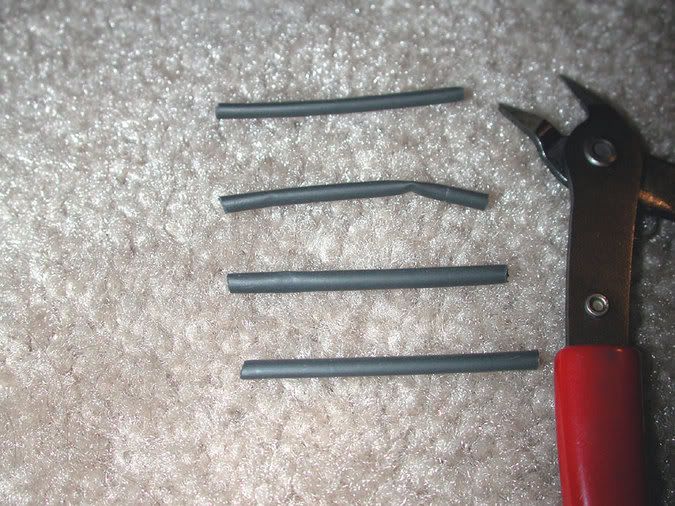
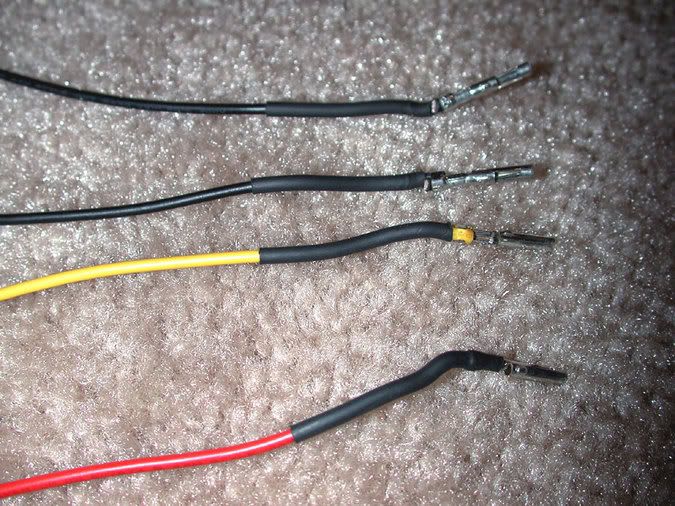
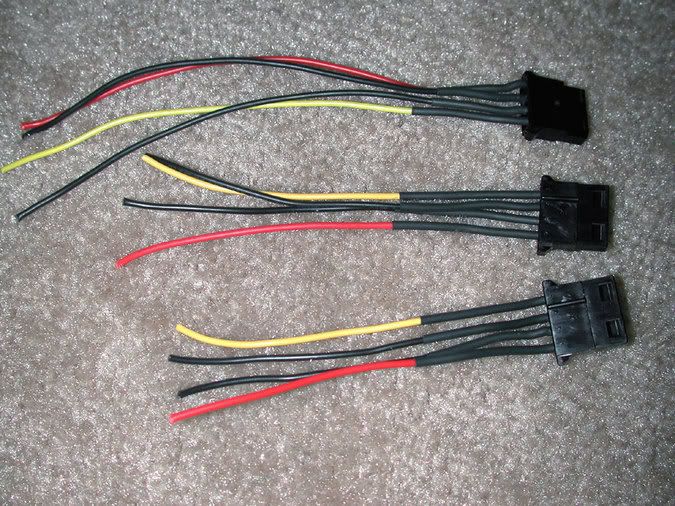
Then you attach the pins to the molex connector. If you don't know how to do this you can usually get the right info from the manufacturer of your PSU as to what color goes where. Since I was making up a cable for three hard drives I made three of these complete sub-assemblies. As you have probably noticed they are three different lengths. The longest one should be about 6" long, the second about 5", and the third one should be about 4" long for my finished cable. If you have wider separation of drives then you may need to fudge a bit on the sizes.
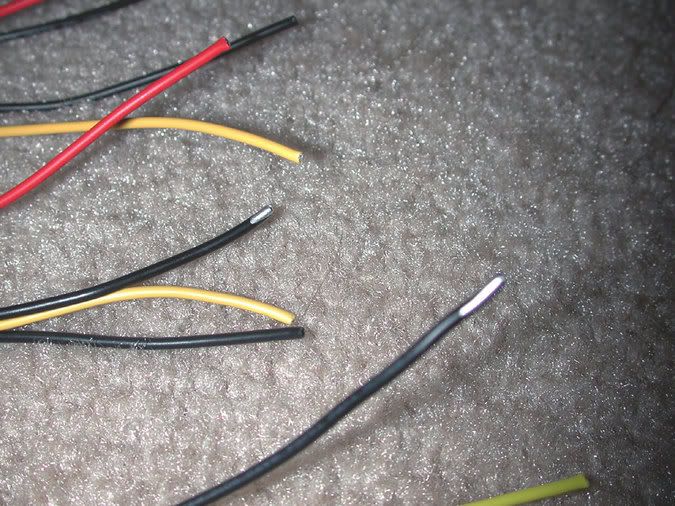
The next thing to do is to mark the black wires so you can identify them later on in the mod. What I did was to use a silver color Dykem Mark & Code pen and marked each black wire that was next to the red wire. This is important so don't forget to do it!
Now you need to cut off a piece of sheathing about 12" long or so. Cut each end with a hot tool of your choice so the ends don't fray why you are working on the cable assembly. Take your cut off piece and slide it down the longest wire assembly you have. Please pick a sheath size much bigger than you would normally use for your power cables as you are going to have a total of twelve (12) wires in this assembly eventually. If you use to small it will not look good unless you like to see colored wire through the sheathing.
The next thing I did was to put a small piece of heatshrink near the plastic molex connector so the heatshrink would not move.
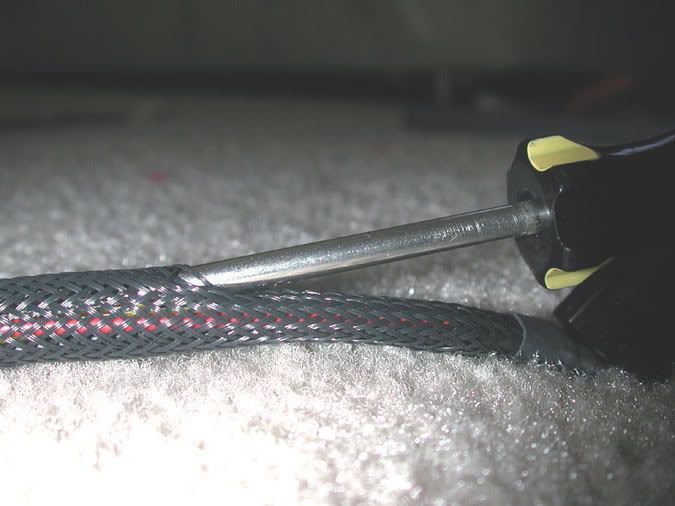
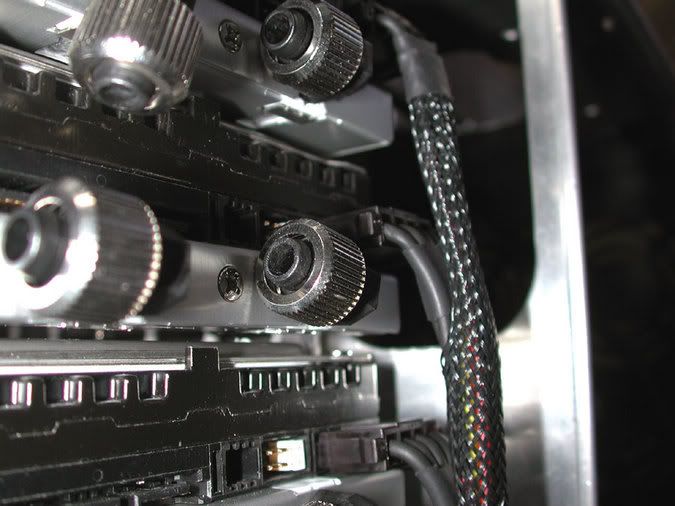
Okay now the fun starts. What you need to do is to put the completed assembly in the top mounted drive. Then you need to guesstimate where the next cable assembly will get inserted into the sheathing. I did this by taking the second connector assembly and plugged it into the HD below the top one. Then you can easily see where you will want the assembly to go. Once you decide where it will go you take the phillips screwdriver and open a small hole in the side of the sheathing. It helps if you gather up a bit of sheathing so it is looser where you want to insert the screwdriver.
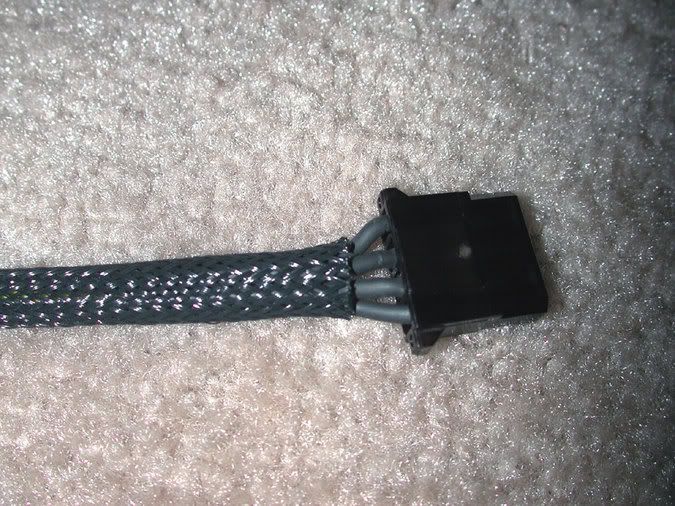
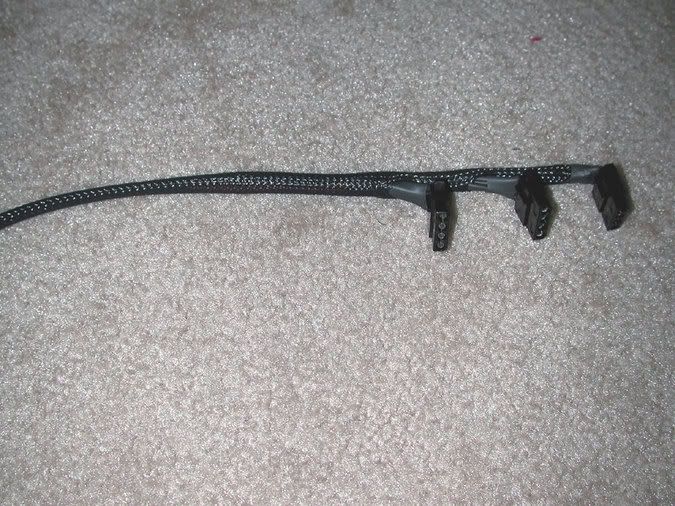
At this point in the mod you should get something that looks kind of like this.

The completed mod will look like the following two pics.
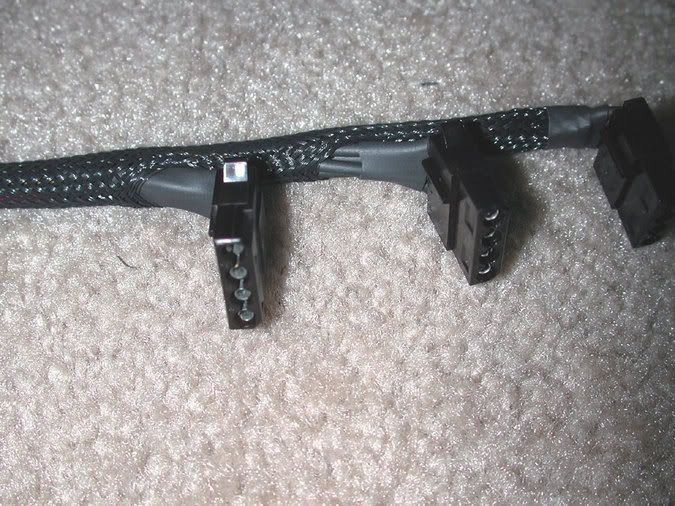
And of course what you get out of all this is a power cable your way. ;D
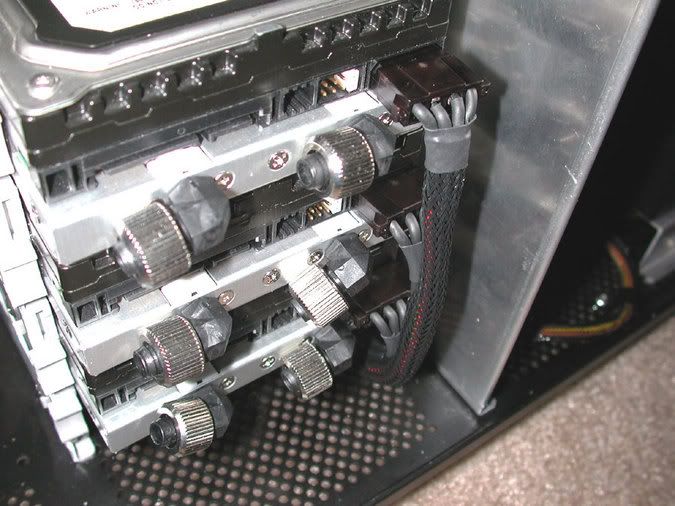
Tomorrow I will solder up all these wires so that the one set of cables coming off the PSU will attach to my HD cable assembly.
So what bugs most people about a PSU? One size wiring loom does not fit all, right? The loom is either too long or too short and usually looks half-assed to boot IMHO. So today I have decided to fix my HD power wiring so I get a nice looking extremely clean install. After all I want it my way.
So the first thing to do is to gather up all the tools you will probably need. So what do we got here? heat shrink; heat shrink gun; red, yellow, and black wire; extra power assemblies, wire cutters; molex female pins; needle nose pliers; phillips screwdriver; molex pin remover tool; and a molex crimping tool.
So the first thing you have to do is either decide if you want to make the wires up from scratch or use some of those old molex extensions you got hanging around. I did a combination of both if the wires I salvaged weren't up to my specs. It helps to look over the metal pins with a Optivisor to make sure they aren't damaged before you procede. Here are the ones I harvested and made up for one 4 pin molex.
The first thing you will want to do is to get out the heatshrink tubing and put about 2" on each wire and shrink it down.
Then you attach the pins to the molex connector. If you don't know how to do this you can usually get the right info from the manufacturer of your PSU as to what color goes where. Since I was making up a cable for three hard drives I made three of these complete sub-assemblies. As you have probably noticed they are three different lengths. The longest one should be about 6" long, the second about 5", and the third one should be about 4" long for my finished cable. If you have wider separation of drives then you may need to fudge a bit on the sizes.
The next thing to do is to mark the black wires so you can identify them later on in the mod. What I did was to use a silver color Dykem Mark & Code pen and marked each black wire that was next to the red wire. This is important so don't forget to do it!
Now you need to cut off a piece of sheathing about 12" long or so. Cut each end with a hot tool of your choice so the ends don't fray why you are working on the cable assembly. Take your cut off piece and slide it down the longest wire assembly you have. Please pick a sheath size much bigger than you would normally use for your power cables as you are going to have a total of twelve (12) wires in this assembly eventually. If you use to small it will not look good unless you like to see colored wire through the sheathing.
The next thing I did was to put a small piece of heatshrink near the plastic molex connector so the heatshrink would not move.
Okay now the fun starts. What you need to do is to put the completed assembly in the top mounted drive. Then you need to guesstimate where the next cable assembly will get inserted into the sheathing. I did this by taking the second connector assembly and plugged it into the HD below the top one. Then you can easily see where you will want the assembly to go. Once you decide where it will go you take the phillips screwdriver and open a small hole in the side of the sheathing. It helps if you gather up a bit of sheathing so it is looser where you want to insert the screwdriver.
At this point in the mod you should get something that looks kind of like this.
The completed mod will look like the following two pics.
And of course what you get out of all this is a power cable your way. ;D
Tomorrow I will solder up all these wires so that the one set of cables coming off the PSU will attach to my HD cable assembly.
-